


Are you new to the world of cryptocurrencies? Unwrapping WETH on Metamask is a crucial step in getting started. WETH, or Wrapped Ether, is a token that represents Ether on the Ethereum blockchain. If you want to use your Ether in decentralized applications or trade it on decentralized exchanges, you’ll need to unwrap it first.
Unwrapping WETH on Metamask might seem complicated, but it’s actually quite simple! In this step-by-step guide, we’ll walk you through the process from start to finish.
Before we begin, make sure you have the Metamask extension installed on your browser and have some Ether in your Metamask wallet. Now, let’s get started!
What is WETH and why should you unwrap it?
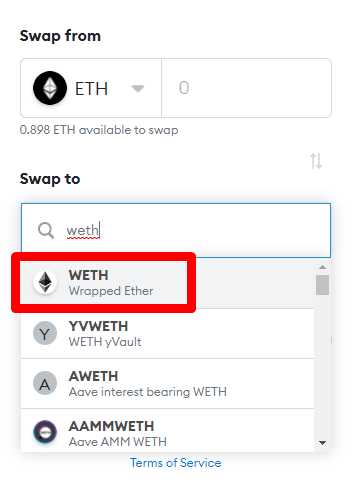
WETH, or Wrapped Ether, is an ERC-20 token that represents Ether (ETH) on the Ethereum blockchain. It was created to enable Ethereum users to interact with decentralized applications (DApps) that only accept ERC-20 tokens. Essentially, WETH bridges the gap between ETH and ERC-20 tokens, making it easier for ETH holders to engage with the broader Ethereum ecosystem.
When you wrap Ether into WETH, you are effectively converting your ETH into an ERC-20 token. This allows you to use your ETH within DApps that require ERC-20 tokens for functionality or participation. Wrapping ETH into WETH is a reversible process, meaning you can always unwrap your WETH back into ETH when needed.
So why should you unwrap WETH? There are a few reasons why unwrapping WETH might be beneficial:
- Improved liquidity: While WETH is widely accepted in the Ethereum ecosystem, some exchanges may prefer dealing exclusively with ETH. By unwrapping your WETH back into ETH, you can access a larger pool of liquidity on these exchanges.
- Lower gas fees: Unwrapping WETH typically requires less gas fees compared to wrapping ETH into WETH. If you no longer need WETH for a particular DApp, unwrapping it can be a more cost-effective option.
- Enhanced interoperability: Unwrapping WETH allows you to freely transfer your ETH to other Ethereum addresses or wallets without any token-specific restrictions. This can be useful if you want to move your ETH outside of the WETH ecosystem.
Ultimately, whether you choose to unwrap WETH or keep it wrapped depends on your specific needs and preferences within the Ethereum ecosystem. If you find yourself needing access to ETH liquidity or wanting to reduce gas fees, unwrapping could be a practical choice.
Step 1: Install and Setup Metamask
To begin with, you will need to install the Metamask extension on your browser. Metamask is a digital wallet that enables you to interact with decentralized applications (DApps) on the Ethereum network.
Here is how you can install and set up Metamask:
1. Open your preferred browser (Chrome, Firefox, or Brave) and search for the Metamask extension.
2. Click on the official Metamask website link to access the extension page.
3. Once on the Metamask page, click on the “Get Chrome Extension” button (or the equivalent for your chosen browser).
4. A pop-up will appear, asking for your permission to add the extension to your browser. Click “Add to Chrome” (or the equivalent for your chosen browser).
5. Wait for the installation process to complete. Once it is done, you will see the Metamask icon in your browser’s toolbar.
6. Click on the Metamask icon to launch the extension. You will be greeted with a welcome screen.
7. Click on the “Get Started” button to begin the setup process.
8. You will now be prompted to create a new wallet or import an existing one. In this case, we will assume you want to create a new wallet. Click on the “Create a Wallet” option.
9. Follow the on-screen instructions to set a strong password and create your wallet seed phrase. Make sure to write down and safely store your seed phrase as it is crucial for wallet recovery.
10. Once you have completed the wallet creation process, Metamask will display your wallet address. You are now ready to use Metamask for interacting with Ethereum applications.
That’s it! You have successfully installed and set up Metamask on your browser. In the next steps, we will guide you on how to unwrap WETH using Metamask.
Step 2: Connect Metamask to a Supported Exchange
After setting up WETH on your Metamask wallet, the next step is to connect your wallet to a supported exchange. This will allow you to swap your WETH tokens for other cryptocurrencies or fiat currencies.
Supported Exchanges
Before proceeding, make sure you are using a supported exchange that has integration with Metamask. Some popular exchanges that support Metamask include Uniswap, Sushiswap, and Binance DEX. Check the exchange’s documentation or website to confirm if it supports Metamask.
Connecting Metamask to the Exchange
To connect your Metamask wallet to a supported exchange, follow these steps:
- Open the exchange’s website and navigate to the login page.
- Look for the “Connect Wallet” or similar button on the login page.
- Click on the “Connect Wallet” button.
- A pop-up window will appear, showing a list of available wallets.
- Click on the Metamask logo or select Metamask from the list of wallets.
- Metamask will prompt you to authorize the connection between your wallet and the exchange.
- Review the connection information and click “Approve” or “Connect” to proceed.
- Metamask may ask you to sign a message to verify the connection. Follow the instructions provided.
- Once the connection is established, your Metamask wallet will be linked to the exchange.
Importing WETH into the Exchange

After connecting Metamask to the exchange, you may need to import your WETH tokens into the exchange’s trading platform. This step allows the exchange to detect and display your WETH balance for trading.
To import your WETH into the exchange, follow these steps:
- Navigate to the exchange’s trading platform or wallet section.
- Look for the “Import Token” or similar option.
- Enter the WETH contract address (0xc02aaa39b223fe8d0a0e5c4f27ead9083c756cc2) in the provided input field.
- Click on the “Import” or “Add Token” button.
- The exchange will detect your WETH balance and display it in your wallet.
Congratulations! You have successfully connected your Metamask wallet to a supported exchange and imported your WETH tokens. Now you can start trading or swapping your WETH for other cryptocurrencies or fiat currencies on the exchange.
Please note that the exact steps may vary slightly depending on the exchange’s user interface. Follow the instructions provided by the specific exchange to ensure a smooth and seamless connection with Metamask.
| Step | Description |
|---|---|
| 1 | Open the exchange’s website and navigate to the login page. |
| 2 | Look for the “Connect Wallet” or similar button on the login page. |
| 3 | Click on the “Connect Wallet” button. |
| 4 | A pop-up window will appear, showing a list of available wallets. |
| 5 | Click on the Metamask logo or select Metamask from the list of wallets. |
| 6 | Metamask will prompt you to authorize the connection between your wallet and the exchange. |
| 7 | Review the connection information and click “Approve” or “Connect” to proceed. |
| 8 | Metamask may ask you to sign a message to verify the connection. Follow the instructions provided. |
| 9 | Once the connection is established, your Metamask wallet will be linked to the exchange. |
Step 3: Unwrap WETH
After you have successfully wrapped your ETH into WETH, you may at some point want to convert it back into regular ETH. This process is known as unwrapping WETH.
To unwrap your WETH on Metamask, follow these steps:
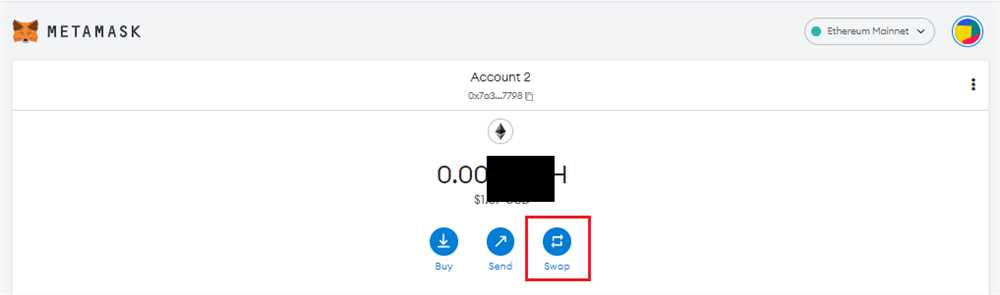
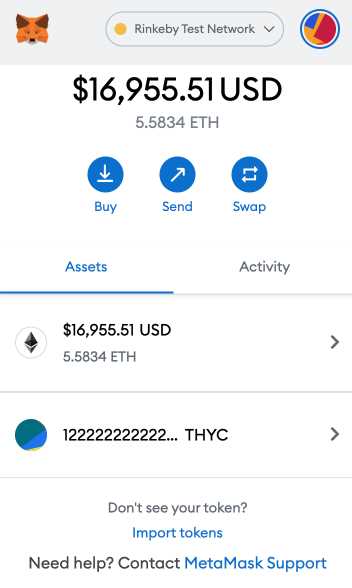
- Open your Metamask wallet and make sure you are on the “Assets” tab.
- Scroll down and find your WETH token.
- Click on the three dots next to the token and select “Send” from the dropdown menu.
- In the recipient address field, enter the address where you want to send your unwrapped ETH.
- Enter the amount of WETH you want to unwrap in the “Amount” field.
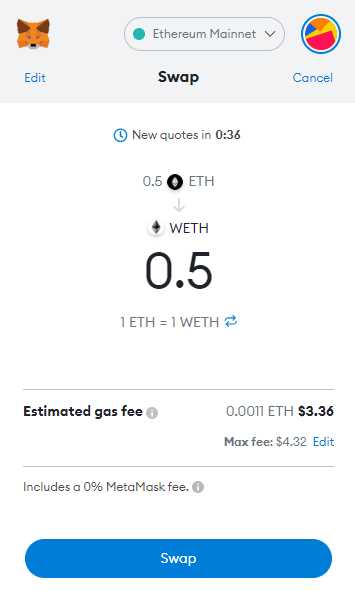
- Review the transaction details and fees.
- Click on “Next” and confirm the transaction in Metamask.
- Wait for the transaction to be processed and confirmed on the Ethereum network.
- Once the transaction is confirmed, you will have successfully unwrapped your WETH back into ETH.
It is important to note that there may be fees associated with unwrapping your WETH, such as gas fees on the Ethereum network. Make sure you have enough ETH in your wallet to cover these fees.
By unwrapping your WETH, you will have access to your original ETH holdings and can freely use them for other transactions or purposes.
Frequently Asked Questions:
What is WETH?
WETH stands for Wrapped Ether and it is an ERC-20 token on the Ethereum blockchain that represents ETH (Ether). It allows users to trade and interact with ETH as they would with any other ERC-20 token.
Why would I want to unwrap WETH?
There could be several reasons why you would want to unwrap WETH. One possible reason is that you want to convert your WETH back into ETH. Another reason could be that you want to use your ETH in a smart contract or decentralized application that does not support WETH.
Are there any fees involved in unwrapping WETH on Metamask?
Yes, there are fees involved in unwrapping WETH on Metamask. When you initiate the unwrapping process, you will need to pay a transaction fee, also known as gas fee, to the Ethereum network. The amount of the gas fee depends on the current network congestion and the gas price you set for your transaction. Additionally, there may be some small fees associated with the unwrap transaction itself.

+ There are no comments
Add yours