


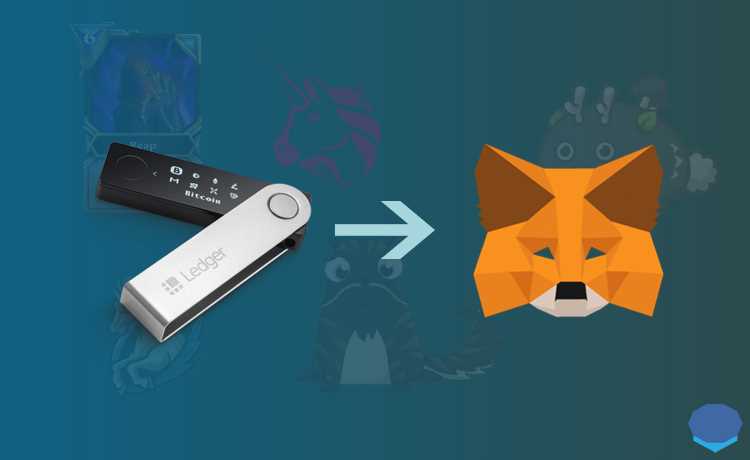
If you’re looking for a secure and convenient way to manage your cryptocurrency assets, then the Ledger Nano hardware wallet combined with the MetaMask browser extension is the perfect solution. Ledger Nano offers state-of-the-art security features, while MetaMask provides a user-friendly interface for accessing decentralized applications. In this guide, we will walk you through the process of setting up and using a Ledger Nano with MetaMask.
Step 1: Setting Up Ledger Nano
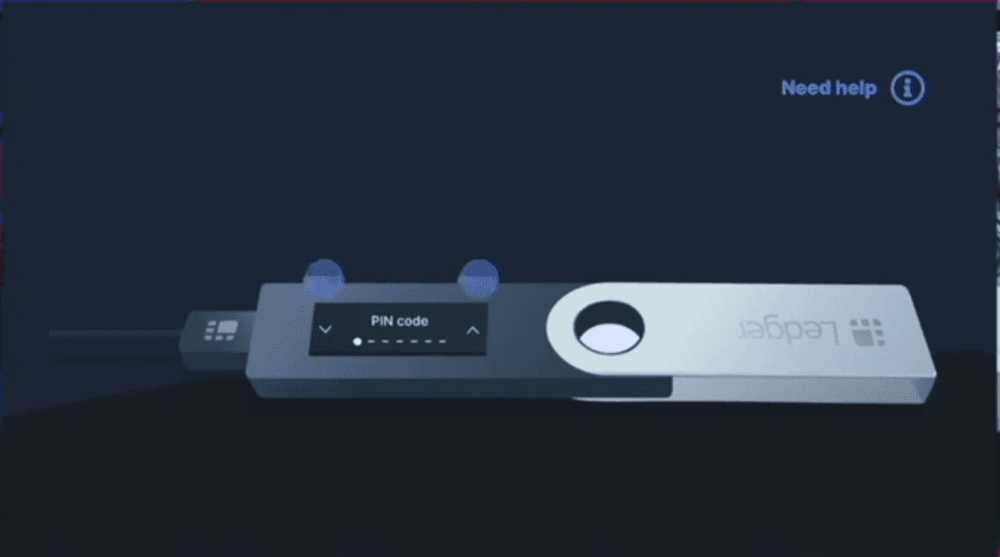
The first step is to set up your Ledger Nano hardware wallet. Connect your Ledger Nano to your computer using the USB cable provided. Follow the instructions on the Ledger device screen to initialize and set up your wallet. Make sure to write down and keep your recovery phrase safe, as it will be crucial for accessing your funds in case you lose your device.
Note: Ledger Nano supports a wide range of cryptocurrencies, including Bitcoin, Ethereum, and many others. Make sure to install the necessary apps on your device to manage the specific cryptocurrencies you own.
Step 2: Installing the MetaMask Extension
After setting up your Ledger Nano, you need to install the MetaMask browser extension. Open your preferred web browser and search for “MetaMask.” Click on the official MetaMask website and follow the instructions to download and install the extension. Once installed, you will see the MetaMask icon in your browser toolbar.
Note: MetaMask is available for popular browsers like Chrome, Firefox, and Brave. Make sure to use a browser that supports MetaMask.
Step 3: Connecting Ledger Nano with MetaMask
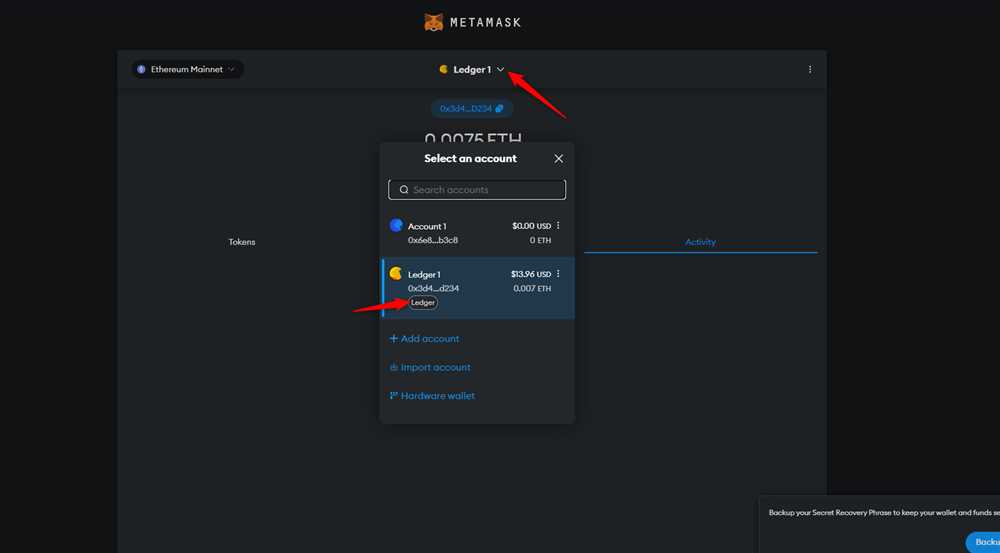
To connect your Ledger Nano with MetaMask, open the MetaMask extension by clicking on its icon in the browser toolbar. On the MetaMask welcome screen, click on “Get Started.” Next, select the option “Connect Hardware Wallet” and choose “Ledger.” Follow the on-screen instructions to connect your Ledger Nano to MetaMask. You may need to enter your Ledger PIN to authorize the connection.
Note: Make sure the Ledger Live app is closed while connecting your Ledger Nano with MetaMask.
Step 4: Accessing and Managing Your Crypto Assets
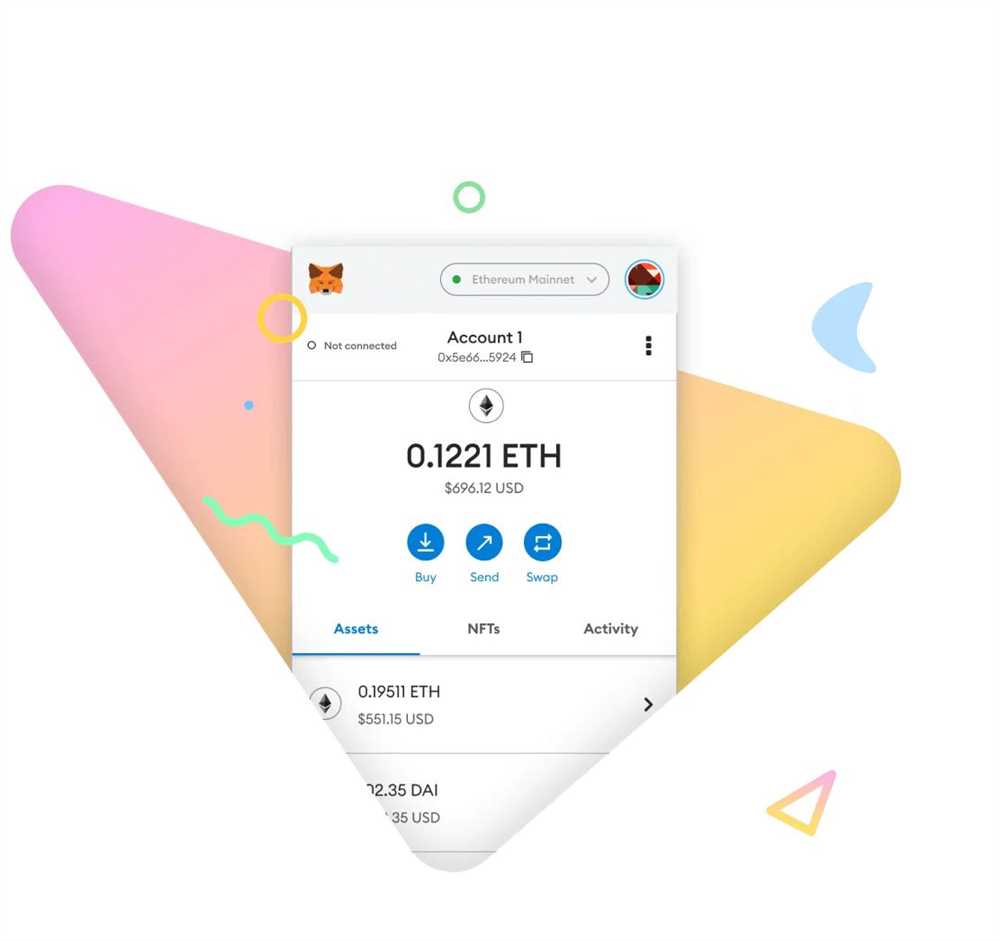
Once the connection between your Ledger Nano and MetaMask is established, you can access and manage your crypto assets. Use the MetaMask interface to view your account balances, send and receive cryptocurrencies, and interact with decentralized applications. Confirm any transactions on your Ledger Nano device for an additional layer of security.
Note: Ledger Nano protects your private keys from online threats and ensures that your transactions are securely processed. By using MetaMask in conjunction with Ledger Nano, you can enjoy the best of both worlds – a highly secure hardware wallet and a user-friendly interface for managing your crypto assets.
Now that you know how to set up and use Ledger Nano with MetaMask, you can take control of your cryptocurrency assets with confidence. Enjoy the peace of mind that comes with knowing your funds are stored securely and easily accessible whenever you need them.
Setting Up Your Ledger Nano Device

Setting up your Ledger Nano device is a straightforward process that ensures the security of your crypto assets.
Follow these steps to get started:
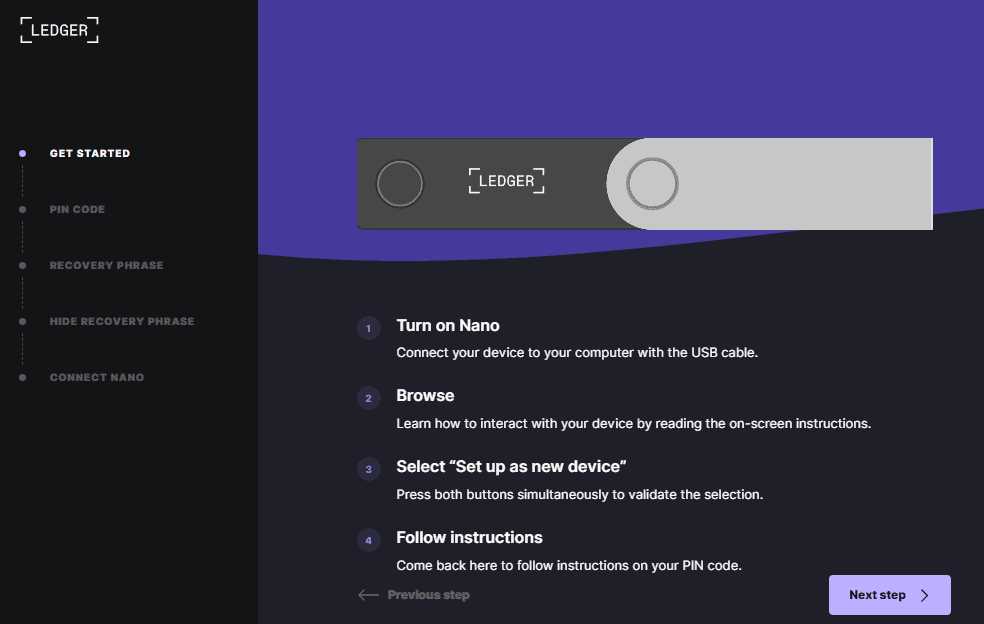
Step 1: Unboxing and Connecting
Start by unboxing your Ledger Nano device. Connect it to your computer using the provided USB cable.
Step 2: Initializing Your Device
After connecting, follow the instructions on the device’s screen to initialize it. This includes setting up a PIN code and writing down your recovery phrase.
Step 3: Installing Ledger Live
Once your device is initialized, you need to install Ledger Live, which is the companion app for managing your crypto assets. Visit the official Ledger website, download and install the appropriate version for your operating system.
Step 4: Setting Up Ledger Live
Open Ledger Live and follow the on-screen instructions to set it up. This will involve selecting your device, creating a new account, and configuring your preferred settings.
Step 5: Adding Apps
To use your Ledger Nano device with Metamask and other applications, you may need to install specific apps on your device. In Ledger Live, navigate to the “Manager” tab and install the required apps.
Step 6: Connecting Metamask to Your Ledger Nano
Now that your Ledger Nano device is set up and apps are installed, you can connect it to Metamask. Open Metamask, click on your account, choose “Connect Hardware Wallet,” and select “Ledger.” Follow the prompts to connect your Ledger Nano device.
Congratulations! You have successfully set up your Ledger Nano device and connected it to Metamask. Now you can securely manage your crypto assets and enjoy enhanced peace of mind.
Installing and Configuring Metamask
To use the Ledger Nano with Metamask, you first need to install and configure the Metamask extension on your web browser. Follow the steps below to get started:
Step 1: Install Metamask
Go to the Metamask website or search for the Metamask extension in your browser’s extension marketplace. Click on the “Add to [Browser Name]” button and wait for the installation to complete.
Step 2: Create a New Wallet or Import an Existing One
Once Metamask is installed, click on the extension icon in your browser toolbar to open the Metamask popup window. Click on the “Get Started” button and choose whether you want to create a new wallet or import an existing one using a seed phrase or private key. Follow the on-screen instructions to complete this step.
Step 3: Set Your Password and Write Down Your Secret Backup Phrase

After creating or importing your wallet, you’ll be prompted to set a password. Choose a strong password that you will remember but is difficult for others to guess. It’s crucial to keep this password secure as it will be required to access your wallet in the future. Additionally, Metamask will provide you with a secret backup phrase, also known as a seed phrase. Write down this phrase and store it in a safe place. It can be used to restore your wallet if you ever lose access to it.
Step 4: Connect Metamask to Your Ledger Nano
Once your wallet is set up, you’ll need to connect your Ledger Nano device to Metamask. To do this, connect your Ledger Nano to your computer using the USB cable and follow the on-screen instructions on the Metamask popup window. You may need to allow Metamask access to your device by confirming the connection on your Ledger Nano’s screen.
That’s it! You’ve successfully installed and configured Metamask for use with your Ledger Nano. You can now use Metamask to interact with various decentralized applications (dApps) and securely manage your cryptocurrencies.
Connecting Ledger Nano to Metamask
To connect your Ledger Nano hardware wallet to Metamask, you will need to follow these steps:
- Make sure you have the latest version of Metamask installed on your browser.
- Connect your Ledger Nano to your computer using the USB cable.
- Open the Metamask extension in your browser.
- Click on the account icon in the top right corner and select “Connect Hardware Wallet.”
- Choose “Ledger” from the list of supported hardware wallets.
- Follow the on-screen instructions to set up your Ledger Nano with Metamask.
- Enter your PIN on the Ledger Nano and click the right button to confirm.
- On Metamask, select the account you want to use with Ledger Nano.
- Your Ledger Nano is now connected to Metamask, and you can use it to sign transactions securely.
By connecting your Ledger Nano to Metamask, you can easily manage your Ethereum and ERC-20 tokens without compromising the security of your private keys. Make sure to keep your Ledger Nano safe and never share your PIN or recovery phrase with anyone.
Transacting with Ledger Nano via Metamask
Transacting with Ledger Nano via Metamask is a secure and convenient way to manage your cryptocurrency transactions. With the Ledger Nano hardware wallet and the integration of the Metamask extension, you can securely sign your transactions without exposing your private keys to potentially malicious websites or applications.
Here’s a step-by-step guide on how to transact with Ledger Nano via Metamask:
- Make sure you have set up and connected your Ledger Nano hardware wallet to your computer.
- Install the Metamask extension on your browser and create a Metamask account if you haven’t already.
- In the Metamask extension, click on the account dropdown and select “Connect Hardware Wallet”.
- Choose “Ledger” as the hardware wallet provider.
- Connect your Ledger Nano to your computer and follow the instructions on the Ledger device’s screen to unlock it.
- Click on “Connect” in the Metamask extension and wait for it to detect your Ledger Nano.
- Enter your Ledger Nano PIN code when prompted on the device.
- Your Ledger Nano is now successfully connected to Metamask.
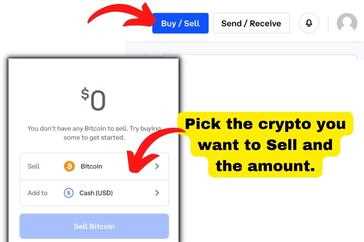
- To make a transaction, simply navigate to the desired cryptocurrency wallet in Metamask and click on “Send”.
- Enter the recipient’s address, the amount you want to send, and any other transaction details.
- Review the transaction details and click on “Confirm” in Metamask.
- Verify the transaction details on your Ledger Nano and confirm the transaction using the device’s buttons.
- Wait for the transaction to be confirmed on the blockchain.
- Your transaction is now complete, and you can see the updated balance in your wallet.
Remember to keep your Ledger Nano and recovery phrase safe to ensure the security of your funds. By using Ledger Nano with Metamask, you can enjoy the benefits of a hardware wallet combined with the convenience of a browser extension for seamless and secure cryptocurrency transactions.
Frequently Asked Questions:
What is Ledger Nano?
Ledger Nano is a hardware wallet that allows users to securely store their cryptocurrency assets.
How can I set up Ledger Nano with Metamask?
To set up Ledger Nano with Metamask, you need to first connect your Ledger device to your computer using a USB cable. Then, open the Metamask extension in your browser and click on the account icon in the top right corner. From there, select “Connect Hardware Wallet” and choose “Ledger” as the type of wallet. Follow the on-screen instructions to complete the setup process.
Can I use Ledger Nano with any other cryptocurrency wallets?
Yes, Ledger Nano can be used with other cryptocurrency wallets as well. It supports various wallet applications such as MyEtherWallet, MyCrypto, and other BIP39/BIP44 compatible wallets.
Is it safe to store my cryptocurrencies on a Ledger Nano?
Yes, storing your cryptocurrencies on a Ledger Nano is considered to be one of the safest ways to store your assets. The device provides secure offline storage and enables users to have full control over their private keys, reducing the risk of online hacks or theft.
+ There are no comments
Add yours