


If you’re new to the world of cryptocurrency, you may be wondering how to send your digital assets from one platform to another. In this step-by-step guide, we’ll walk you through the process of sending crypto from MetaMask, a popular Ethereum wallet, to Coinbase, one of the leading cryptocurrency exchanges.
Step 1: Connect MetaMask to Coinbase
Before you can send crypto from MetaMask to Coinbase, you’ll need to connect your MetaMask wallet to Coinbase. To do this, follow these steps:
- Open MetaMask and click on the network selector.
- Select “Custom RPC” and enter the following details:
- Network Name: Coinbase
- New RPC URL: https://rpc.coinbase.com
- Chain ID: 0x1
- Symbol: ETH
- Block Explorer URL: https://etherscan.io
- Click “Save” to add the Coinbase network to your MetaMask wallet.
Step 2: Import Coinbase Wallet Address into MetaMask
Once you’ve connected MetaMask to Coinbase, you’ll need to import your Coinbase wallet address into MetaMask. Follow these steps:
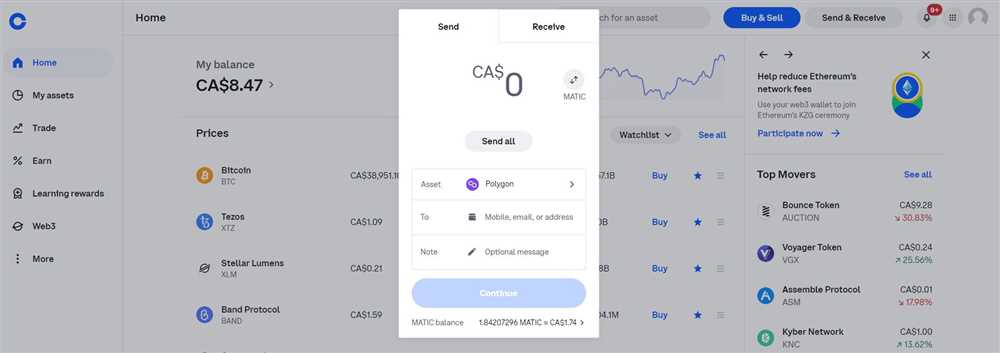
- Open Coinbase and navigate to your wallet.
- Click on the “Receive” button to view your wallet address.
- Copy the wallet address to your clipboard.
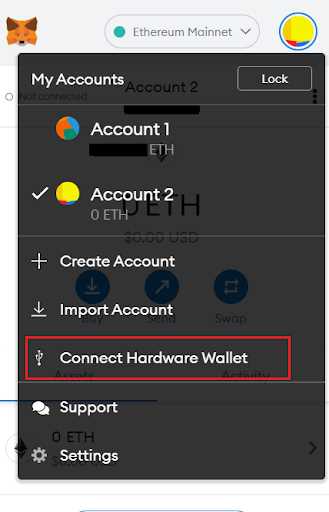
- Switch back to MetaMask and click on the account selector.
- Select “Import Account” and paste your Coinbase wallet address.
- Click “Import” to add your Coinbase wallet address to MetaMask.
Step 3: Send Crypto from MetaMask to Coinbase
Now that you’ve connected MetaMask to Coinbase and imported your Coinbase wallet address into MetaMask, you’re ready to send crypto. Here’s how:
- Open MetaMask and select the account you want to send crypto from.
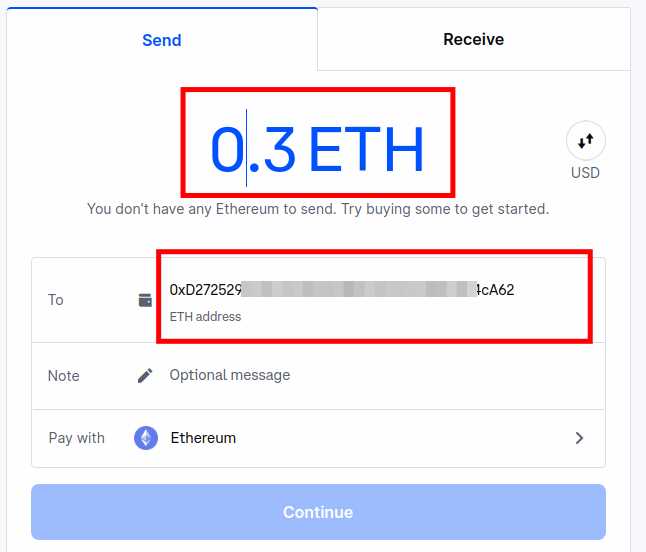
- Click on the “Send” button.
- Enter the recipient’s wallet address, the amount of crypto you want to send, and any additional details requested by MetaMask.
- Review the transaction details and fees.
- Click “Confirm” to initiate the transaction.
- Wait for the transaction to be confirmed on the blockchain.
That’s it! You’ve successfully sent crypto from MetaMask to Coinbase. It may take some time for the transaction to be completed, so be patient. Once the transaction is confirmed, you’ll see the crypto in your Coinbase wallet.
Remember to always double-check the recipient’s wallet address before sending any crypto and ensure that you have enough funds in your MetaMask wallet to cover the transaction fees. Happy sending!
A Detailed Guide on Transferring Crypto from MetaMask to Coinbase
Transferring cryptocurrencies from your MetaMask wallet to your Coinbase account requires a few simple steps. By following this guide, you can easily move your funds between these two platforms.
- Open your MetaMask wallet and make sure you have the correct cryptocurrency selected.
- Click on the “Send” button to initiate a transaction.
- Copy the Coinbase wallet address that you want to send your crypto to.
- Paste the Coinbase wallet address into the “Recipient Address” field in MetaMask.
- Enter the amount of crypto you want to send and review the transaction details.
- Double-check the Coinbase wallet address to ensure accuracy.
- Click on the “Next” button to proceed with the transaction.
- Review the gas fee and adjust if needed.
- Click on the “Confirm” button to finalize the transaction.
- Wait for the transaction to be confirmed on the blockchain.
- Your cryptocurrency will now be transferred from MetaMask to your Coinbase account.
It is important to note that the transaction time may vary depending on the network congestion and the gas fee you set. Make sure to have a reliable internet connection and sufficient funds in your MetaMask wallet to cover the gas fees.
Once the transaction is confirmed, you can check your Coinbase account to verify that the crypto has been successfully transferred. Remember to always double-check wallet addresses to avoid any potential errors or loss of funds.
Step 1: Setting Up Your MetaMask Wallet
Before you can send crypto from MetaMask to Coinbase, you’ll first need to set up your MetaMask wallet. Follow these steps to get started:
- Install the MetaMask extension: Visit the MetaMask website and download the extension for your browser (available for Chrome, Firefox, and Brave).
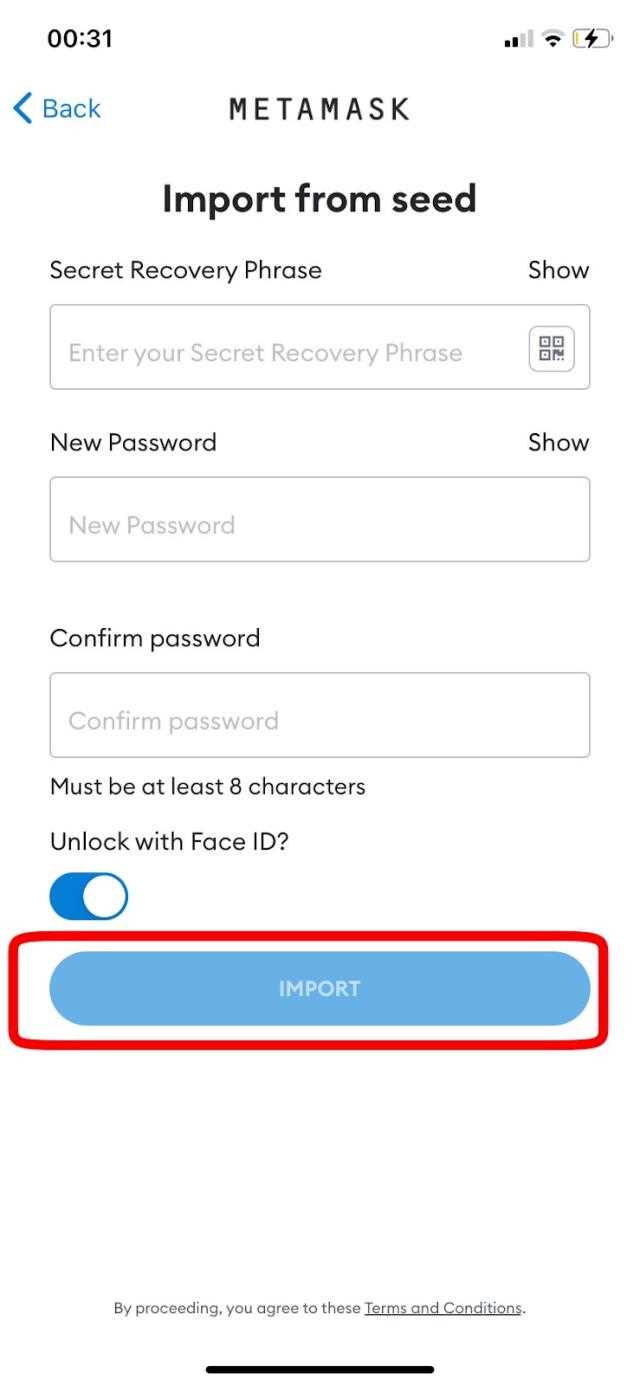
- Create a new MetaMask wallet: Once the extension is installed, click on the MetaMask icon in your browser toolbar and follow the prompts to create a new wallet. Make sure to secure your wallet with a strong password and back up your seed phrase.
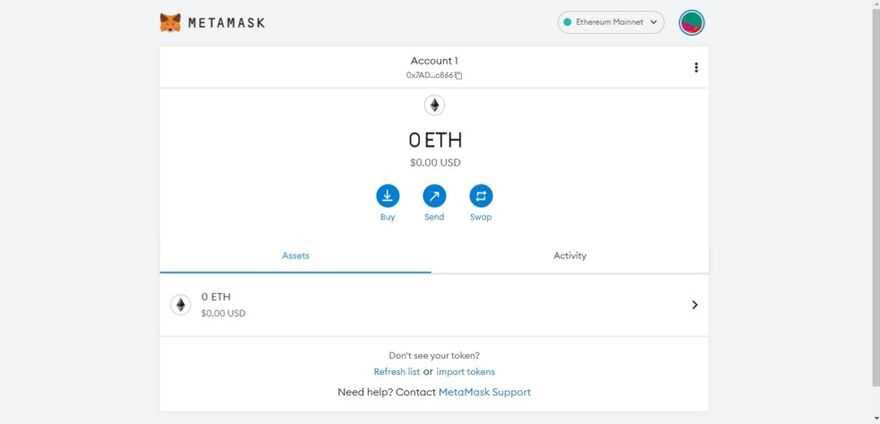
- Connect your wallet: After creating your wallet, you’ll be prompted to connect it to a network. Choose the Ethereum Mainnet network to access the Ethereum blockchain.
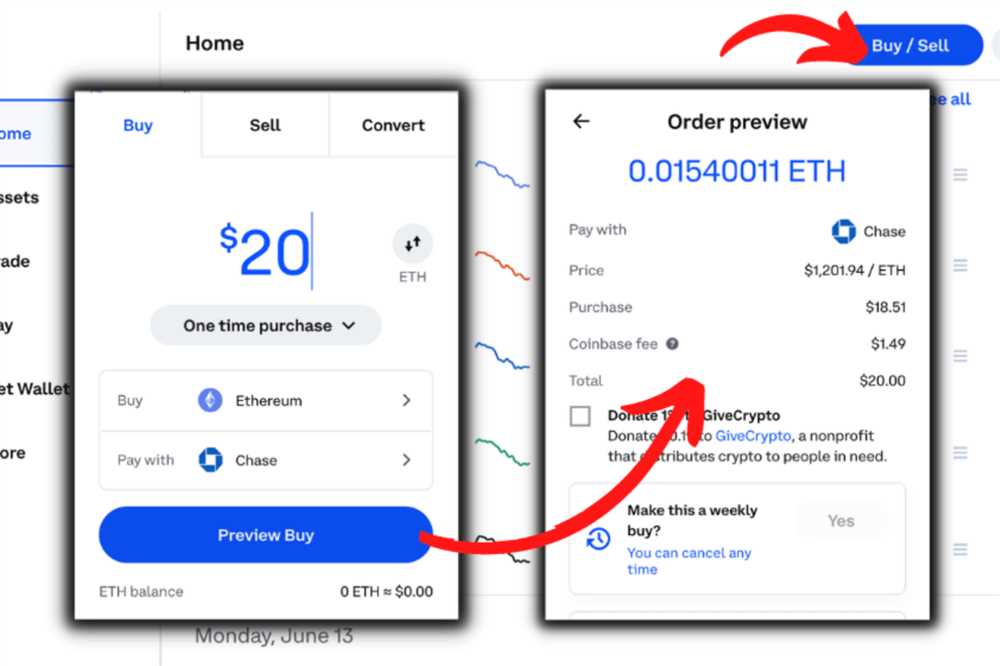
- Add funds to your wallet: Once your wallet is connected, you’ll need to add some Ethereum or other supported cryptocurrencies to your wallet. You can do this by purchasing crypto from an exchange or receiving it from another wallet.
- Verify your wallet on Coinbase: To send crypto from MetaMask to Coinbase, you’ll need to verify your MetaMask wallet on Coinbase. Log in to your Coinbase account, navigate to the “Settings” tab, and follow the instructions to add your MetaMask wallet.
Congratulations! You have now successfully set up your MetaMask wallet and are ready to send crypto to Coinbase.
Step 2: Adding Coinbase as a Custom Network in MetaMask
Once you have installed and set up MetaMask, the next step is to add Coinbase as a custom network. This will allow you to send your crypto directly from MetaMask to your Coinbase account.
Here’s how to do it:
- Open the MetaMask extension in your browser and make sure you are on the main account page.
- Click on the network dropdown menu, which is usually located on the top of the MetaMask window.
- Select “Custom RPC” from the menu. This will open a new window where you can input the details for the custom network.
- In the “New RPC URL” field, enter the Coinbase RPC URL. This URL can usually be found on the Coinbase website or in their documentation.
- Give your custom network a name, such as “Coinbase” or “Coinbase Custom Network”.
- In the “Chain ID” field, enter the correct Chain ID for Coinbase. Again, you can find this information on the Coinbase website or in their documentation.
- Click on the “Save” button to add Coinbase as a custom network in MetaMask.
- Now, when you go back to the MetaMask account page, you should see Coinbase as an available network in the network dropdown menu.
By adding Coinbase as a custom network in MetaMask, you can easily transfer your crypto from MetaMask to your Coinbase account without any hassle. This will make it more convenient for you to manage your digital assets and use them as you wish.
Step 3: Initiating the Transfer from MetaMask to Coinbase
Once you have successfully connected your MetaMask wallet to Coinbase, you can now initiate the transfer process. Follow the steps below to send crypto from MetaMask to Coinbase:
- Open your MetaMask wallet and make sure you are on the main account page.
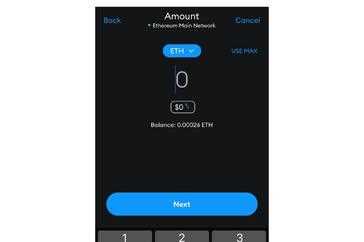
- Click on the “Send” button.
- In the “Recipient Address” field, paste the wallet address of your Coinbase account where you want to send the crypto.
- Enter the amount of crypto you wish to send in the “Amount” field. Make sure it is within the limits set by Coinbase for the specific cryptocurrency.
- Double-check the recipient address and the amount to ensure accuracy.
- Choose the appropriate gas fee. Higher gas fees will result in faster transaction confirmation, but also higher transaction costs.
- Click on the “Next” button.
- Review the transaction details one last time to ensure everything is correct.
- If everything looks good, click on the “Confirm” button to initiate the transfer.
- Wait for the transaction to be confirmed and included in a block on the blockchain.
Once the transaction is confirmed, the crypto will be sent from your MetaMask wallet to your Coinbase account. You can then go to your Coinbase account to check the balance and access the funds.
Note: The transaction time may vary depending on network congestion and the gas fee selected.
Step 4: Confirming the Transfer and Checking Your Coinbase Wallet
Once you have initiated the transfer from your MetaMask wallet to your Coinbase wallet, you will need to confirm the transaction before it can be completed. This confirmation process is an important security feature to ensure that your crypto assets are being sent to the intended recipient.
To confirm the transfer, you will need to review the details of the transaction on your MetaMask wallet. Make sure that the recipient’s wallet address is correct and that the amount you are sending is accurate. Once you have verified the details, click on the “Confirm” button to proceed.
After confirming the transfer, the transaction will be broadcasted to the Ethereum network for processing. This process typically takes a few minutes, but it may vary depending on network congestion and other factors. You can track the progress of the transaction by checking the transaction hash, which is a unique identifier for the transfer.
Once the transaction is successfully processed and confirmed on the Ethereum network, you can check your Coinbase wallet to ensure that the funds have been deposited. Log in to your Coinbase account and navigate to the wallet where you were expecting the funds to be deposited.
On your Coinbase wallet, you should see the updated balance reflecting the transferred crypto assets. It is important to note that depending on network congestion and Coinbase’s internal processes, it may take some time for the balance to update. If you do not see the funds immediately, do not panic and give it some time.
It is recommended to double-check the transaction details and balance on both your MetaMask and Coinbase wallets to make sure everything matches. This helps to ensure that the transfer was successful and that your crypto assets have been safely received in your Coinbase wallet.
Once you have confirmed the transfer and verified the funds in your Coinbase wallet, you can proceed with managing your crypto assets as desired, such as selling, trading, or withdrawing them to another wallet or bank account.
Note: It is always recommended to enable two-factor authentication (2FA) and use secure password practices to protect your crypto assets and online accounts.
By following these steps, you can successfully send your crypto assets from MetaMask to Coinbase and have peace of mind knowing that your funds are secure in your Coinbase wallet.
Frequently Asked Questions:
What is MetaMask?
MetaMask is a popular cryptocurrency wallet browser extension that allows users to interact with different decentralized applications (dapps) on the Ethereum blockchain.

+ There are no comments
Add yours