


Welcome to the beginner’s guide on setting up and using Solana Wallet with Metamask! In this guide, we will walk you through the step-by-step process of creating a Solana wallet, connecting it to Metamask, and making your first transactions on the Solana network. Whether you are new to cryptocurrency or an experienced user, this guide will provide you with all the information you need to get started with Solana and Metamask.
Solana is a fast and secure blockchain platform that allows developers to build decentralized applications (dApps) and create their own tokens. It has gained popularity in the crypto community for its high throughput, low fees, and scalability. Metamask, on the other hand, is a popular browser extension that allows you to manage your Ethereum wallet and interact with dApps on the Ethereum network. By connecting your Solana wallet to Metamask, you can access and manage your Solana assets directly from the Metamask interface.
To get started, you will need to install Metamask on your browser if you haven’t already. Once installed, create a new Metamask account or import your existing Ethereum account. After setting up Metamask, you can add the Solana network to your wallet by following a few simple steps. Open your Metamask extension, click on the network selection dropdown, and select “Custom RPC”. In the “New Network” settings, enter the following details:
Network Name: Solana
New RPC URL: https://api.mainnet-beta.solana.com
Chain ID: 101
Symbol: SOL
Block Explorer URL: https://explorer.solana.com
After entering the details, click “Save”, and you will have successfully added the Solana network to your Metamask wallet. You can now create a new Solana wallet or connect your existing Solana wallet to Metamask. To create a new Solana wallet, go to the Solana Wallet website and follow the instructions to set up your wallet. Once your wallet is set up, copy the wallet address and go back to Metamask. Click on the Metamask extension, and under the account section, click on “Import Account”. Paste your Solana wallet address and click “Import”. Your Solana wallet will now be connected to Metamask, and you can view and manage your Solana assets within the Metamask interface.
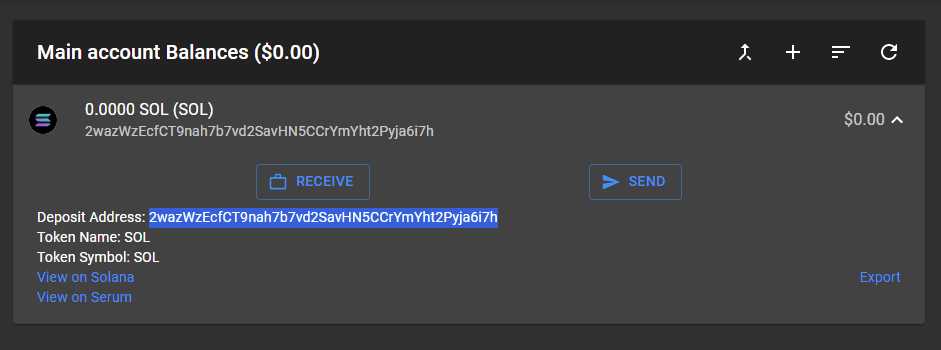
With your Solana wallet connected to Metamask, you can now start making transactions on the Solana network. You can send and receive SOL tokens, participate in decentralized finance (DeFi) protocols, and interact with various dApps within the Solana ecosystem. Simply select your Solana wallet on the Metamask extension, choose the action you want to perform, and follow the prompts to complete the transaction. It’s that easy!
This beginner’s guide has provided you with the necessary steps to set up and use Solana Wallet with Metamask. By following these instructions, you can seamlessly manage your Solana assets, participate in the Solana ecosystem, and explore the world of decentralized finance on the Solana network. Happy transacting!
Getting Started: Set Up Your Solana Wallet

Setting up a Solana wallet is the first step to start using Solana’s decentralized applications (dApps) and engaging with the Solana blockchain. Follow the steps below to set up your Solana wallet:
| Step | Description |
|---|---|
| Step 1 | Install the Metamask browser extension if you haven’t done so already. Metamask is a popular Ethereum wallet that can be used to interact with the Solana blockchain. |
| Step 2 | Open the Metamask extension and click on the network selection dropdown. Choose “Custom RPC” as the network. |
| Step 3 | In the Custom RPC settings, enter the following details to connect to the Solana Mainnet: |
|
|
| Step 4 | Click “Save” to save the custom network settings. |
| Step 5 | You have now successfully set up your Solana wallet using Metamask! You can now use your wallet to send and receive Solana tokens, interact with dApps, and participate in the Solana ecosystem. |
Note that although Metamask is primarily an Ethereum wallet, its support for custom networks allows users to connect to other compatible blockchains like Solana. This provides a convenient way to manage multiple wallets and access various blockchain networks with a single wallet interface.
Follow these steps to set up and configure your Solana wallet with Metamask:
Setting up and configuring your Solana wallet with Metamask is a straightforward process that can be completed in a few simple steps. This guide will help you navigate through the process and have your Solana wallet up and running in no time.
Step 1: Install Metamask Extension
The first step is to install the Metamask browser extension if you don’t have it already. To do so, visit the Metamask website and follow the instructions for your preferred browser. Once installed, you will see the Metamask icon in your browser toolbar.
Step 2: Create or Import a Solana Wallet
Next, open Metamask by clicking on the extension icon in your browser toolbar. If you already have a Metamask account, you can import your existing wallet by selecting the “Import Wallet” option and following the prompts. If you don’t have a wallet yet, click on “Create a Wallet” to generate a new one. Make sure to securely store your wallet’s seed phrase as it is essential for wallet recovery.
Step 3: Network Configuration
After setting up your wallet, click on the network dropdown in Metamask and select “Custom RPC” to add the Solana network. Fill in the following network details:
- Network Name: Solana
- New RPC URL: https://api.mainnet-beta.solana.com
- Chain ID: 101
- Currency Symbol: SOL
- Block Explorer URL: https://explorer.solana.com
Click on “Save” to add the Solana network to your Metamask wallet.
Step 4: Add SOL Tokens to Metamask
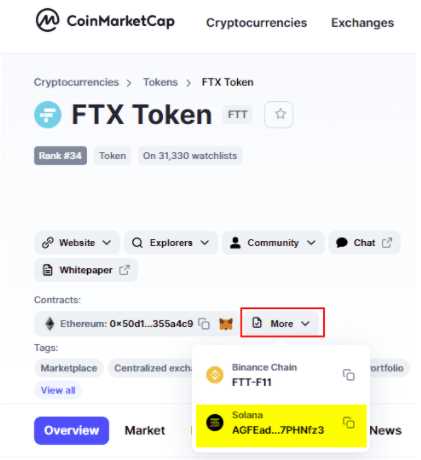
Now that your wallet is set up and the Solana network is configured, you need to add SOL tokens to your Metamask wallet. To do this, click on the Metamask extension icon, select your Solana wallet, and click on “Add Token.” Enter the SOL token contract address, which is: [insert contract address here]. Metamask will then display your SOL token balance in your wallet.
That’s it! You have successfully set up and configured your Solana wallet with Metamask. You can now use your wallet to send and receive SOL tokens on the Solana network.
Connecting Solana Wallet to Metamask
Metamask is a popular Ethereum wallet that allows users to connect to various blockchains. While it natively supports Ethereum, it can also be used to connect to Solana and other compatible networks. This guide will walk you through the steps to set up and use Solana Wallet with Metamask.
Step 1: Install Metamask
If you haven’t already, download and install the Metamask extension for your web browser. Once installed, create a new wallet or import an existing one by following the on-screen instructions.
Step 2: Configuring Metamask for Solana
By default, Metamask is set up for Ethereum. To connect it to Solana, you’ll need to add the Solana network to your wallet.
- Click on the Metamask extension icon in your browser.
- Click on the network selection dropdown and choose “Custom RPC”.
- In the “Network Name” field, enter “Solana”.
- In the “New RPC URL” field, enter “https://api.mainnet-beta.solana.com”.
- Click “Save” to add the Solana network to Metamask.
Step 3: Importing Solana Wallet
Now that Metamask is configured for Solana, you can import your Solana wallet into Metamask.
- Open your Solana wallet and locate your private key or seed phrase.
- Back in Metamask, click on the account dropdown and choose “Import Account”.
- Select the “Private Key” or “Seed Phrase” option based on your Solana wallet.
- Enter your private key or seed phrase and click “Import”.
Congratulations! You have successfully connected your Solana wallet to Metamask. You can now use Metamask to interact with Solana dApps and manage your SOL tokens.
Note: Make sure to only import your Solana wallet into trusted wallets like Metamask. Keep your private keys and seed phrases secure and never share them with anyone.
Learn how to connect your Solana wallet to Metamask and benefit from the integration:
If you are a cryptocurrency enthusiast looking to explore the Solana network and enjoy the convenience of using Metamask, this guide is for you. By connecting your Solana wallet to Metamask, you can take advantage of the integration between these two platforms and easily manage your Solana assets.
To get started, follow these simple steps:
- Make sure you have Metamask installed on your browser. If you don’t have it yet, you can download and install the extension from the Metamask website.
- Open Metamask and create a new wallet or import an existing one if you already have a wallet with Solana.
- In Metamask, click on the network selection dropdown and choose “Custom RPC” to add a new network.
- Fill in the following details for the Solana network:
- Network Name: Solana
- New RPC URL: https://api.mainnet-beta.solana.com
- Chain ID: 101
- Symbol: SOL
- Explorer URL: https://explorer.solana.com
- Click on “Save” to add the Solana network to Metamask.
- You can now see the Solana network listed in the network selection dropdown. Select it to switch to the Solana network.
- Next, you will need to connect your Solana wallet to Metamask. To do this, click on the account icon in Metamask and select “Connect to Hardware Wallet” or “Import Wallet” if you have an existing Solana wallet.
- Follow the prompts and enter the required information to connect your Solana wallet to Metamask.
- Once connected, you can now manage your Solana assets through Metamask. You can view your Solana account balance, send and receive SOL tokens, and interact with decentralized applications (dApps) on the Solana network.
By connecting your Solana wallet to Metamask, you can enjoy the seamless integration between these two platforms and take advantage of the wide range of features and functionalities offered by both Solana and Metamask. So, don’t hesitate to set up your Solana wallet with Metamask today!
Using Solana Wallet and Metamask: A Beginner’s Guide
Introduction:
Solana is a high-performance blockchain protocol that aims to enable scalable, fast, and low-cost decentralized applications and cryptocurrencies. Metamask, on the other hand, is a popular cryptocurrency wallet that allows users to securely store and manage their digital assets. In this beginner’s guide, we will walk you through the process of setting up and using the Solana wallet with Metamask.
Step 1: Install Metamask
Before you can use the Solana wallet with Metamask, you need to have Metamask installed on your browser. If you haven’t done so already, visit the official Metamask website and follow the instructions to install the wallet extension for your preferred browser.
Step 2: Create a Solana Wallet
Once you have Metamask installed, you can proceed to create a Solana wallet. Open the Metamask extension and click on the account icon. From the dropdown menu, select “Create Account”. Follow the prompts to set up your wallet and make sure to securely back up your seed phrase. Your Solana wallet is now created and associated with your Metamask account.
Step 3: Connect Solana Network
With your Solana wallet ready, you need to connect it to the Solana network. Click on the network dropdown in Metamask and select “Custom RPC”. In the provided fields, enter the following details:
| Network Name | RPC URL | Chain ID |
|---|---|---|
| Solana | https://api.mainnet-beta.solana.com | 101 |
Click on “Save” to save the network settings. You are now connected to the Solana network.
Step 4: Import Solana Wallet
If you already have a Solana wallet and want to import it into Metamask, you can do so by clicking on the account icon in Metamask and selecting “Import Account”. Enter your Solana wallet address and follow the prompts to import the wallet. Your Solana wallet is now imported and associated with your Metamask account.
Step 5: Using Solana Wallet with Metamask
With your Solana wallet set up and connected to Metamask, you can now start using it to manage your Solana assets. You can send and receive SOL and other Solana-based tokens, view your transaction history, and interact with decentralized applications built on the Solana blockchain.
Remember to always keep your wallet and seed phrase secure. Be cautious of phishing attempts and never share your seed phrase with anyone.
That’s it! You have successfully set up and are now using the Solana wallet with Metamask. Enjoy exploring Solana’s scalability and Metamask’s user-friendly interface.
Frequently Asked Questions:
What is Solana Wallet?
Solana Wallet is a digital wallet that allows you to store, manage, and transact with Solana tokens. It provides a secure and convenient way to interact with the Solana blockchain.
How can I set up a Solana Wallet?
To set up a Solana Wallet, you will need to download and install the Solana Wallet extension for Chrome or Firefox. Once installed, you can create a new wallet or import an existing wallet using a recovery phrase or a private key.
Can I use Metamask with Solana Wallet?
Yes, you can use Metamask with Solana Wallet. To do this, you will need to configure Metamask to connect to the Solana network by adding a custom RPC URL. Once configured, you can use Metamask to interact with the Solana blockchain, including accessing your Solana Wallet and transferring tokens.
What are the benefits of using Solana Wallet with Metamask?
Using Solana Wallet with Metamask provides several benefits. It allows you to manage both your Solana and Ethereum assets in one place, simplifies the token transfer process, and provides a familiar interface for those already using Metamask. Additionally, it opens up opportunities to participate in decentralized applications and protocols on both the Solana and Ethereum networks.
+ There are no comments
Add yours