


Are you ready to take your cryptocurrency trading to the next level? If you’re using Metamask as your Ethereum wallet, you’re already one step ahead. But did you know that you can unlock even more possibilities by adding Wrapped Ether (WETH) to your wallet?
Wrapped Ether (WETH) is not your ordinary cryptocurrency. It’s an ERC20 token that represents Ether (ETH) on the Ethereum blockchain. By adding WETH to your Metamask wallet, you can seamlessly trade Ether and other ERC20 tokens without leaving the comfort of your wallet.
So, why should you add WETH to your Metamask wallet? The answer is simple: convenience and accessibility. With WETH in your wallet, you can easily participate in decentralized exchanges (DEXs) and access a wide range of decentralized finance (DeFi) applications.
Unlock the Power of Metamask
Introduction
Metamask is a powerful browser extension that allows you to interact with decentralized applications (dApps) on the Ethereum blockchain. With Metamask, you can securely store your Ether (ETH), as well as other ERC-20 tokens, and easily perform transactions without the need for a centralized exchange.
Benefits of Metamask
1. Ease of use: Metamask provides a user-friendly interface that allows even beginners to easily navigate and use its features.
2. Security: Metamask keeps your private keys securely within your browser, ensuring that your funds are protected from external threats.
3. Compatibility: Metamask can be easily integrated with various dApps and web platforms, allowing you to seamlessly interact with decentralized applications.
4. Customizability: Metamask allows you to add custom tokens and manage your portfolio all in one place, giving you full control over your assets.
Getting Started with Metamask
To start using Metamask, simply install the extension on your preferred browser and create a new wallet. Once your wallet is set up, you can import an existing wallet or create a new one. Remember to save your seed phrase and private key in a secure place.
After setting up your wallet, you can start adding Ethereum and other tokens to it. Metamask supports various ways of acquiring tokens, including purchasing them on exchanges, receiving them through airdrops or faucets, and participating in token sales.
Once you have tokens in your wallet, you can easily manage them, send them to others, or use them in decentralized applications.
Unlock the power of Metamask and experience the freedom and convenience of transacting on the Ethereum blockchain. The possibilities are endless!
Get started with Metamask today and take control of your digital assets!
Add WETH to Your Wallet
If you want to take full advantage of the power of MetaMask, it’s important to understand how to add WETH (Wrapped Ether) to your wallet. WETH is an ERC-20 token that represents Ether.
To add WETH to your wallet, follow these steps:
Step 1: Open MetaMask
First, open your MetaMask wallet extension in your browser.
Step 2: Go to the Assets Tab
Next, click on the “Assets” tab in the MetaMask interface.
Step 3: Click on “Add Token”
In the Assets tab, you’ll see a button that says “Add Token.” Click on it.
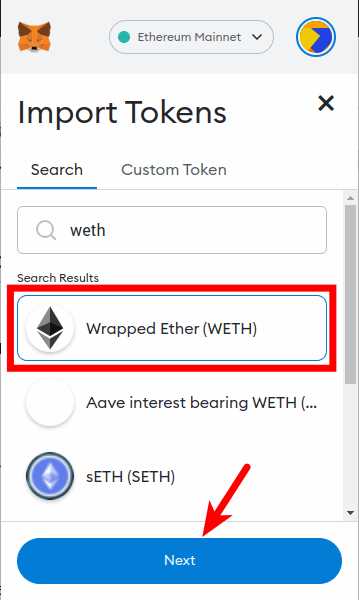
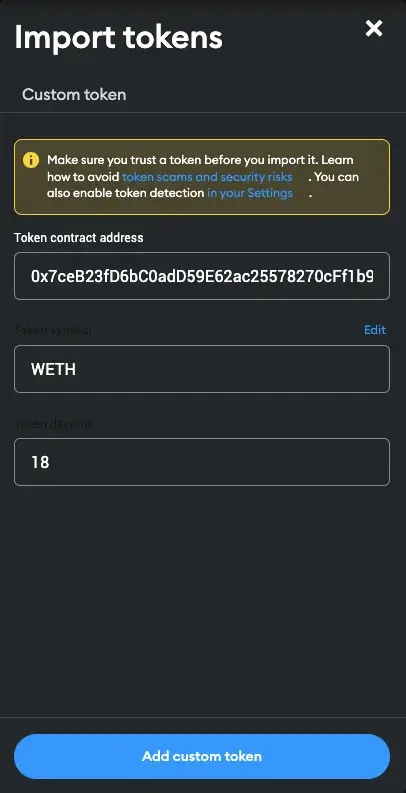
Step 4: Choose “Custom Token”
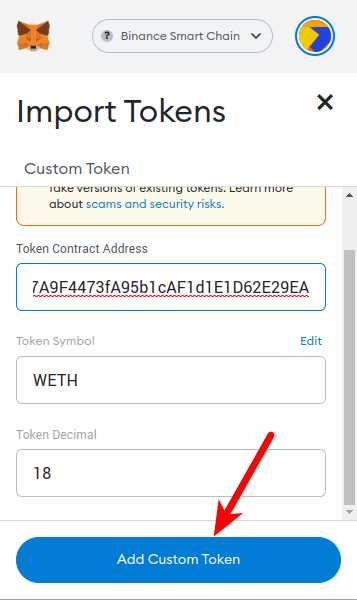
A dialog will appear with a dropdown menu. Select “Custom Token” from the dropdown menu.
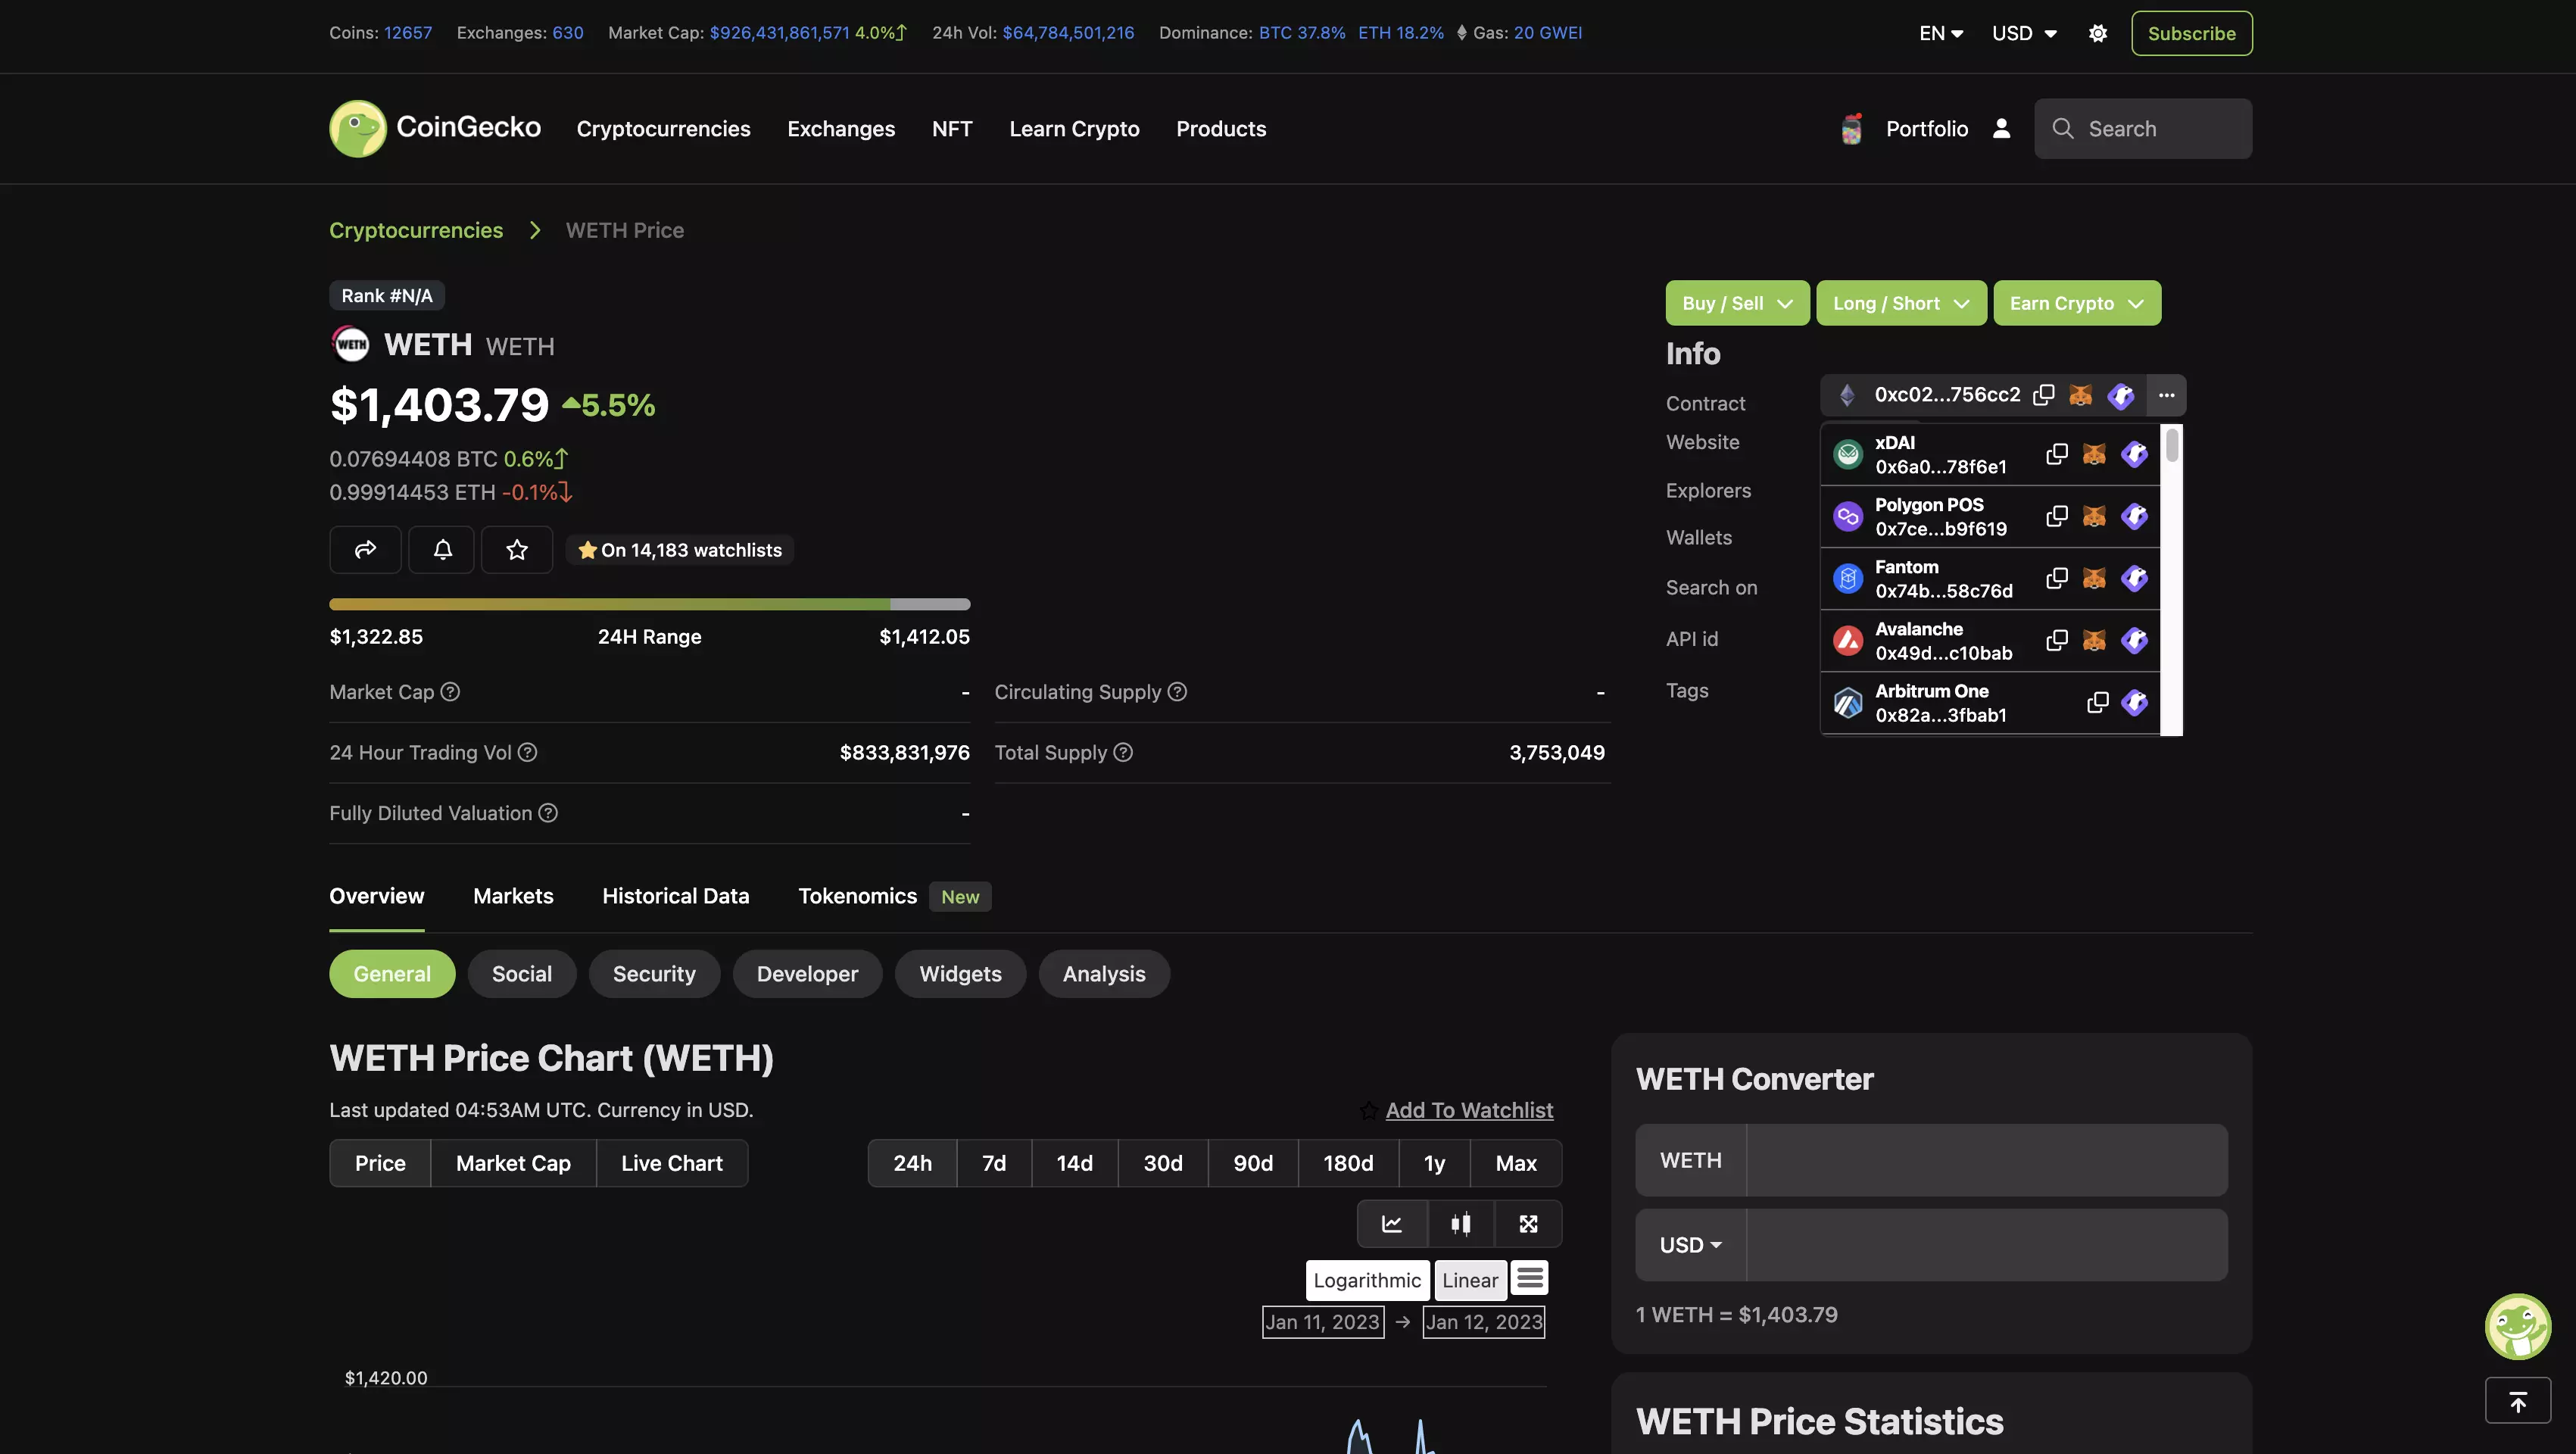
Step 5: Enter WETH Contract Address
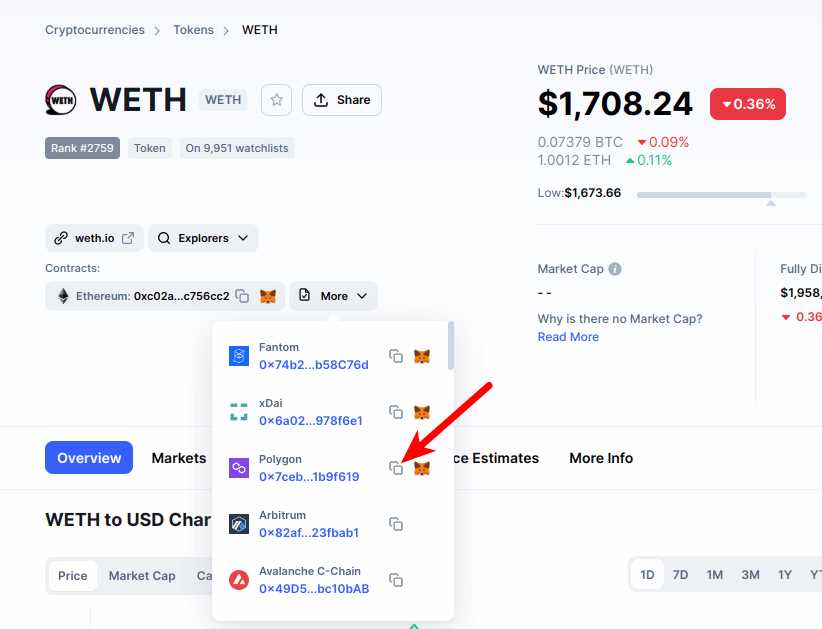
You’ll need to enter the WETH contract address in the “Token Contract Address” field. The WETH contract address is: 0xC02aaA39b223FE8D0A0e5C4F27eAD9083C756Cc2
Step 6: Add WETH to Your Wallet
After entering the contract address, click on the “Next” button. You’ll then see a confirmation screen. Click on “Add Tokens” to add WETH to your wallet.
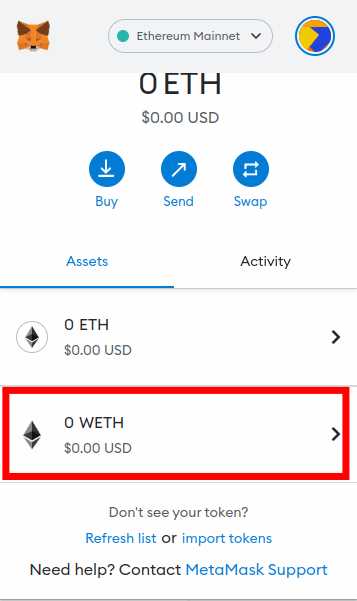
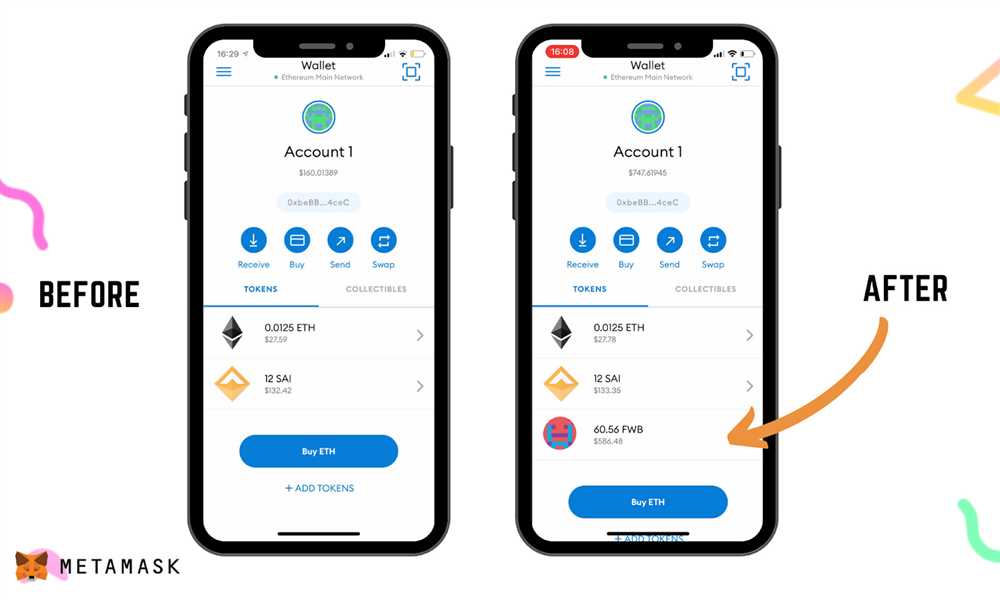
Once you’ve completed these steps, you’ll be able to see your WETH balance in the MetaMask wallet interface.
Now that you’ve added WETH to your wallet, you can use it to participate in DeFi platforms, trade on decentralized exchanges, or even lend it out for interest. The possibilities are endless!
Please note that adding WETH to your wallet may incur transaction fees, depending on network congestion. Make sure to have enough Ether in your wallet to cover the fees.
Getting Started with Metamask
If you’re new to cryptocurrency and digital wallets, Metamask is a great place to start. It is a browser extension that allows you to interact with the Ethereum blockchain and manage your digital assets securely.
Installation
To get started with Metamask, follow these simple steps:
- Open your preferred browser (supported browsers include Chrome, Firefox, Brave, and Edge).
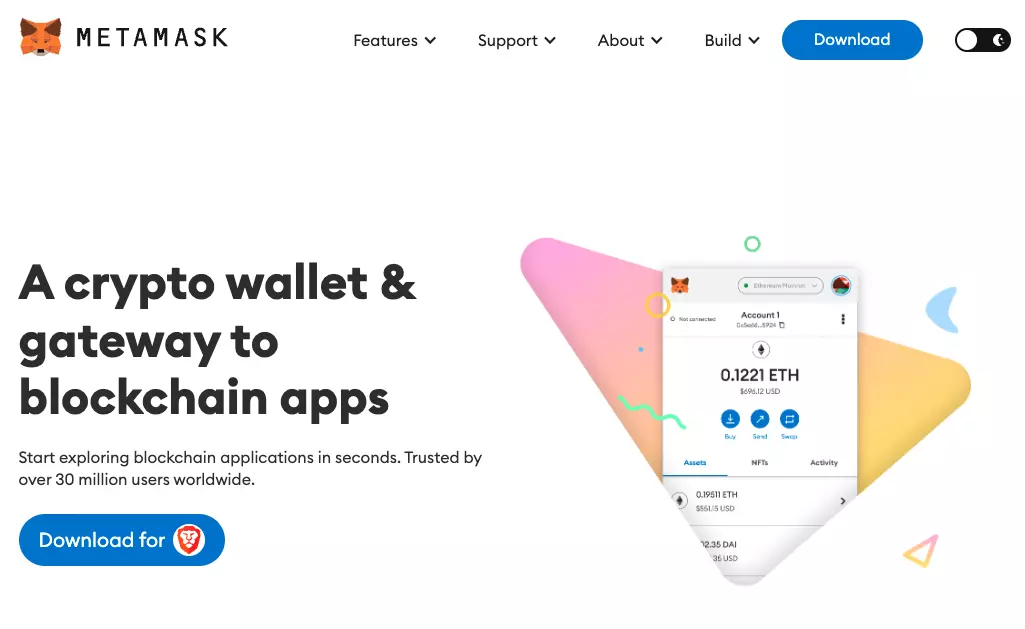
- Go to the Metamask website or search for “Metamask” in the browser’s extension store.
- Click on the “Install” button and follow the instructions to add the extension to your browser.
Creating a Wallet
Once you have installed Metamask, you’ll need to create a wallet:
- Click on the Metamask extension icon in your browser’s toolbar.
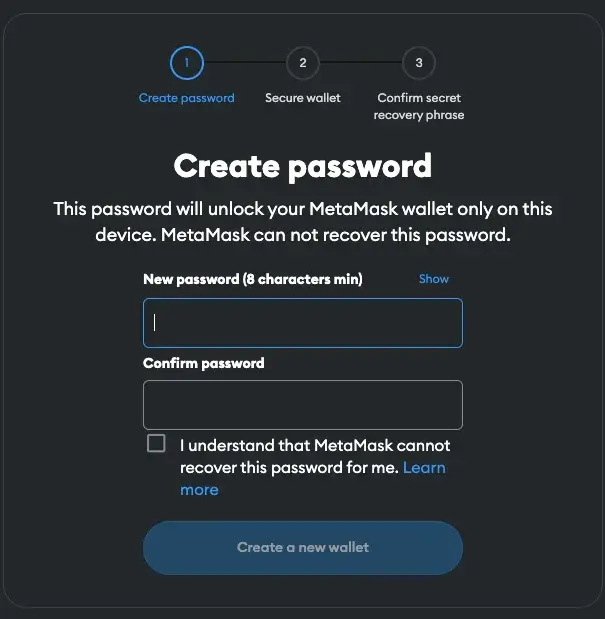
- Click on “Create a Wallet” and choose a strong password.
- Read and accept the terms and conditions, then click on “Create”.
- Metamask will generate a unique twelve-word recovery phrase. Write it down and keep it in a safe place. This phrase is crucial for recovering your wallet if you ever lose access to your device.
Connecting to Ethereum
Now that you have a wallet, you can connect it to the Ethereum network:
- Click on the Metamask extension icon and enter your password to unlock your wallet.
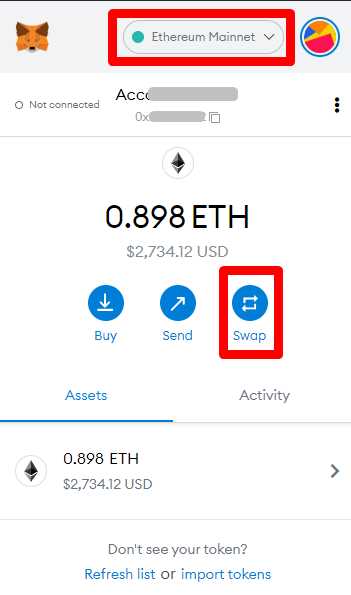
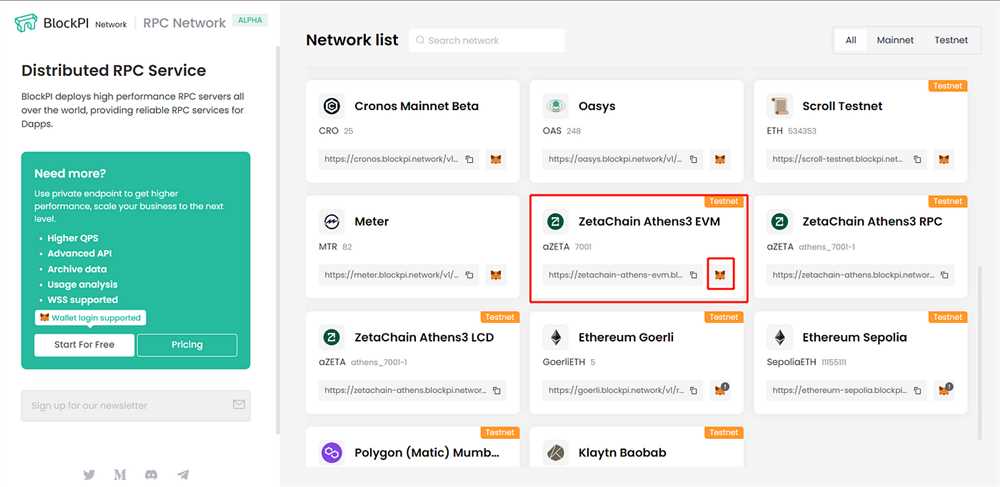
- Click on the network dropdown menu and select “Main Ethereum Network” to connect to the mainnet.
- If you’re developing or testing on a different network, you can choose one from the dropdown menu.
Buying and Sending Ethereum
With your wallet connected, you can now buy and send Ethereum:
- Click on “Buy” to purchase Ethereum using a partner exchange or select “Send” to send Ethereum to another address.
- Follow the prompts and enter the necessary information to complete the transaction.
Conclusion
Congratulations! You are now ready to explore the world of Ethereum and utilize the power of Metamask. Remember to always keep your recovery phrase safe and be cautious when interacting with smart contracts or providing sensitive information online.
Install Metamask Extension
If you want to unlock the power of Metamask and start using WETH, the first step is to install the Metamask extension for your web browser. Follow the steps below to get started:
Step 1: Choose your web browser
Metamask is compatible with several popular web browsers, including Google Chrome, Firefox, Brave, and Microsoft Edge. Choose the browser you prefer and open the browser’s Web Store or add-on marketplace.
Step 2: Search for Metamask
In the search bar of your chosen web store or add-on marketplace, type in “Metamask” and press Enter. The Metamask extension should appear in the search results.
Step 3: Install Metamask
Click on the Metamask extension in the search results to open its details page. Look for the “Add to” or “Install” button and click on it. The extension will then begin to download and install on your browser. You may need to grant certain permissions or agree to terms and conditions, depending on your browser.
Once the installation is complete, you should see the Metamask icon in the top right corner of your browser’s toolbar.
Congratulations! You have successfully installed the Metamask extension. In subsequent steps, we will guide you through the process of setting up your Metamask wallet and adding WETH to it.
Create a New Wallet
If you don’t already have a Metamask wallet, you will need to create one in order to add WETH to your wallet.
To create a new wallet, follow these steps:
1. Install Metamask
First, you will need to install the Metamask extension for your web browser. Metamask is available for Google Chrome, Firefox, and Brave browsers. Simply go to the Metamask website and follow the instructions to install the extension.
2. Set Up a New Wallet
Once you have installed the Metamask extension, you can set up a new wallet in just a few simple steps.
Click on the Metamask icon in your browser’s toolbar to open the extension.
Click on the “Get Started” button on the welcome screen.
You will be presented with the option to either import an existing wallet or create a new one. Since we are creating a new wallet, select the “Create a Wallet” option.
Enter a strong password for your wallet. Make sure to choose a password that you will remember, as you will need it to access your wallet in the future.
Click on the “Create” button to create your new wallet.
3. Backup Your Wallet
After creating your wallet, Metamask will display a secret backup phrase that you must write down and store in a safe place. This backup phrase is the only way to recover your wallet if you lose your password or access to your computer.
Write down the backup phrase and keep it in a safe and secure location. Do not share this phrase with others, as it could give them access to your wallet and funds.
Once you have written down the backup phrase, click on the “Next” button to verify your backup phrase.
Metamask will ask you to select the words of your backup phrase in the correct order. This is to ensure that you have properly recorded your backup phrase. Select the words in the correct order and click on the “Confirm” button.
Congratulations! You have successfully created a new Metamask wallet. You can now use this wallet to add WETH and other cryptocurrencies to your wallet.
Frequently Asked Questions:
What is Metamask?
Metamask is a web extension wallet that allows users to interact with the Ethereum blockchain and decentralized applications (dApps) securely. It simplifies the process of connecting to Ethereum networks and managing digital assets.
Why would I want to add WETH to my Metamask wallet?
Adding WETH to your Metamask wallet allows you to interact with decentralized applications (dApps) and platforms that use WETH as a base token. WETH is a wrapped version of Ether (ETH) and is commonly used in DeFi (Decentralized Finance) applications for lending, borrowing, and trading. By having WETH in your wallet, you can participate in various DeFi activities and access a wider range of opportunities in the decentralized ecosystem.
Can I convert WETH back to ETH in my Metamask wallet?
Yes, you can convert WETH back to ETH in your Metamask wallet. To do this, you can utilize a decentralized exchange (DEX) such as Uniswap or SushiSwap. Simply connect your wallet to the DEX, select the WETH/ETH pair, and input the amount of WETH you would like to convert. The DEX will automatically execute the swap and convert your WETH back to ETH, which will then be reflected in your wallet.
Are there any fees involved when adding or converting WETH in Metamask?
Yes, there may be fees involved when adding or converting WETH in Metamask. These fees, commonly known as gas fees, are paid to the Ethereum network for processing transactions and executing smart contracts. The gas fees can vary depending on network congestion and the complexity of the transaction. When adding or converting WETH, it is important to consider the current gas fees and adjust accordingly.
+ There are no comments
Add yours