


If you’re interested in exploring the exciting world of decentralized finance (DeFi) and non-fungible tokens (NFTs), you’ll need to have a reliable and secure wallet to manage your digital assets. One of the most popular wallets in the cryptocurrency space is MetaMask, and it now offers support for Polygon, a promising Ethereum scaling solution.
Polygon is a layer 2 scaling solution that aims to improve Ethereum’s scalability and reduce transaction fees. By leveraging the power of sidechains, Polygon enables faster and cheaper transactions, making it an attractive choice for users who want to avoid high gas fees on the Ethereum network.
In this step-by-step guide, we’ll walk you through the process of setting up Polygon on MetaMask so you can start taking advantage of its benefits. Whether you’re new to the world of cryptocurrencies or an experienced user, this guide will help you navigate the process easily.
How to Set Up Polygon on MetaMask

MetaMask is a popular Ethereum wallet that allows users to manage their cryptocurrencies and interact with decentralized applications (DApps). Polygon is a layer 2 scaling solution for Ethereum that aims to improve scalability and reduce transaction fees. By setting up Polygon on MetaMask, you can take advantage of the benefits offered by Polygon while using your familiar MetaMask wallet.
Step 1: Install and Set Up MetaMask
If you haven’t already, you’ll need to install the MetaMask extension for your browser. Visit the official MetaMask website and follow the instructions for your specific browser. Once installed, create a new MetaMask wallet or import your existing wallet using your seed phrase.
Step 2: Switch to Polygon Network
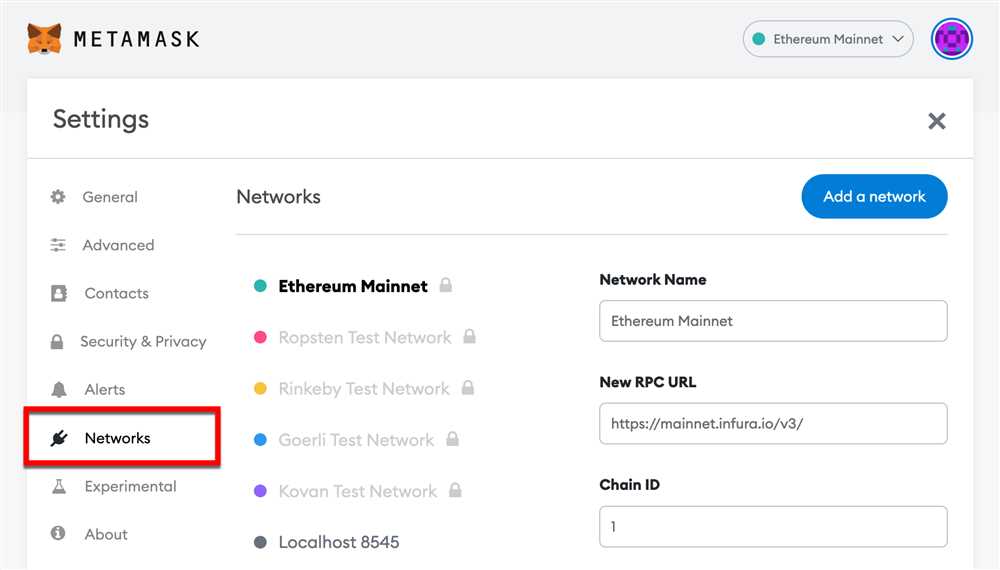
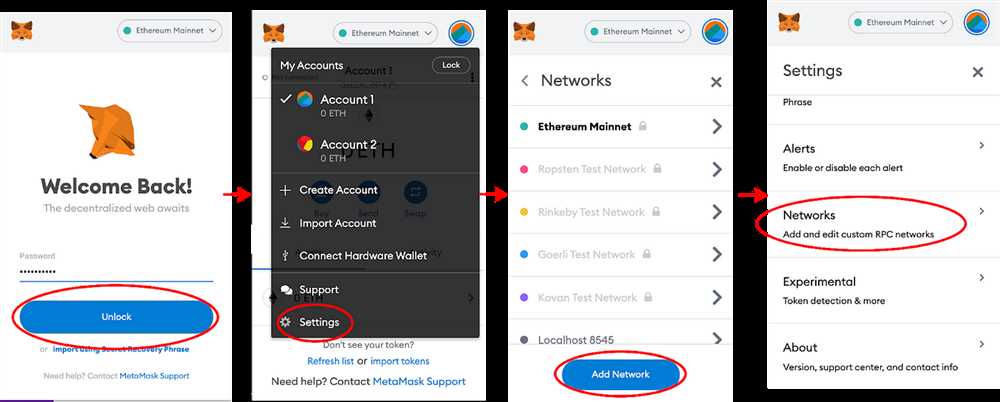
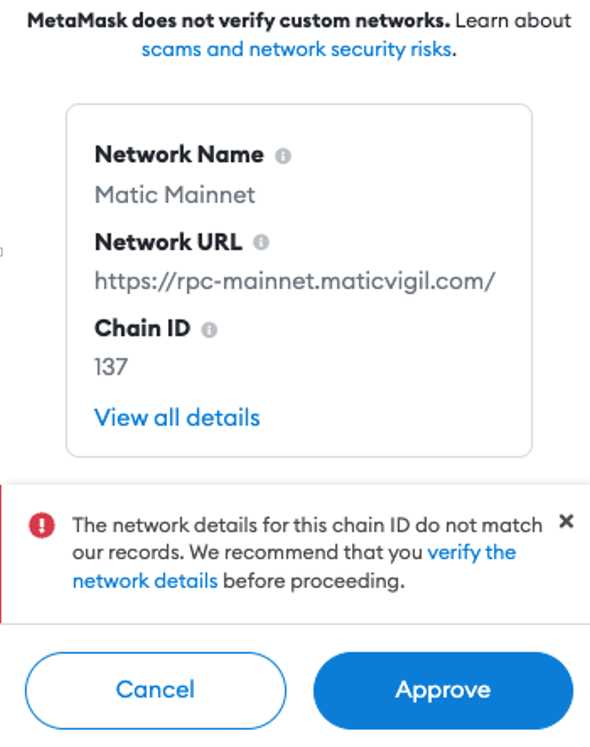
After setting up MetaMask, you’ll need to switch to the Polygon network. Click on the MetaMask extension icon in your browser to open the wallet. On the top of the wallet interface, you’ll see the current network. Click on it and select “Custom RPC” to add a new network.
In the “New RPC URL” field, enter the following URL: https://rpc-mainnet.maticvigil.com/. Enter “Polygon Mainnet” for the network name. Leave the other fields blank and click “Save”.
Step 3: Obtain MATIC Tokens
In order to use Polygon, you’ll need MATIC tokens. MATIC is the native cryptocurrency of the Polygon network. You can obtain MATIC tokens from a cryptocurrency exchange by depositing Ethereum and swapping it for MATIC. Once you have MATIC tokens, make sure they are in your MetaMask wallet.
Step 4: Start Using Polygon on MetaMask
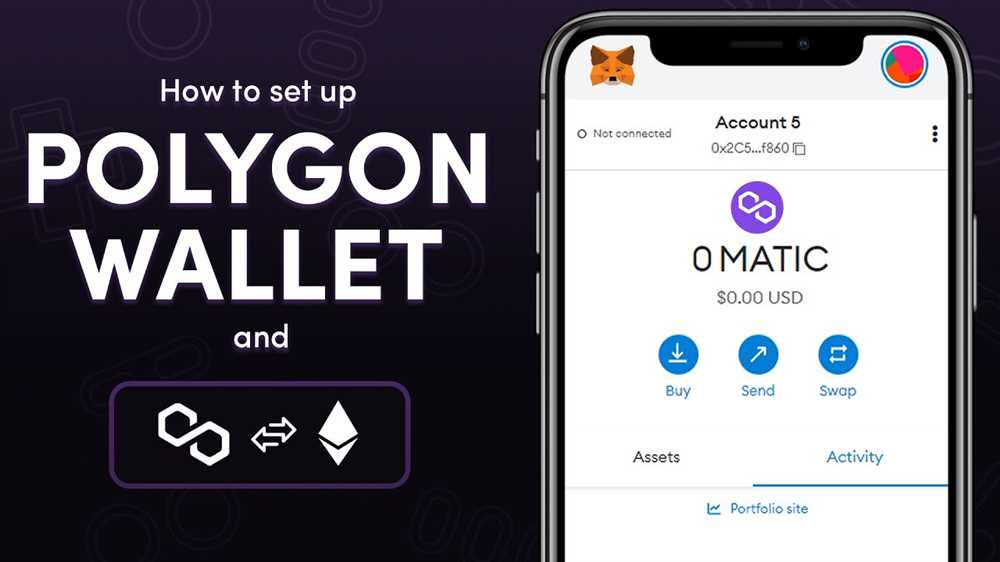
Now that you have set up Polygon on MetaMask, you can start using Polygon DApps and interacting with the Polygon network. You can browse decentralized exchanges, yield farming platforms, gaming applications, and more. When using Polygon DApps, make sure to connect your MetaMask wallet to the Polygon network by clicking on the network icon and selecting “Polygon Mainnet”.
Remember to always exercise caution and do your own research when using DApps and interacting with cryptocurrencies. Keep your wallet and seed phrase safe and be mindful of potential scams and phishing attempts.
Congratulations! You have successfully set up Polygon on MetaMask and are ready to explore the world of decentralized finance on the Polygon network.
Step 1: Install and Set Up MetaMask
To get started with Polygon on MetaMask, you need to install the MetaMask extension on your web browser and set it up. Here’s a step-by-step guide to help you:
- Open your preferred web browser and visit the official MetaMask website.
- Click on the “Download” button located on the top right corner of the website.
- Choose your browser and click on the corresponding download link.
- After the extension is successfully installed, you will see the MetaMask icon added to your browser’s toolbar.
- Click on the MetaMask icon, and a pop-up will appear with a welcome message. Click on the “Get Started” button.
- You will be presented with two options: “Import Wallet” or “Create Wallet.” If you already have a MetaMask wallet and want to use it, select “Import Wallet.” If you don’t have a wallet, select “Create Wallet.” For the purpose of this guide, let’s assume you are creating a new wallet.
- Create a strong password for your wallet. Make sure it is unique and not easily guessable. Confirm the password and click on the “Create” button.
- Read and accept the terms of use. Click on the “I Agree” button.
- A secret backup phrase will be generated. This phrase is crucial for recovering your wallet, so make sure to store it somewhere safe. Click on the “Next” button once you have noted down the backup phrase.
- Verify your backup phrase by selecting the words in the correct order as shown on the screen.
- After verifying your backup phrase, your MetaMask wallet will be ready to use.
Congratulations! You have successfully installed and set up MetaMask on your web browser. In the next step, we will connect MetaMask to the Polygon network.
Frequently Asked Questions:
What is MetaMask?
MetaMask is a cryptocurrency wallet and browser extension that allows users to manage their digital assets, interact with decentralized applications (dApps) on various blockchain networks, and securely store their private keys.
What is Polygon?
Polygon is a layer 2 scaling solution for the Ethereum blockchain. It aims to improve scalability and reduce transaction fees on the Ethereum network by providing a framework for building and connecting multiple sidechains, also known as “Polygon chains,” to the Ethereum mainnet.
+ There are no comments
Add yours