


Metamask is a popular browser extension that allows users to access blockchain-based applications, such as decentralized finance (DeFi) platforms, directly through their web browsers. It serves as a digital wallet, providing users with a secure and convenient way to manage their cryptocurrency assets and interact with the decentralized web.
If you’re new to Metamask and want to start using it on Firefox, this step-by-step guide will walk you through the process of installing and setting up the extension on your browser. Whether you’re an experienced crypto user or just curious about decentralized applications, Metamask is a must-have tool that makes it easy to explore the world of blockchain technology.
Step 1: Install Metamask Extension
The first step is to visit the Firefox Add-ons store and search for the Metamask extension. Once you find it, click on the “Add to Firefox” button to start the installation process. You may be prompted to confirm the installation and grant necessary permissions.
Note: Make sure you are downloading the official version of Metamask from a trusted source to ensure the security of your funds.
Step 2: Create or Import a Wallet
After the installation is complete, you will see the Metamask fox icon in the top right corner of your browser. Click on the icon to open the extension. If you’re a new user, you’ll be prompted to create a new wallet. Follow the instructions provided to set up your wallet. If you already have a Metamask wallet, you can choose to import an existing one using your seed phrase or private key.
Step 3: Secure Your Wallet
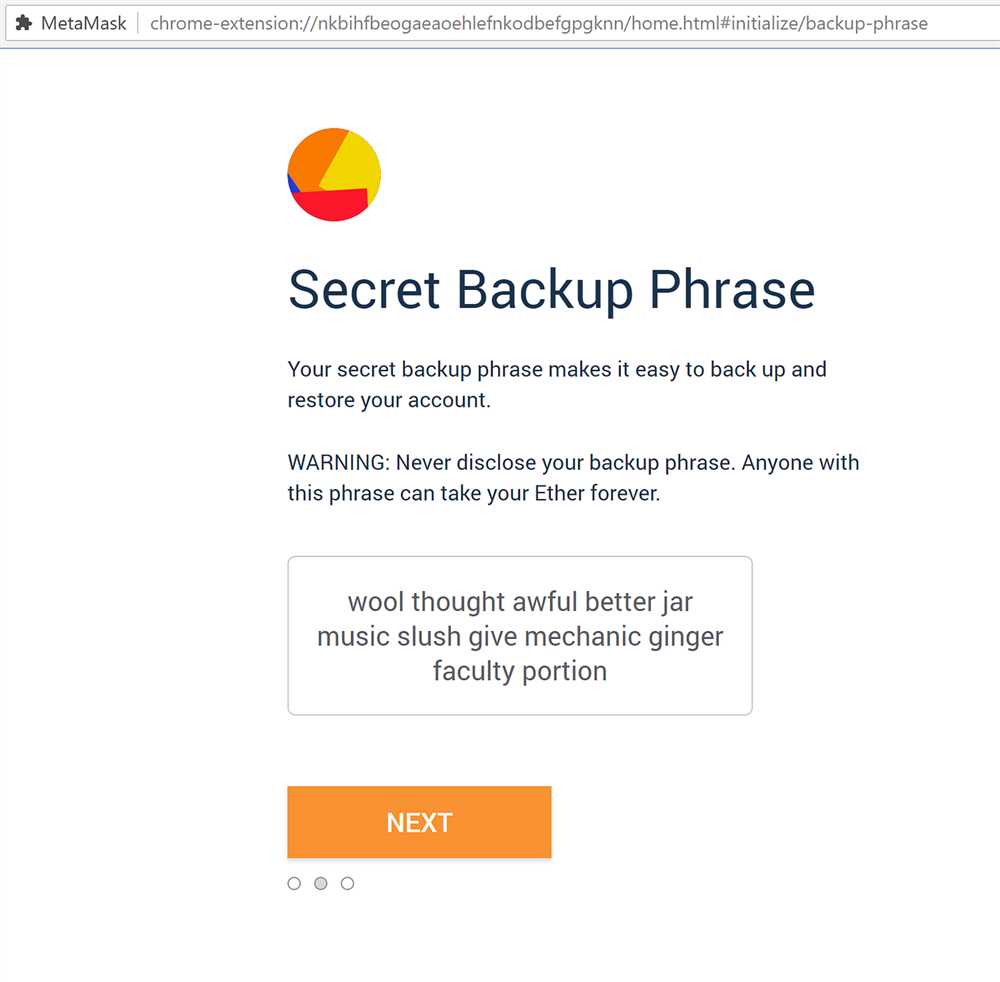
Once your wallet is created or imported, it’s important to take steps to secure it. Metamask will provide you with a 12-word seed phrase during the setup process. Be sure to write down this seed phrase and store it in a safe place. This seed phrase is crucial for recovering your wallet in case you lose access to your device.
Note: Never share your seed phrase or private key with anyone, as it gives full control of your wallet to anyone who possesses it.
Step 4: Connect to Ethereum Network
Metamask supports multiple Ethereum networks, including the mainnet, testnets, and custom networks. By default, it will be connected to the Ethereum mainnet. However, if you want to interact with specific dapps or test out features on testnets, you can change the network by clicking on the network dropdown in the Metamask interface and selecting the desired network.
Now that you have successfully installed and set up Metamask on Firefox, you’re ready to explore the world of decentralized applications and manage your cryptocurrency assets with ease. Enjoy the benefits of a secure and user-friendly interface, and stay up to date with the latest developments in the blockchain space!
Step-by-Step Guide:
Installing and using the Metamask extension on Firefox is a simple process that allows you to interact with decentralized applications (dApps) on the Ethereum blockchain. Follow these steps to get started:
Step 1: Install the Metamask Extension
- Open your Firefox browser and go to the Firefox Add-Ons page.
- Search for “Metamask” in the search bar.
- Click on the “Add to Firefox” button next to the Metamask extension.
- Wait for the installation process to complete, and then click on the Metamask icon that appears in your Firefox toolbar.
Step 2: Create a Metamask Account
- Click on the “Get Started” button.
- Read and accept the terms of use.
- Create a new wallet by clicking on the “Create a Wallet” button.
- Enter a strong password and confirm it.
- Click on the “I agree” button.
- Download and save your wallet seed phrase in a safe place. This will be used for wallet recovery.
- Click on the “Next” button to reveal your seed phrase.
- Confirm your seed phrase by selecting the words in the correct order.
- Click on the “Confirm” button.
Step 3: Connect Metamask to Ethereum Mainnet
- In the Metamask extension, click on the network selection dropdown menu.
- Select “Main Ethereum Network.”
- Read and accept the terms of use.
- Congratulations! You are now connected to the Ethereum Mainnet.
Now that you have successfully installed and set up the Metamask extension on Firefox, you can start exploring and interacting with dApps on the Ethereum blockchain. Happy browsing!
How to Install Metamask Extension on Firefox
If you are using the Firefox browser and want to start using the Metamask extension, you’re in the right place. Metamask is a popular cryptocurrency wallet and decentralized application (dApp) browser extension that allows you to interact with Ethereum-based applications directly from your browser.
Step 1: Open the Firefox Add-Ons Store
The first step in installing Metamask on Firefox is to open the Firefox Add-Ons store. You can do this by clicking on the three horizontal lines in the upper-right corner of the browser window, and then selecting “Add-Ons” from the menu that appears.
Step 2: Search for Metamask
Once you are in the Firefox Add-Ons store, type “Metamask” into the search bar. This will bring up a list of results related to the Metamask extension. Look for the official Metamask extension and click on it.
Step 3: Click “Add to Firefox”
After clicking on the Metamask extension in the search results, you will be taken to the extension’s page. On this page, you will see a button that says “Add to Firefox.” Click on this button to start the installation process.
If you see a prompt asking you to confirm the installation, click “Add” to proceed.
Step 4: Confirm the Installation
Once you have clicked “Add to Firefox,” you will see a confirmation dialog box. This dialog box will provide you with some information about the permissions required by the Metamask extension. Read through this information and click “Add” to confirm the installation.
Step 5: Pin Metamask to Your Toolbar
After confirming the installation, you will see the Metamask icon appear in your Firefox toolbar. To make it easier to access, you can pin the Metamask extension to your toolbar. Simply right-click on the Metamask icon and select “Pin to Toolbar” from the menu that appears.
Now that you have successfully installed the Metamask extension on Firefox, you can begin using it to access and interact with Ethereum-based applications. Simply click on the Metamask icon in your toolbar to open the extension and get started.
Remember to keep your Metamask wallet secure by setting a strong password and backing up your seed phrase. Happy exploring!
Using Metamask Extension on Firefox: A Beginner’s Guide
Metamask is a popular browser extension that allows users to interact with decentralized applications (DApps) on the Ethereum blockchain. With Metamask, users can store, manage, and use Ethereum-based tokens and interact with smart contracts seamlessly in their web browsers.
If you are new to blockchain technology or cryptocurrencies, this guide will walk you through the process of installing and using the Metamask extension on Firefox. Whether you want to participate in an Initial Coin Offering (ICO), trade cryptocurrencies, or simply explore the world of decentralized finance, Metamask is a great tool to get started.
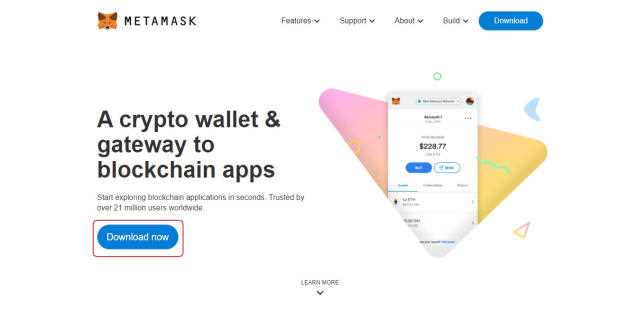
Step 1: Install Metamask Extension on Firefox
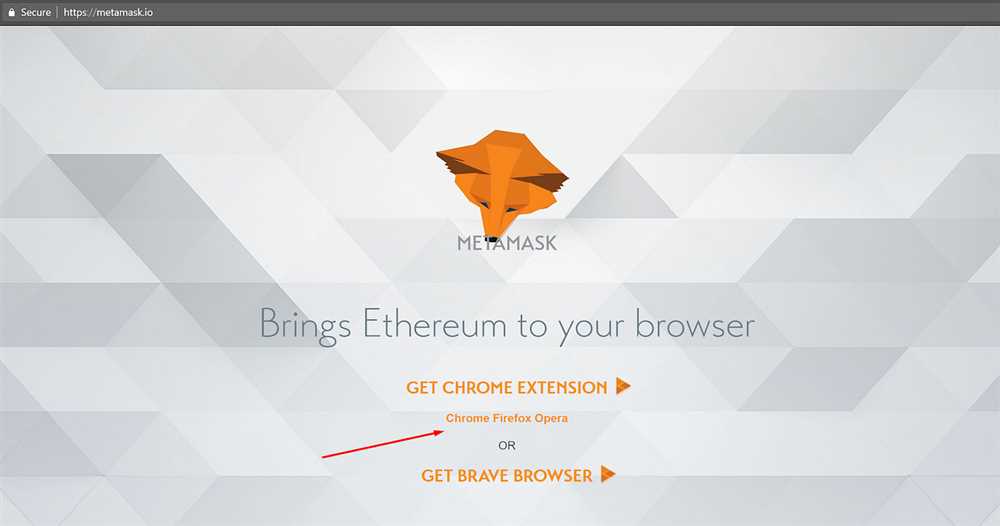
To begin, open your Firefox browser and navigate to the official Metamask page on the Firefox Add-ons store. Click the “Add to Firefox” button to start the installation process.
 |
Figure 1: Installing Metamask Extension on Firefox |
Once the installation is complete, you will see the Metamask icon in your Firefox toolbar.
Step 2: Create a New Metamask Wallet
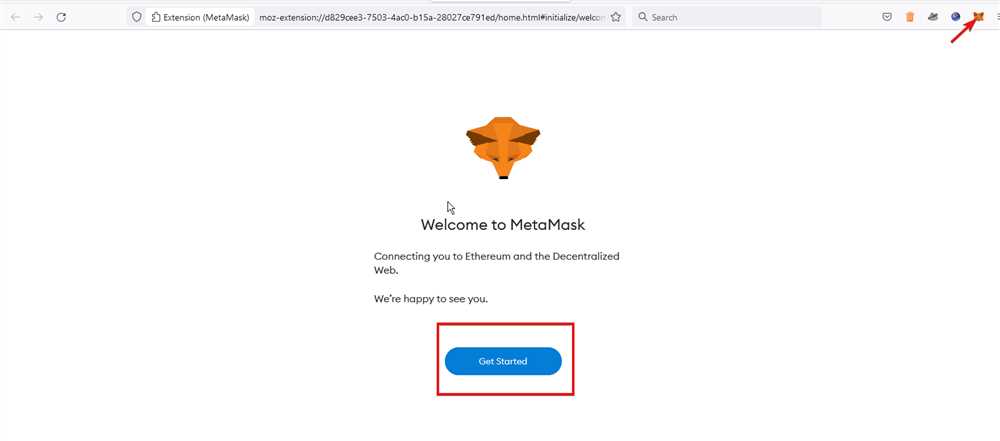
Click on the Metamask icon in the toolbar to open the extension. In the welcome screen, click “Get Started” to begin creating your new Metamask wallet.
 |
Figure 2: Metamask Welcome Screen |
Follow the on-screen instructions to set up a secure password for your wallet. Make sure to write down your secret backup phrase and store it in a safe place. This phrase can be used to restore your wallet if you lose access to your device.
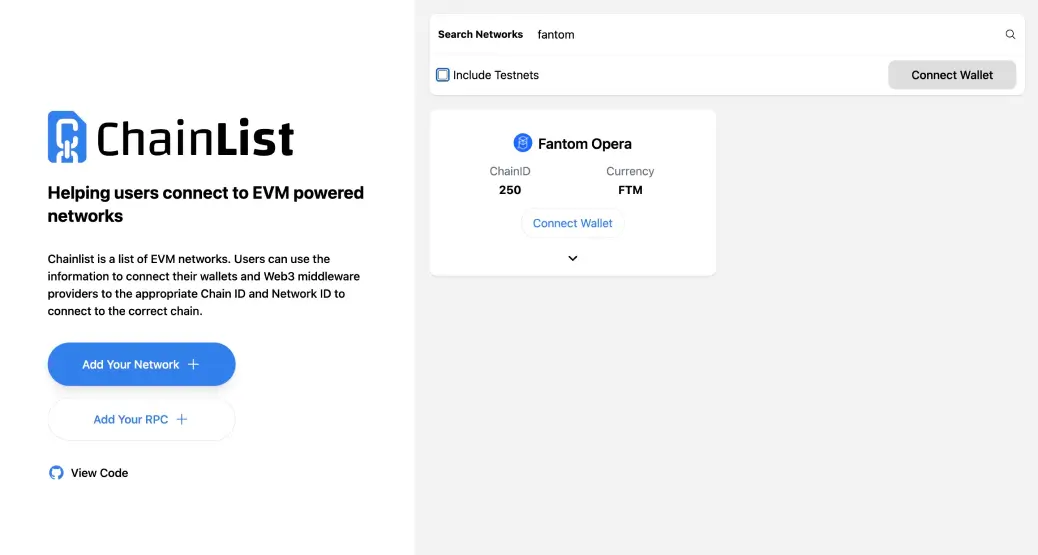
Step 3: Connect Metamask to a Network
After setting up your wallet, you need to connect Metamask to a network to start using it. By default, Metamask is connected to the Ethereum Mainnet.
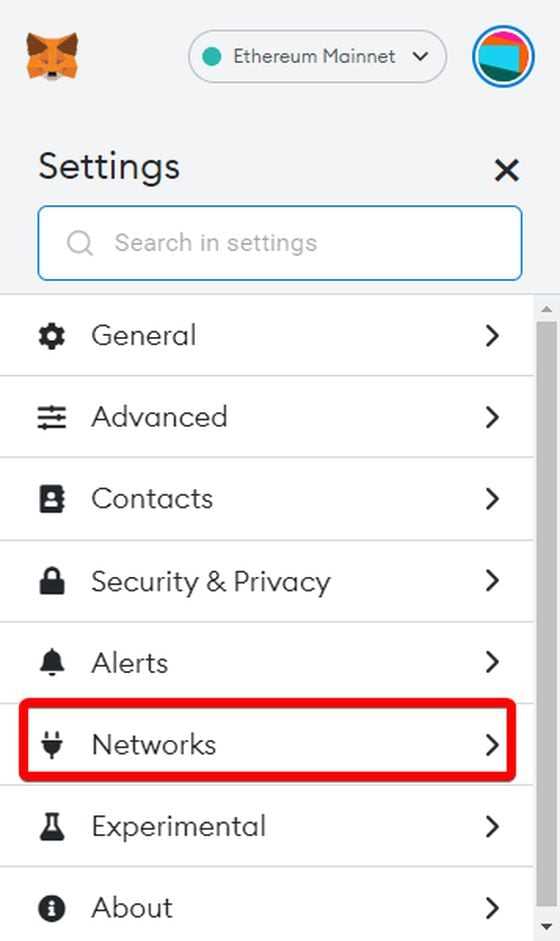
To connect to a different network, click on the network name in the top center of the extension and select the desired network from the dropdown list.
 |
Figure 3: Metamask Network Selection |
For testing purposes or interacting with DApps on test networks, you can choose networks like Ropsten, Kovan, or Rinkeby.
Step 4: Importing an Existing Wallet or Adding Accounts
If you already have a Metamask wallet or want to import an existing wallet, click on the account icon in the top right corner of the extension and select “Import Account” or “Create Account.” Follow the instructions to import or create a new account.
You can add multiple accounts to your Metamask extension by clicking the account icon and selecting “Create Account.” This feature allows you to organize your funds and transactions effectively.
Step 5: Using Metamask on Websites
Metamask is designed to work seamlessly with websites that support Ethereum-based interactions. When you visit a DApp or a blockchain-enabled website, Metamask will automatically detect and display relevant information.
For example, if a website requires you to sign a transaction or approve a smart contract interaction, Metamask will prompt you to review and confirm the action.
Additionally, you can use Metamask to send and receive Ethereum and tokens by using the “Send” and “Receive” buttons within the extension.
Step 6: Keeping Your Wallet Secure
As with any digital wallet, it is essential to follow security best practices to protect your funds. Here are a few tips to keep your Metamask wallet secure:
- Keep your secret backup phrase offline and preferably on a physical medium like a paper.
- Enable two-factor authentication (2FA) for added security.
- Be cautious when interacting with unknown websites and contracts.
- Regularly update Metamask and your browser to benefit from the latest security patches.
By following these steps, you can safely and confidently use the Metamask extension on Firefox to explore the world of decentralized applications and cryptocurrencies.
Step-by-Step Tutorial: Setting Up and Using Metamask on Firefox
Welcome to our step-by-step tutorial on how to set up and use Metamask on Firefox! Metamask is a popular browser extension that allows you to interact with decentralized applications (dapps) on the Ethereum network.
Getting Started

Before we begin, make sure you have Firefox installed on your computer. You can download it from the official Firefox website if you don’t have it already.
Once you have Firefox installed, follow these steps:
Step 1: Add Metamask to Firefox
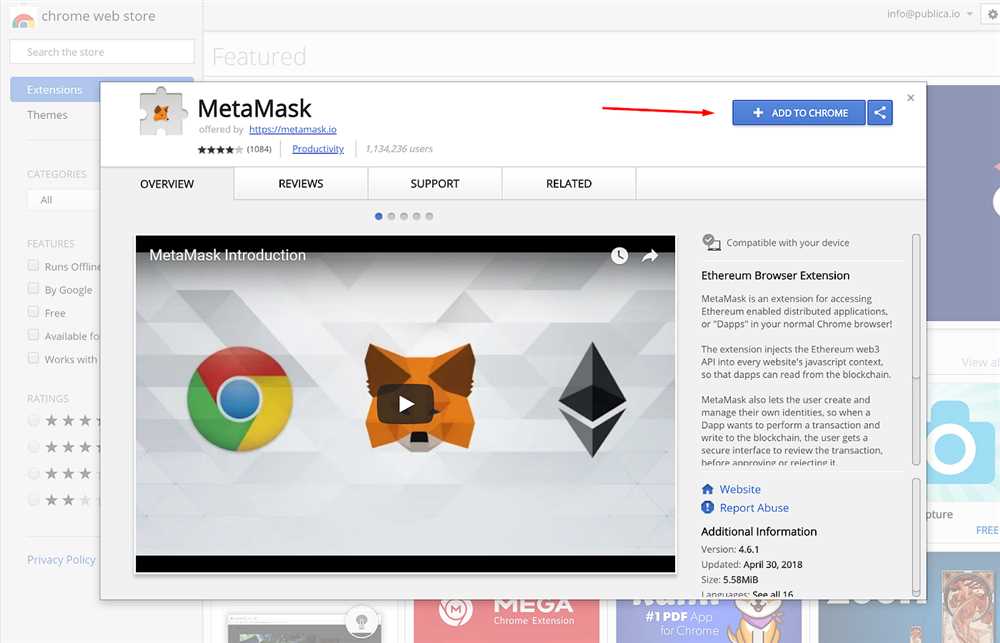
Go to the Firefox Add-ons page and search for “Metamask”. Click on the “Add to Firefox” button to install the extension.
Tip: You can also visit the Metamask website and click on the “Get Chrome Extension” button. Then, use the Firefox Add-on Converter to install it on Firefox.
Step 2: Create a Metamask Account
After the installation is complete, you will see the Metamask icon at the top-right corner of your Firefox browser. Click on it to open the extension.
Click on “Create a Wallet” and follow the instructions to set up a new Metamask account. Make sure to choose a strong password and securely store your seed phrase.
Tip: The seed phrase is crucial for recovering your account if you ever lose access to your device. Write it down and keep it in a safe place.
Step 3: Connect to the Ethereum Network
Once your account is created, you will be prompted to choose a network. Select “Main Ethereum Network” for interacting with the live Ethereum blockchain.
Note: You can also choose other networks like the Ropsten Test Network for testing purposes.
Step 4: Fund Your Metamask Account
Now it’s time to add some Ether (ETH) to your new Metamask account. You can do this by either purchasing ETH from an exchange or receiving it from someone else.
Click on the menu icon at the top-left corner of the Metamask extension and select “Account Details”. Your account address will be displayed, which you can share with others to receive funds.
Step 5: Interacting with Dapps
With your Metamask account funded, you’re ready to start using decentralized applications (dapps). When you visit a dapp, the Metamask extension will automatically detect it and prompt you to connect.
Click on the “Connect” button to establish a connection between your Metamask account and the dapp. You may also need to confirm transactions and sign messages using Metamask.
Congratulations! You have successfully set up and are now using Metamask on Firefox. Enjoy exploring the world of decentralized finance and blockchain applications!
Metamask Extension for Firefox: Installation and Usage Guide
Metamask is a popular browser extension that allows users to securely manage and interact with decentralized applications (DApps) on the Ethereum blockchain. This step-by-step guide will walk you through the process of installing and using the Metamask extension on Firefox.
Installation:
- Open your Firefox browser and go to the Metamask extension page.
- Click the “Add to Firefox” button to start the installation process.
- A pop-up window will appear, click “Add” to confirm the installation.
- Wait for the installation to complete, and then click the “Restart Firefox” button to finish the process.
Usage:
Once the Metamask extension is successfully installed, follow these steps to start using it:
- Click the Metamask icon at the top right corner of your Firefox browser to open the extension.
- If you already have a Metamask account, click “Import Wallet” and enter your seed phrase or private key to import your existing account.
- If you don’t have a Metamask account yet, click “Create a Wallet” and follow the on-screen instructions to set up a new account.
- Once your account is set up or imported, you can now interact with DApps and manage your Ethereum assets through the Metamask interface.
Important Security Note: Remember to keep your seed phrase or private key safe and never share it with anyone. Losing access to your account information may result in permanent loss of your funds.
Disclaimer: This guide is for informational purposes only and should not be considered as financial or investment advice. Users are solely responsible for their own actions when using the Metamask extension.
Frequently Asked Questions:
What is Metamask Extension?
Metamask Extension is a browser extension that allows users to interact with the Ethereum blockchain. It serves as a wallet for managing Ethereum digital assets and as a gateway to decentralized applications (dApps).
+ There are no comments
Add yours