


Cryptocurrency transactions are becoming increasingly popular, and many people are using wallets like MetaMask to manage their digital assets. If you have a MetaMask wallet and want to transfer your funds to a Coinbase exchange account, you’re in the right place. In this article, we will guide you through the process step by step.
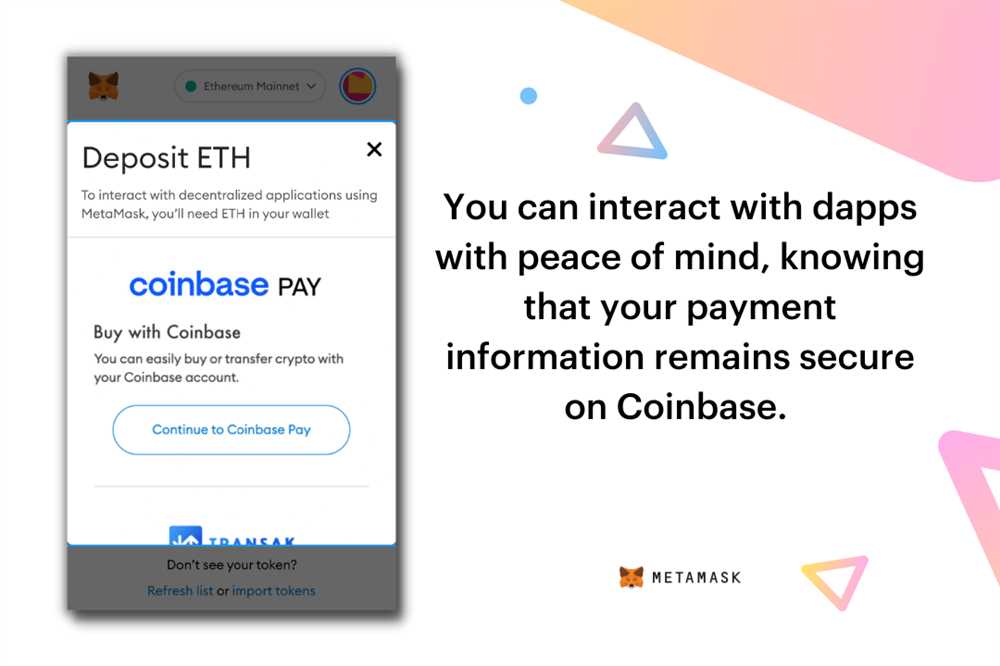
MetaMask is a browser extension wallet that allows users to interact with decentralized applications (dApps) on the Ethereum blockchain. It provides a convenient and secure way to store, manage, and transfer cryptocurrencies. On the other hand, Coinbase is a well-known cryptocurrency exchange platform that supports various cryptocurrencies and provides a simple user interface for buying, selling, and trading digital assets.
Before you can send funds from your MetaMask wallet to your Coinbase exchange account, you need to ensure that you have both set up and connected. If you haven’t already done so, install the MetaMask extension on your preferred browser and create a new wallet. Similarly, sign up for a Coinbase account and complete the necessary verification steps to enable trading and withdrawing funds.
Once you have both the MetaMask wallet and Coinbase account ready, follow these steps to transfer funds:
- Open your MetaMask wallet: Click on the MetaMask extension in your browser and enter your password to unlock your wallet.
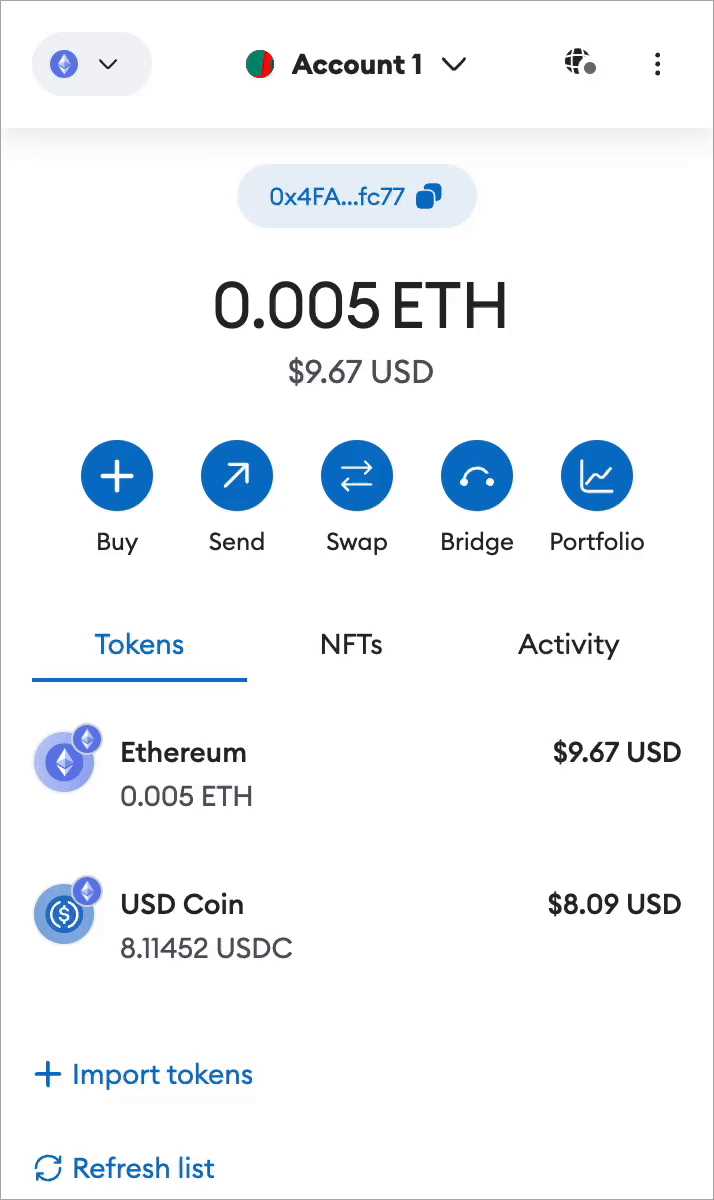
- Check your account balance: Make sure you have sufficient funds in your MetaMask wallet for the transfer.
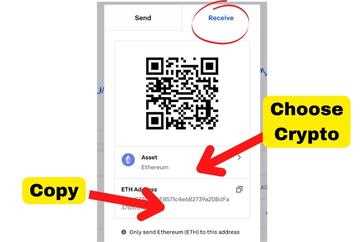
- Copy your Coinbase wallet address: Log in to your Coinbase account and navigate to the wallet section. Find your desired cryptocurrency wallet and copy the wallet address.
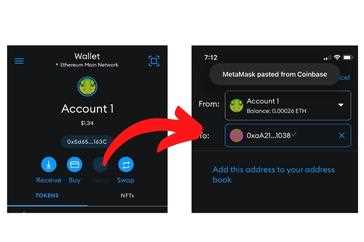
- Send funds from MetaMask to Coinbase: In your MetaMask wallet, click on the “Send” button. Paste the Coinbase wallet address in the recipient field, enter the amount you wish to transfer, and review the transaction details.
- Confirm the transaction: After reviewing the transaction details, click on the “Confirm” button. MetaMask will prompt you to confirm the transaction on your wallet.
- Wait for the transaction to complete: Transactions on the Ethereum blockchain usually take a few minutes to complete. You can monitor the progress and check the transaction status on both MetaMask and Coinbase.
It’s important to note that sending funds from your MetaMask wallet to Coinbase incurs transaction fees, which vary depending on the blockchain network’s congestion and the amount being transferred. Make sure you have enough Ethereum (ETH) in your MetaMask wallet to cover the fees.
By following these steps, you can securely and efficiently transfer your funds from your MetaMask wallet to your Coinbase exchange account. This enables you to take advantage of Coinbase’s features, such as trading or exchanging cryptocurrencies, and provides you with more flexibility in managing your digital assets. Remember to always double-check the recipient’s wallet address to avoid any potential mistakes or loss of funds.
Step-by-Step Guide on Sending Funds from MetaMask Wallet to Coinbase Exchange

If you are looking to send your funds from your MetaMask Wallet to your Coinbase Exchange account, this step-by-step guide will walk you through the process:
- Make sure you have both MetaMask Wallet and Coinbase Exchange accounts set up and logged in.
- In your MetaMask Wallet, locate and click on the “Send” button.
- On the “Send” page, enter the recipient’s wallet address in the designated field. Make sure you double-check the address to avoid any errors.
- Enter the amount of funds you wish to send.
- Choose the currency you want to send. Make sure it matches the currency you want to receive in your Coinbase Exchange account.
- Review the transaction details to ensure accuracy.
- If everything looks correct, click on the “Next” or “Continue” button to proceed with the transaction.
- MetaMask Wallet will generate a transaction confirmation page. Review the details once again to ensure accuracy.
- If you are satisfied with the transaction details, click on the “Confirm” or “Send” button to initiate the transaction.
- Depending on network congestion, it may take some time for the transaction to be confirmed and completed. You can track the progress of the transaction through the transaction ID, which will be provided by MetaMask Wallet.
- Once the transaction is confirmed, log in to your Coinbase Exchange account.
- In your Coinbase Exchange account, locate and click on the “Deposit” or “Receive” button.
- Choose the currency you have sent from your MetaMask Wallet.
- Copy the wallet address provided by Coinbase Exchange.
- Switch back to your MetaMask Wallet and navigate to the “Send” page.
- Paste the Coinbase Exchange wallet address in the recipient’s wallet address field.
- Enter the same amount of funds you sent from your MetaMask Wallet.
- Review the transaction details once again to ensure accuracy.
- If everything looks correct, click on the “Next” or “Continue” button to proceed with the transaction.
- MetaMask Wallet will generate a transaction confirmation page. Review the details once again to ensure accuracy.
- If you are satisfied with the transaction details, click on the “Confirm” or “Send” button to initiate the transaction.
- Once the transaction is confirmed, the funds will be transferred from your MetaMask Wallet to your Coinbase Exchange account.
Remember to exercise caution and double-check all details before initiating any transactions to avoid any loss of funds.
Connect Your MetaMask Wallet to Coinbase Exchange
If you have funds stored in your MetaMask wallet and you want to transfer them to your Coinbase exchange account, you’ll need to connect your MetaMask wallet to Coinbase. Here’s how you can do it:
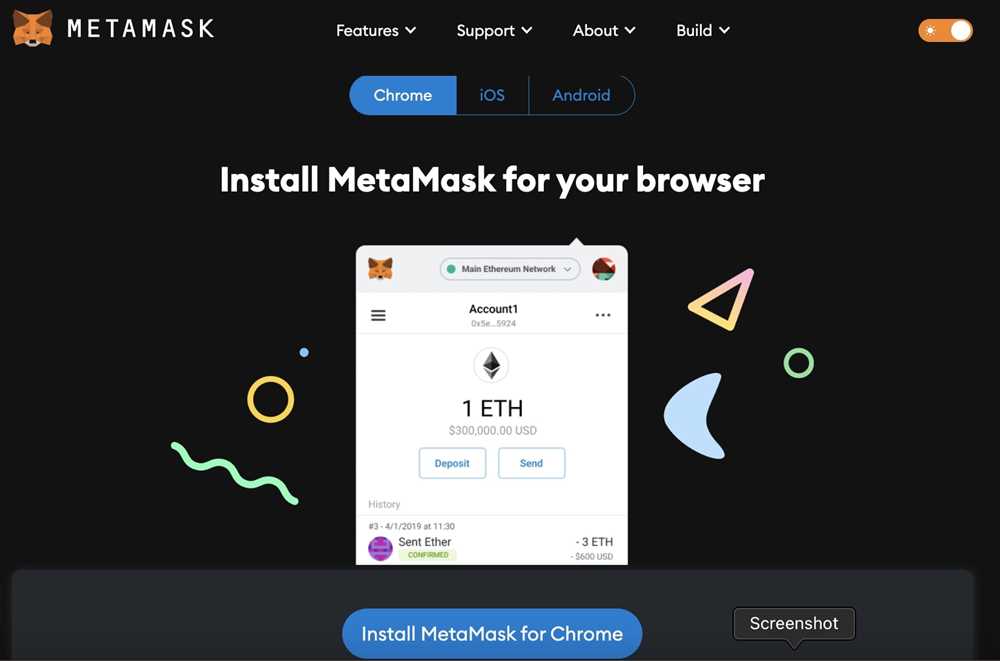
Step 1: Install MetaMask
If you don’t have MetaMask installed on your browser, you’ll need to install it first. Visit the MetaMask website and follow the instructions to add the extension to your browser.
Step 2: Create or Import a MetaMask Wallet
Once you have MetaMask installed, create a new wallet or import an existing one by following the prompts provided. Make sure to securely store your wallet’s seed phrase as it is necessary for wallet recovery.
Step 3: Log in to Coinbase
Open your Coinbase account and log in using your credentials. Once logged in, navigate to the “Settings” or “Account” section of your Coinbase account.
Step 4: Connect Coinbase to MetaMask
In the “Settings” or “Account” section, find the option to connect your wallet. Look for the MetaMask Wallet option and select it. This will prompt a pop-up window from MetaMask asking for your permission to connect.
After granting permission, you should see your MetaMask wallet connected to your Coinbase account. This means you can now transfer funds from your MetaMask wallet to your Coinbase exchange.
Note: There may be additional security measures or authentication steps required by both MetaMask and Coinbase during the connection process. Follow the instructions provided by both platforms to ensure a secure connection.
Verify Your Wallet Address
Before sending funds from your MetaMask wallet to your Coinbase exchange account, it’s crucial to verify that you have entered the correct wallet address.
Here are the steps to verify your wallet address:
- Log in to your MetaMask wallet.
- Click on the account icon at the top right corner of the extension.
- Select the account whose wallet address you want to verify.
- Copy the wallet address by clicking on the copy icon or selecting the address text and pressing Ctrl+C (or Command+C on Mac).
- Open your Coinbase exchange account.
- Go to the “Wallets” or “Accounts” section.
- Find the cryptocurrency wallet that matches the one in your MetaMask wallet.
- Click on the wallet to see the wallet address associated with it.
- Compare the wallet address in Coinbase with the one copied from MetaMask to ensure they match exactly.
It’s crucial to double-check the wallet address before initiating any transaction, as sending funds to an incorrect address may result in permanent loss of your funds.
Once you have verified that the wallet address matches, you can proceed with the process of sending funds from your MetaMask wallet to your Coinbase exchange account.
Transfer Funds from MetaMask Wallet to Coinbase Exchange
To transfer funds from your MetaMask wallet to your Coinbase exchange account, follow the steps below:
- Open your MetaMask wallet and make sure you are connected to the Ethereum network.
- On the MetaMask wallet interface, locate and click on the “Send” button.
- Enter the Coinbase exchange wallet address in the “Recipient Address” field. Ensure that you have the correct address.
- Specify the amount of funds you want to transfer in the “Amount” field. Make sure you have enough balance to cover the transaction fee as well.
- Set the gas fee for the transaction. MetaMask should automatically estimate an appropriate gas fee, but you can adjust it if needed.
- Review the transaction details carefully and ensure that everything is accurate.
- Click on the “Confirm” or “Send” button to initiate the transfer.
- Wait for the transaction to be processed and confirmed on the Ethereum network. This may take some time depending on network congestion.
- Once the transfer is completed, you can verify the transaction on a blockchain explorer using the provided transaction hash.
- Finally, log in to your Coinbase exchange account and ensure that the transferred funds are reflected in your account balance.
Please note that cryptocurrency transactions are irreversible, so double-check all the details before initiating a transfer. Additionally, ensure that you are using the correct wallet addresses and have sufficient funds to cover the transfer and transaction fees.
Always take precautions to secure your wallet and transactions. Safeguard your private keys and avoid sharing sensitive information with anyone.
Confirm and Complete the Transaction
After entering the recipient’s address and the amount you want to send, you need to confirm and complete the transaction in your MetaMask wallet.
First, review the transaction details carefully to ensure everything is correct. Check the recipient’s address again to make sure it matches with your intended destination. Also, double-check the amount you are sending to avoid any mistakes.
Once you have confirmed the details, click on the “Send” button or a similar option in your MetaMask wallet interface to proceed with the transaction. A confirmation prompt might appear, asking you to verify the transaction.
Check your wallet’s transaction fee and make sure you are comfortable with it. Ethereum network fees can vary depending on the network’s congestion and gas prices. If the fees seem too high, you may consider adjusting the gas price or waiting for a lower network congestion period.
After confirming the transaction, you might need to wait for a few moments for it to be processed and included in a block on the Ethereum blockchain. This process can take some time, especially during peak congestion periods. It’s essential not to close your MetaMask wallet or interrupt the process while the transaction is being confirmed.
Once the transaction is confirmed and included in a block, you can check its status on the Ethereum blockchain explorer, such as Etherscan.io. This explorer will provide you with detailed information about the transaction, including the transaction hash, the block it’s included in, and the current number of confirmations.
Finally, keep in mind that the funds you sent from your MetaMask wallet to your Coinbase exchange account might take some time to reflect in your Coinbase balance. This delay is due to the network and Coinbase’s internal processing. However, you can always check your Coinbase account to confirm the arrival of the funds.
Frequently Asked Questions:
How do I send funds from my MetaMask wallet to Coinbase Exchange?
To send funds from your MetaMask wallet to Coinbase Exchange, you need to follow a few steps. First, log in to your MetaMask wallet and make sure you have enough funds in your account. Then, navigate to the “Send” tab and enter the recipient’s wallet address. Next, specify the amount you want to send and select the appropriate gas fees. Finally, click on the “Send” button and confirm the transaction. Once the transaction is confirmed, the funds will be sent to Coinbase Exchange.
What is MetaMask wallet?
MetaMask is a popular cryptocurrency wallet that allows users to manage their Ethereum-based assets and interact with decentralized applications (dApps) on the Ethereum network. It is a browser extension that can be installed on Chrome, Firefox, and Brave browsers, and it offers a user-friendly interface for managing digital assets securely. MetaMask also acts as a gateway for users to access various Ethereum dApps and services.
Is it possible to send funds from MetaMask wallet to any other cryptocurrency exchange besides Coinbase?
Yes, it is possible to send funds from MetaMask wallet to any other cryptocurrency exchange or wallet that supports Ethereum-based assets. MetaMask wallet allows users to send and receive ERC-20 tokens, which are widely supported by many exchanges and wallets. So, as long as the exchange or wallet you want to send funds to supports Ethereum-based assets, you should be able to send funds from your MetaMask wallet.
Are there any fees associated with sending funds from MetaMask wallet to Coinbase Exchange?
Yes, there are fees associated with sending funds from MetaMask wallet to Coinbase Exchange. When sending funds on the Ethereum network, users have to pay gas fees, which are used to incentivize miners to include transactions in blocks. Gas fees can vary depending on network congestion and the size of the transaction. You can choose to pay higher gas fees to ensure faster confirmation times, or lower gas fees to reduce costs, but it might take longer for the transaction to be confirmed.
+ There are no comments
Add yours