


Metamask is a powerful tool that allows you to manage your Ethereum assets and interact with decentralized applications (DApps) seamlessly. As an ERC20 wallet, it offers a secure and convenient way to store, send, and receive ERC20 tokens on the Ethereum network.
With Metamask, you can easily connect to your Ethereum wallet directly from your browser, eliminating the need for downloading or syncing the entire Ethereum blockchain. It acts as a bridge between your web browser and the Ethereum network, providing you with a user-friendly interface to manage your digital assets.
As an ERC20 wallet, Metamask supports a wide range of tokens that are built on the Ethereum blockchain. Whether you’re a trader looking to store your tokens securely or a DApp enthusiast wanting to participate in token sales and decentralized finance (DeFi) projects, Metamask is a versatile tool that caters to your needs.
Using Metamask as an ERC20 wallet is straightforward. After installing the Metamask extension, you can easily import your existing Ethereum wallet or create a new one. Once your wallet is set up, you can start receiving ERC20 tokens by providing your wallet address. You can also send tokens by specifying the recipient’s address and the amount to be sent.
In addition to basic token transfers, Metamask offers advanced features such as custom gas limits and token approval management. You can set the gas limit for your transactions based on your requirements, ensuring smooth and efficient token transfers. Furthermore, you can approve or revoke access for smart contracts to spend your ERC20 tokens, giving you complete control over your assets.
Overall, Metamask is a valuable tool for anyone looking to manage ERC20 tokens on the Ethereum network. Its user-friendly interface, advanced features, and secure storage make it an ideal choice for both beginners and experienced users. So, whether you’re a casual token holder or an avid DApp user, Metamask is here to simplify your Ethereum experience!
What is Metamask?
Metamask is a browser extension and e-wallet that allows users to interact with the Ethereum blockchain. It provides a user-friendly interface and serves as a bridge between users and the decentralized web. With Metamask, users can manage their Ethereum assets, interact with smart contracts, and browse decentralized applications (DApps).
Metamask acts as a secure digital wallet, providing users with a unique Ethereum address that they can use to send, receive, and store ERC20 tokens. It also offers integration with popular web browsers like Chrome, Firefox, and Brave, making it easily accessible for users.
One of the key features of Metamask is its ability to securely store private keys. Private keys are encrypted and stored locally on the user’s device, ensuring that only the user has access to their assets. This eliminates the need to rely on centralized exchanges or custodial wallets, allowing users to have full control over their funds.
Key Features of Metamask:
- Wallet Management: Metamask enables users to manage their Ethereum assets, including ETH and ERC20 tokens, in a convenient and user-friendly way.
- Secure Storage: Metamask ensures the secure storage of private keys, protecting user funds from unauthorized access.
- Smart Contract Interaction: Metamask allows users to interact with smart contracts on the Ethereum blockchain, enabling participation in decentralized applications and token sales.
- No KYC: Metamask does not require users to complete Know Your Customer (KYC) procedures, making it a privacy-centric wallet option.
In summary, Metamask is a powerful tool for anyone looking to securely manage and interact with their Ethereum assets. Whether you are an experienced Ethereum user or just getting started, Metamask provides the necessary tools and functionality to engage with the decentralized web ecosystem.
A beginner’s guide to using Metamask as an ERC20 wallet
If you are new to the world of cryptocurrencies and blockchain, you may have heard about Metamask. It is a popular browser extension that allows you to interact with Ethereum-based decentralized applications (dApps) and acts as an ERC20 wallet. In this guide, we will walk you through the basic steps of setting up and using Metamask as an ERC20 wallet.
1. Install Metamask: Start by installing Metamask from the official website (https://metamask.io). It is available for Google Chrome, Firefox, and Brave browsers. Once installed, you will see the Metamask icon at the top right corner of your browser.
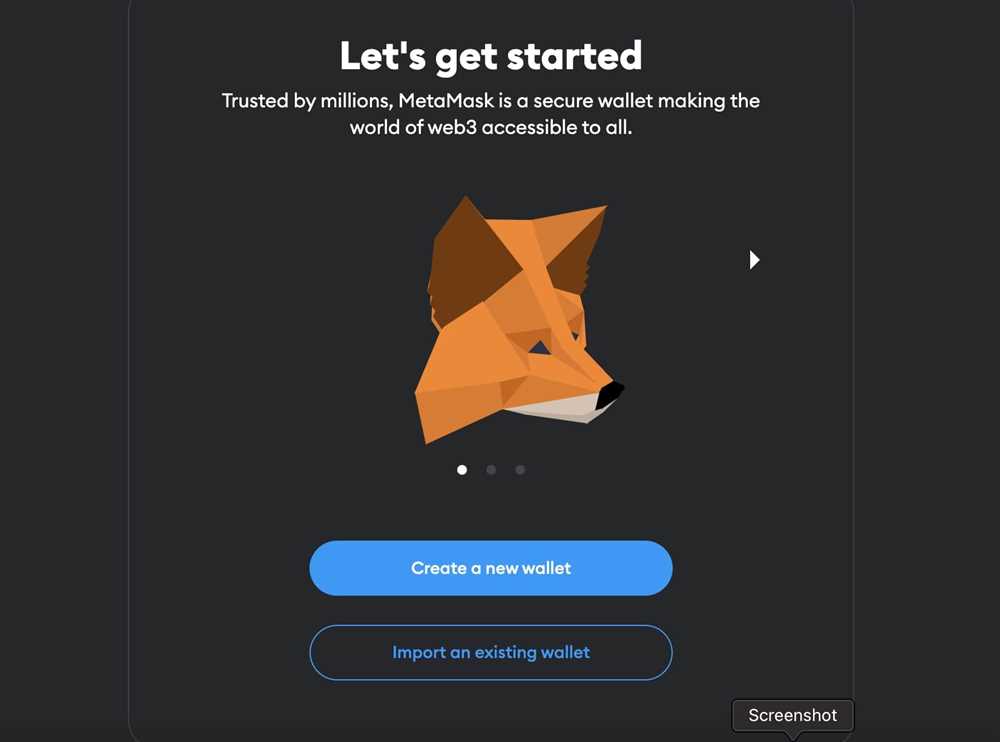
2. Create a new wallet: Click on the Metamask icon and follow the prompts to create a new wallet. Make sure to set a strong password and securely store your seed phrase. This seed phrase will be used to recover your wallet if you ever lose access to your account.
3. Import an existing wallet: If you already have an Ethereum wallet, you can import it into Metamask by selecting the option to import using a seed phrase or private key. This allows you to manage your existing ERC20 tokens within Metamask.
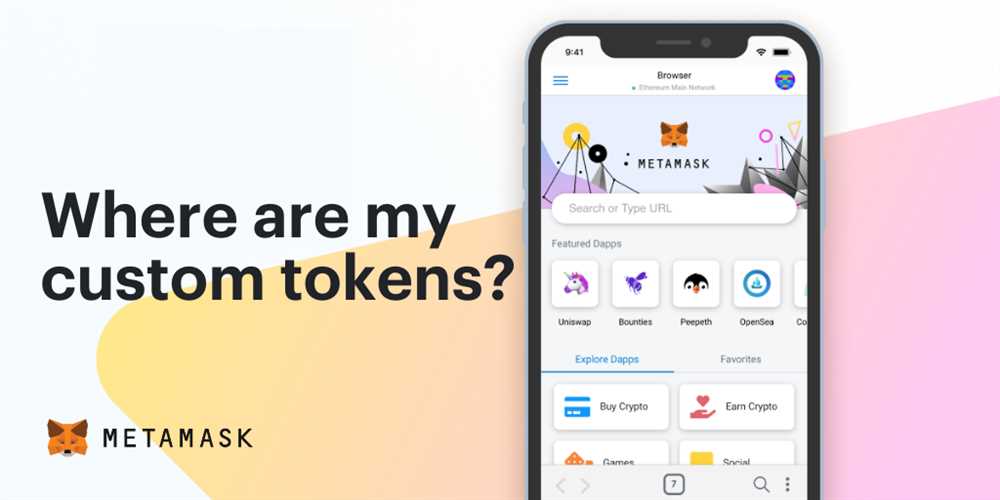
4. Add ERC20 tokens: Now that your Metamask wallet is set up, you can add ERC20 tokens to it. Click on the Metamask icon and select “Add Token” to manually add an ERC20 token. Enter the token contract address, symbol, and decimals, and click on “Add.” This will allow you to view and manage your ERC20 tokens within the Metamask interface.
5. Send and receive ERC20 tokens: To send ERC20 tokens, click on the Metamask icon and select “Send.” Enter the recipient’s address, the amount of tokens you want to send, and any additional details. Confirm the transaction and wait for it to be processed on the Ethereum network. To receive ERC20 tokens, simply give the sender your wallet address, and the tokens will be sent to your Metamask wallet.
6. Secure your wallet: It is crucial to keep your Metamask wallet secure. Make sure to enable two-factor authentication and use a secure password. Additionally, consider storing your seed phrase offline in a safe place. This will protect your wallet from unauthorized access.
7. Explore dApps: Metamask allows you to interact with a wide range of Ethereum-based decentralized applications (dApps). You can access these dApps by clicking on the Metamask icon and selecting “Explore”. This opens up a world of possibilities, including decentralized exchanges, decentralized finance (DeFi) platforms, and more.
8. Stay up to date: The world of blockchain and cryptocurrencies is constantly evolving. Stay up to date with the latest news and developments to make the most of your Metamask ERC20 wallet. Join online communities, follow blogs and social media accounts, and immerse yourself in the vibrant blockchain ecosystem.
Metamask is a powerful tool that allows you to manage your ERC20 tokens with ease. By following this beginner’s guide, you will be able to set up and use Metamask as your go-to ERC20 wallet. Start exploring the world of decentralized finance and take control of your digital assets with Metamask.
Getting Started with Metamask
Metamask is a popular cryptocurrency wallet that allows users to interact with Ethereum and other Ethereum-based blockchains. It acts as a browser extension and can be easily installed on Google Chrome, Brave, Firefox, and other supported browsers. To get started with Metamask, follow the steps below:
- Install Metamask: Visit the official Metamask website and install the extension for your preferred browser.
- Create a New Wallet: Once the extension is installed, click on the Metamask icon in your browser toolbar. Select “Create a Wallet” and follow the on-screen instructions to set up a new wallet. Make sure to save your secret backup phrase in a secure location.
- Connect to a Network: After creating your wallet, you need to connect to a network. By default, Metamask connects to the Ethereum Mainnet. You can also choose other networks like the Ropsten Testnet or a local network for development purposes.
- Add Tokens: To use Metamask as an ERC20 wallet, you need to add ERC20 tokens to your wallet. Click on the “Assets” tab, then select “Add Token.” Enter the contract address of the token you want to add, and Metamask will automatically detect the token details.
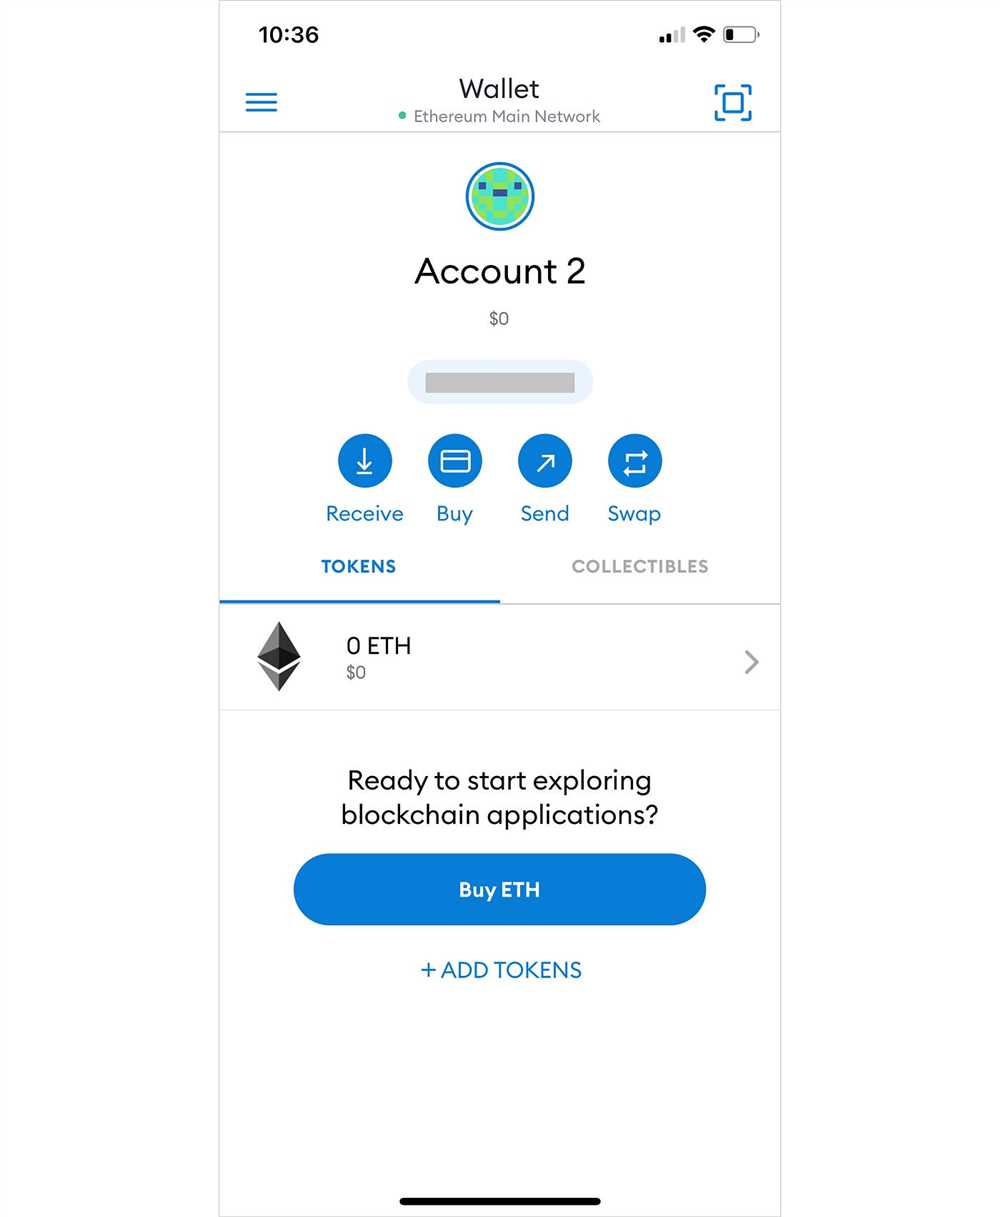
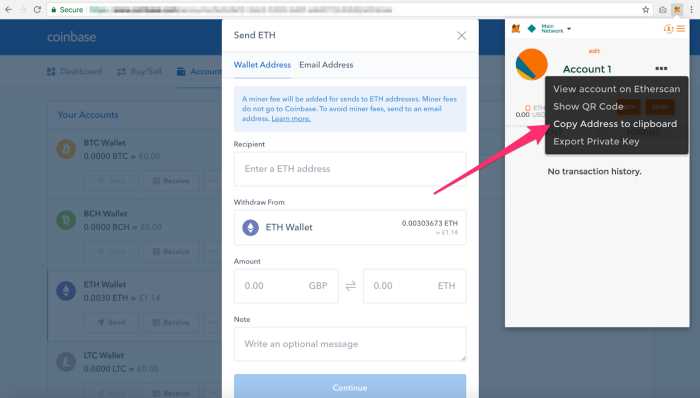
- Sending and Receiving Tokens: To send tokens, click on the “Send” button, enter the recipient address, token amount, and click “Next” to confirm the transaction. To receive tokens, click on the “Receive” button, and Metamask will display your wallet address along with a QR code for easy sharing.
- Export and Import Wallet: It’s essential to back up your wallet and keep it secure. Metamask allows you to export your wallet using the secret backup phrase. You can also import an existing wallet by selecting “Import Wallet” and entering the backup phrase.
With these basic steps, you can get started with Metamask and use it as an ERC20 wallet. Remember to always keep your wallet and backup phrase secure to protect your funds.
Setting up Metamask for Ethereum transactions
Metamask is a user-friendly cryptocurrency wallet that allows you to easily manage your ERC20 tokens and interact with the Ethereum blockchain. In this section, we will guide you through the process of setting up Metamask for Ethereum transactions.
Install and set up Metamask
To get started, you need to have the Metamask extension installed in your web browser. Follow these steps to install and set up Metamask:
- Open your web browser and navigate to the official Metamask website.
- Click on the “Get Chrome Extension” button to download and install Metamask.
- After the installation is complete, click on the Metamask icon that appears in the top-right corner of your browser.
- A new tab will open, asking you to import an existing wallet or create a new one. Choose the option that suits you best.
- Follow the on-screen instructions to import or create a new wallet. Make sure to keep your seed phrase safe, as it can be used to restore access to your wallet.
- Set up a password for your wallet and click “Create” or “Import” to proceed.
- Once your wallet is set up, you will be redirected to the Metamask dashboard.
Connect Metamask to your Ethereum wallet
Now that you have installed and set up Metamask, the next step is to connect it to your Ethereum wallet. Follow these steps to connect Metamask to your Ethereum wallet:
- In the Metamask dashboard, click on the account icon located in the top-right corner of the screen.
- A drop-down menu will appear, showing you various options. Click on the “Import Account” button.
- In the import window, paste your Ethereum wallet’s private key or upload your keystore JSON file.
- Enter the password for your Ethereum wallet and click “Import” to connect it to Metamask.
- Once connected, your Ethereum wallet will be listed as an account in the Metamask dashboard.
Start making Ethereum transactions
With Metamask set up and connected to your Ethereum wallet, you are ready to start making Ethereum transactions. Here are the steps to make an Ethereum transaction using Metamask:
- In the Metamask dashboard, click on the account icon to choose the Ethereum account you want to use for the transaction.
- Depending on the action you want to perform, you can either send Ethereum to another address or interact with a smart contract.
- To send Ethereum, click on the “Send” button and enter the recipient’s address, the amount to be sent, and any additional information required.
- To interact with a smart contract, click on the “DApps” tab in the Metamask dashboard and choose the desired smart contract.
- Follow the instructions provided by the smart contract to complete the transaction.
- Review the transaction details and gas fees, then click “Confirm” to submit the transaction.
- Wait for the transaction to be confirmed on the Ethereum blockchain.
Congratulations! You have successfully set up Metamask for Ethereum transactions. Now you can easily manage your ERC20 tokens and interact with the Ethereum blockchain using Metamask.
Using Metamask as an ERC20 Wallet
Metamask is a popular wallet browser extension that allows you to interact with Ethereum-based decentralized applications and manage your digital assets. In addition to its functionalities as a web3 gateway and Ethereum wallet, Metamask can also be used as an ERC20 wallet.
ERC20 refers to the Ethereum Request for Comments standard 20, which is a set of rules and protocols that define how tokens on the Ethereum blockchain should be programmed. Many cryptocurrencies and tokens, including popular ones like Ether (ETH) and Chainlink (LINK), are built using the ERC20 standard.
To use Metamask as an ERC20 wallet, you need to follow these steps:
- Install and set up Metamask: If you haven’t already, install the Metamask browser extension and create a new wallet or import an existing one. Make sure to securely store your seed phrase and set a strong password.
- Connect to the Ethereum network: Once Metamask is set up, click on the extension icon in your browser and choose the Ethereum Mainnet network. This will connect your wallet to the Ethereum blockchain.
- Add ERC20 tokens to Metamask: To add ERC20 tokens to your Metamask wallet, click on the “Assets” tab and then click “Add Token”. You can enter the token contract address or search for the token by its symbol or name. Metamask will fetch the token details and add it to your wallet.
- Send and receive ERC20 tokens: With ERC20 tokens added to your Metamask wallet, you can now send and receive them. To send tokens, click on the “Send” button, enter the recipient’s address, specify the amount, and confirm the transaction. To receive tokens, simply share your wallet address with the sender.
- Manage and track your ERC20 tokens: Metamask allows you to manage and track your ERC20 tokens. You can view your token balances, transaction history, and token details within the wallet interface. You can also customize the token list and reorder tokens according to your preference.
Using Metamask as an ERC20 wallet provides a convenient way to store, manage, and transact with your ERC20 tokens. It eliminates the need for separate wallets for different tokens and simplifies the overall user experience. However, it’s important to exercise caution and ensure the security of your Metamask wallet by following best practices such as keeping your seed phrase offline and using strong password protection.
Overall, Metamask is a versatile tool that not only serves as a web3 gateway but also allows you to leverage its functionalities as an ERC20 wallet to interact seamlessly with the Ethereum ecosystem.
Frequently Asked Questions:
What is Metamask?
Metamask is a browser extension that allows users to interact with the Ethereum blockchain. It acts as a digital wallet for storing and managing Ethereum and ERC20 tokens, enabling users to send, receive, and store their digital assets securely.
Can I use Metamask as an ERC20 wallet?
Yes, Metamask can be used as an ERC20 wallet. ERC20 tokens are built on the Ethereum blockchain, which Metamask is designed to interact with. You can add ERC20 tokens to your Metamask wallet by clicking on the “Add Token” button and providing the contract address of the token.
Is Metamask secure?
Metamask takes several measures to ensure the security of user funds. It uses encryption techniques to protect private keys stored on the device, requires users to set up a password, and offers the option to add an additional layer of security through a seed phrase. However, it’s important for users to remain vigilant and follow best security practices to mitigate the risk of potential attacks.
+ There are no comments
Add yours