


If you are new to the world of cryptocurrency, you have probably heard about Metamask. Metamask is a popular browser extension that serves as a digital wallet and allows users to interact with decentralized applications (dApps) on the Ethereum blockchain. One of the key features of Metamask is its ability to import tokens, which allows you to manage and trade various cryptocurrencies within the same wallet.
Importing tokens into Metamask can be a bit confusing for beginners, but fear not! In this article, we will guide you through the process step by step, making it easy for you to import your favorite tokens and start using them right away.
First, let’s talk about what tokens are. In simple terms, tokens are digital assets that represent something of value, such as a cryptocurrency or a virtual item. These tokens can be created on different blockchains, but in this article, we will focus on Ethereum tokens, as Metamask is specifically designed for the Ethereum blockchain. Importing tokens into Metamask allows you to view your token balances, send and receive tokens, and even trade them on decentralized exchanges.
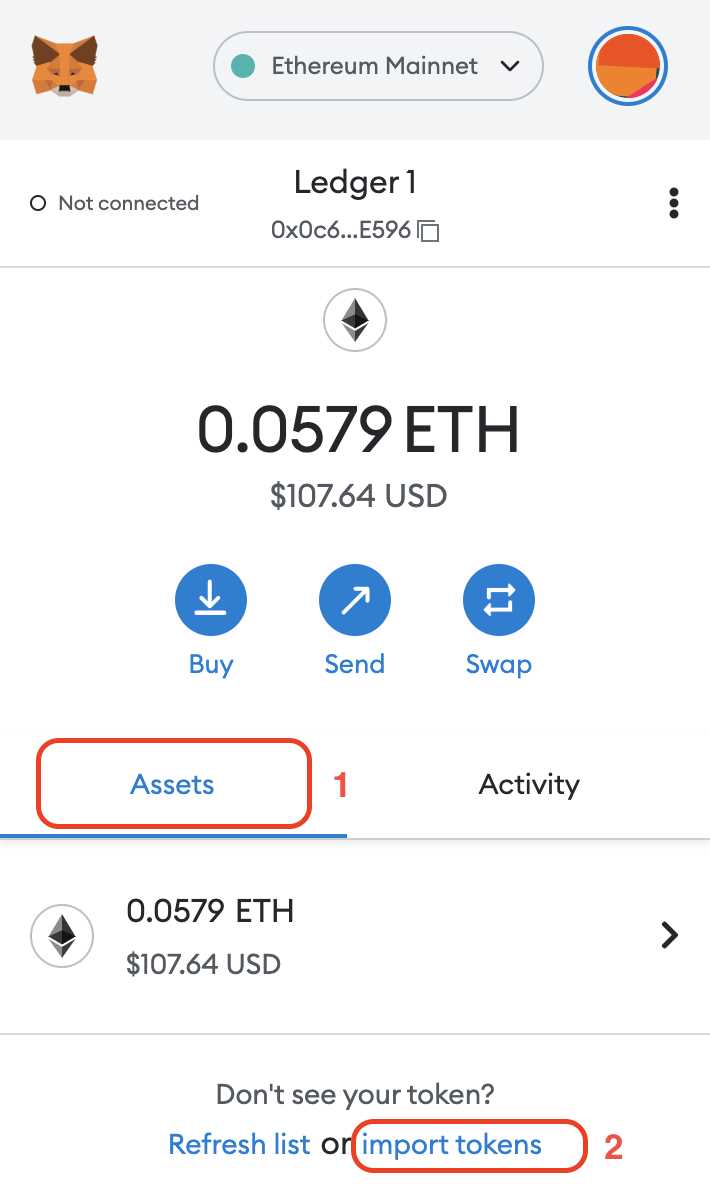
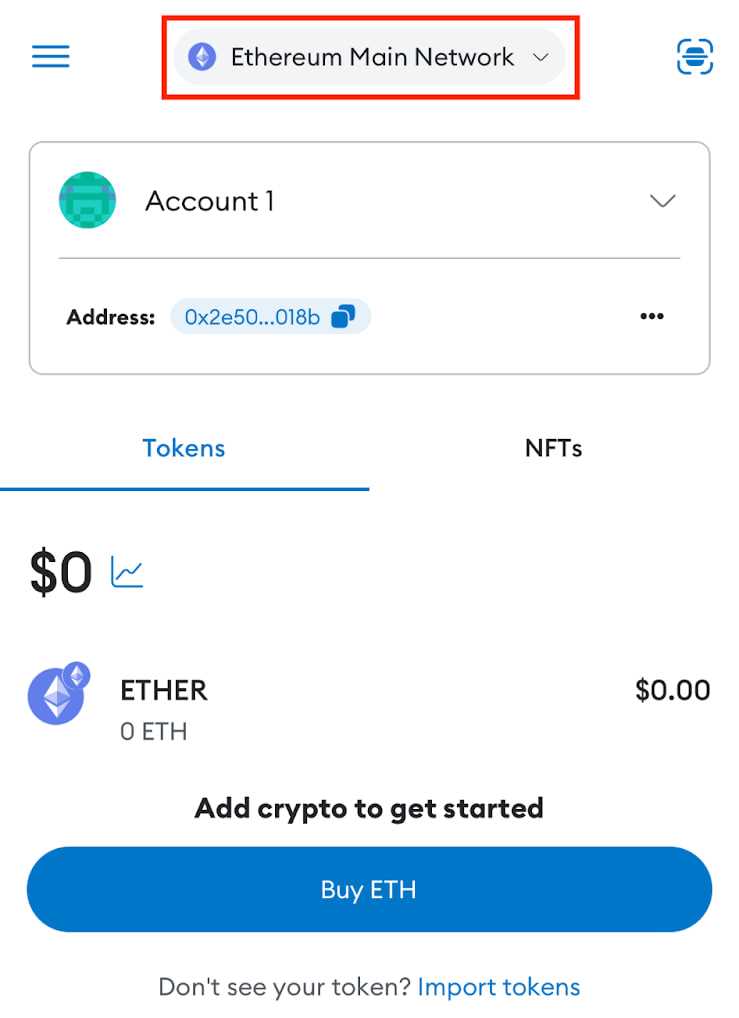
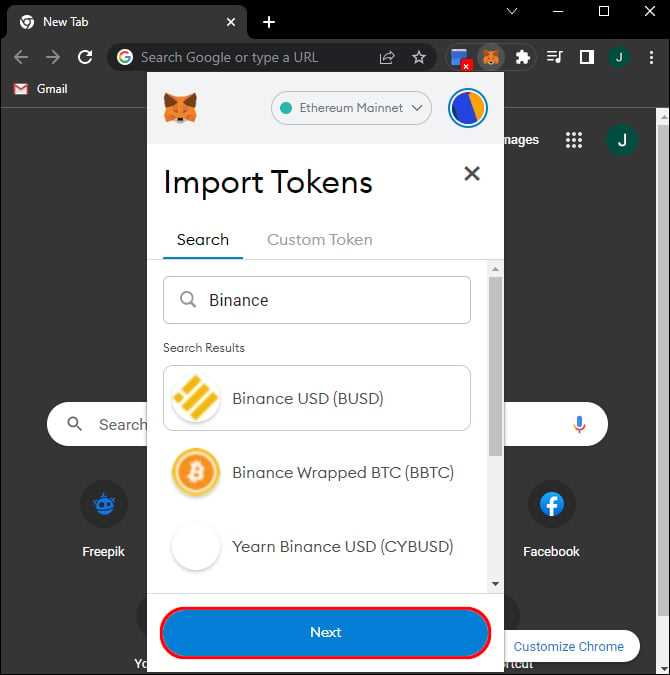
Now, let’s dive into the process of importing tokens into Metamask. The first thing you need to do is open your Metamask wallet in your browser. Once you have opened your wallet, click on the “Assets” tab at the top. Here, you will see a button that says “Add Token.” Click on this button, and you will be taken to the token import screen. On this screen, you can choose to either import a token by searching for it using its contract address, or you can import a token by selecting it from a list of popular tokens.
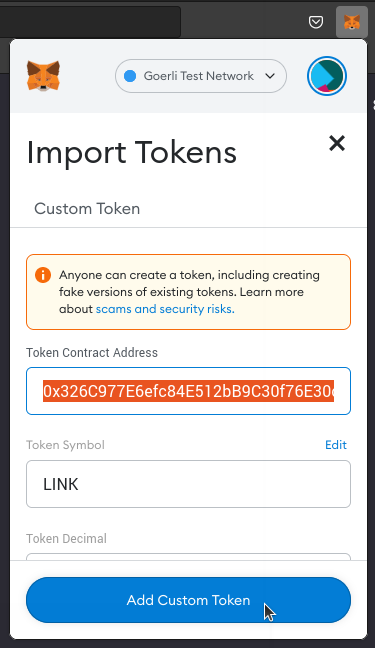
If you choose to import a token using the contract address, you will need to find the contract address of the token you want to import. You can usually find this information on the token’s website or on popular cryptocurrency tracking websites. Once you have the contract address, simply paste it into the search bar on the token import screen in Metamask. Metamask will automatically retrieve the token’s information and add it to your wallet.
If you prefer to import a token from a list of popular tokens, simply scroll through the list and click on the token you want to import. Metamask will automatically add the token to your wallet without the need for a contract address. It’s that easy!
Now that you know how to import tokens into Metamask, you can start exploring the world of decentralized finance (DeFi) and take advantage of the numerous opportunities it offers. Whether you want to trade tokens on decentralized exchanges, participate in token sales, or simply manage your token portfolio, Metamask is the ideal tool for Ethereum users. Start importing your favorite tokens today and join the exciting world of blockchain technology!
Understanding Metamask
Metamask is a popular cryptocurrency wallet that allows users to manage their Ethereum-based assets and interact with decentralized applications (dApps) on the Ethereum network.
How Does Metamask Work?
Metamask works as a browser extension and acts as a bridge between a user’s web browser and the Ethereum network. It allows users to securely store and manage their private keys, which are necessary for authorizing transactions on the Ethereum network.
When a user accesses a dApp, Metamask automatically injects its functionality into the web page, enabling the user to interact with the dApp using their Ethereum address and account balance. Metamask also provides a user-friendly interface for confirming and signing transactions, ensuring the security of the user’s funds.
Key Features of Metamask
Metamask offers several key features that make it a popular choice among Ethereum users:
| Feature | Description |
|---|---|
| Ethereum Wallet | Metamask allows users to securely store and manage their Ethereum-based assets, including Ether (ETH) and ERC-20 tokens. |
| dApp Browser | Metamask acts as a dApp browser, allowing users to seamlessly interact with decentralized applications on the Ethereum network. |
| Transaction Signing | Metamask provides a user-friendly interface for confirming and signing transactions, ensuring the security of the user’s funds. |
| Network Switching | Metamask allows users to easily switch between different Ethereum networks, such as the mainnet, testnets, and custom networks. |
| Custom Token Support | Metamask supports the addition of custom tokens, allowing users to manage a wide range of ERC-20 tokens in their wallet. |
By understanding the key features of Metamask and its role as a cryptocurrency wallet and dApp browser, users can take full advantage of this powerful tool to safely and conveniently manage their Ethereum-based assets.
Importing Tokens into Metamask
Metamask is a popular web wallet for Ethereum and ERC-20 tokens. If you want to manage and use custom tokens on Metamask, you will need to manually import them. Here’s how you can import tokens into Metamask:
Step 1: Copy Token Contract Address
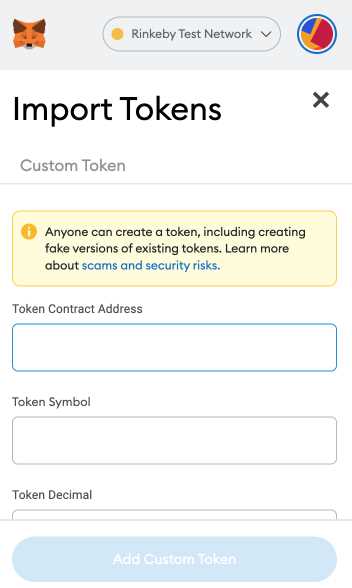
First, you need to find the contract address of the token you want to import. This information is usually available on the project’s website or in online token directories. Copy the contract address to your clipboard.
Step 2: Open Metamask and Go to Settings
Open the Metamask browser extension and click on the three horizontal lines in the top-right corner. From the dropdown menu, select “Settings”.
Step 3: Click on “Add Token”
In the Settings menu, click on the “Add Token” button. This will open a new window where you can manually add a token.
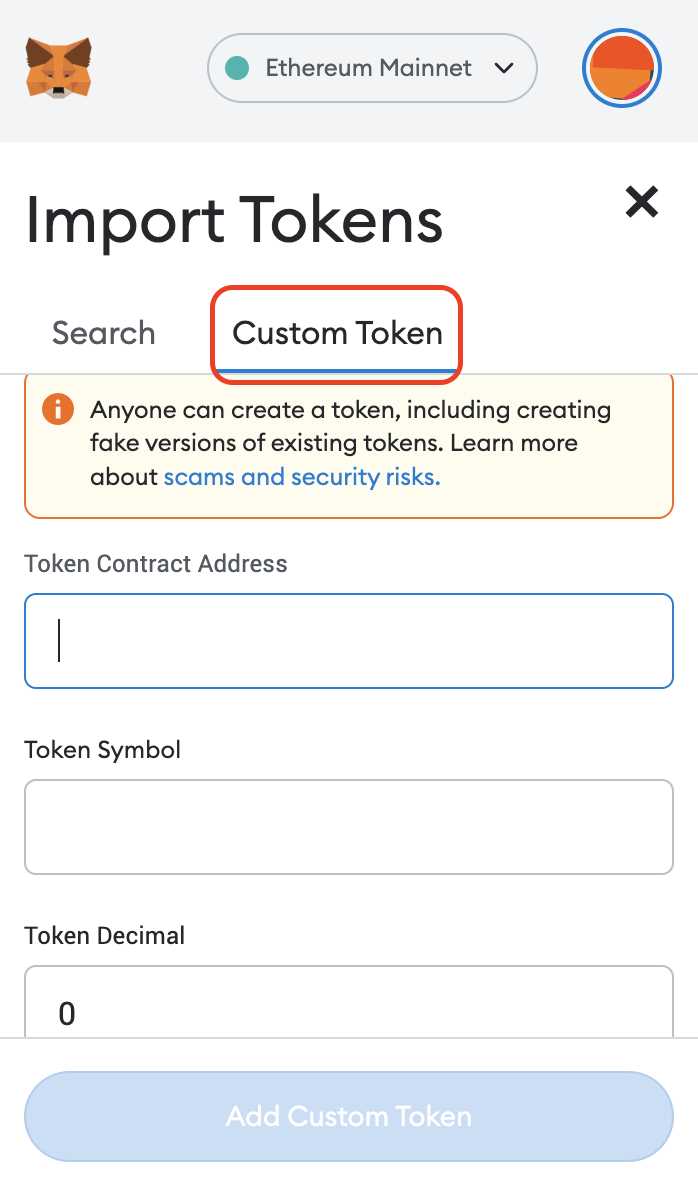
Step 4: Fill in Token Details
In the “Add Token” window, there are three fields you need to fill in:
- Token Contract Address: Paste the contract address you copied earlier into this field.
- Token Symbol: Enter the symbol of the token (e.g., ETH, DAI, LINK).
- Decimals of Precision: Enter the number of decimal places the token uses (e.g., 18 for most ERC-20 tokens).
Step 5: Click on “Next” and “Add Tokens”
Once you have filled in the token details, click on the “Next” button. Metamask will verify the token information. If everything is correct, click on the “Add Tokens” button to import the token into your Metamask wallet.
That’s it! You have successfully imported a token into Metamask. You can now manage and use the token alongside your other Ethereum assets.
Managing Imported Tokens in Metamask
Once you have successfully imported tokens into your Metamask wallet, you can easily manage them using the Metamask interface.
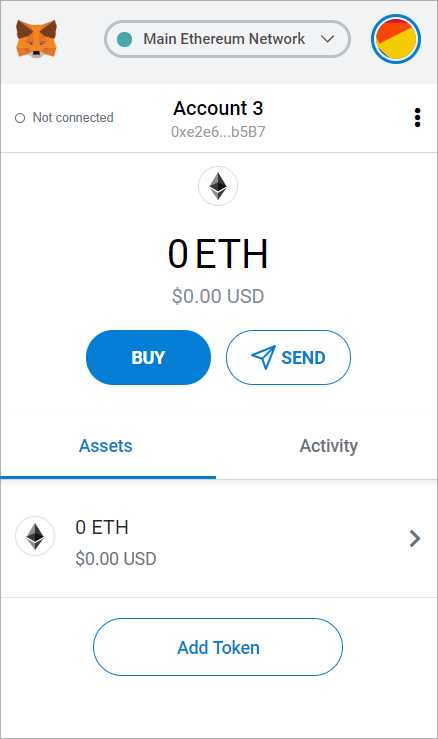
To view your imported tokens, click on the Metamask icon in your browser toolbar and select the wallet you want to manage. Then, click on the “Assets” tab.
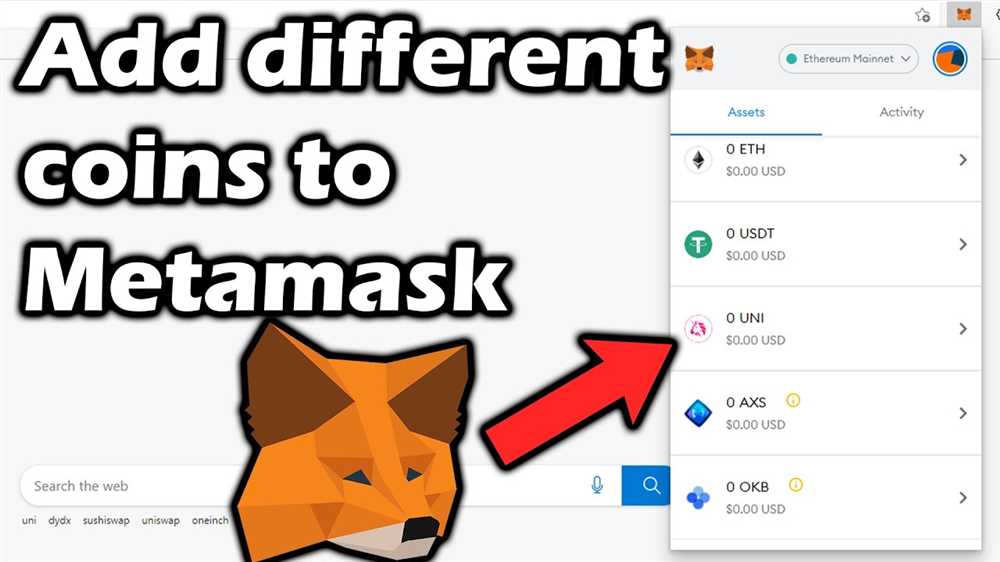
On the “Assets” tab, you will see a list of all the tokens that you have imported. Each token will be displayed with its symbol, name, and balance. You can also see the token’s address by clicking on the token.
Send Tokens
If you want to send tokens to another wallet, you can easily do so in Metamask. Simply click on the token you want to send, and a window will pop up where you can enter the recipient’s address and the amount of tokens you want to send. Review the details and click “Next” to complete the transaction.
Receive Tokens
If you want to receive tokens in your wallet, you can share your token address with the sender. To find your token address, click on the token you want to receive, and the address will be displayed. You can copy the address or share it directly with the sender.
It is important to note that the token address generated by Metamask is specific to your wallet. Do not share your wallet’s Ethereum address with others as it is not compatible with ERC20 standard tokens.
Hide or Show Tokens
If you have a long list of imported tokens and want to hide some of them, you can do so in Metamask. Go to the “Assets” tab, and click on the three dots next to the token you want to hide. Then, select “Hide Token.” The token will no longer be displayed in the assets list.
If you want to show a hidden token again, click on the three dots and select “Show Token”. The token will be displayed in the assets list again.
Managing imported tokens in Metamask is a simple and convenient process. Whether you want to send tokens, receive tokens, or adjust your token list, Metamask provides user-friendly tools to help you manage your tokens effortlessly.
Benefits of Importing Tokens in Metamask
Metamask is a popular cryptocurrency wallet that allows users to interact with decentralized applications (dApps) on the Ethereum blockchain. One of the key features of Metamask is the ability to import tokens, which provides a range of benefits for users.
1. Access to a wider variety of tokens: By importing tokens into Metamask, users can gain access to a wider variety of tokens beyond the default list of supported tokens. This allows users to participate in a broader range of decentralized finance (DeFi) projects and take advantage of new investment opportunities.
2. Increased control and ownership: Importing tokens into Metamask gives users increased control and ownership over their digital assets. Instead of relying on third-party platforms or exchanges to hold tokens, users can keep their tokens directly in their Metamask wallet. This reduces the risk of hacks or thefts associated with centralized exchanges.
3. Easy and convenient management: With Metamask, users can easily manage their imported tokens in one place. The wallet provides a streamlined interface for viewing token balances, sending and receiving tokens, and interacting with dApps. This makes it convenient for users to keep track of their tokens and perform transactions without the need for multiple wallets or platforms.
4. Seamless integration with dApps: Metamask is widely supported by dApps on the Ethereum blockchain. By importing tokens into Metamask, users can seamlessly interact with these dApps without the need to manually transfer tokens between different wallets. This simplifies the user experience and makes it easier to engage with decentralized applications.
5. Enhanced security: Importing tokens into Metamask can enhance security by leveraging the wallet’s built-in encryption and protection measures. Metamask uses mnemonic phrases and password authentication to secure access to the wallet, providing an extra layer of protection for users’ imported tokens.
Overall, importing tokens in Metamask offers a range of benefits, including access to a wider variety of tokens, increased control and ownership, easy management, seamless integration with dApps, and enhanced security. These advantages make Metamask an attractive option for cryptocurrency users looking to maximize their token holdings and engage with the Ethereum ecosystem.
Frequently Asked Questions:
What is Metamask?
Metamask is a cryptocurrency wallet that allows users to manage their Ethereum-based assets and interact with decentralized applications (dApps) on the Ethereum blockchain.
How can I import tokens into Metamask?
To import tokens into Metamask, you need to go to the “Token” tab in the wallet interface, click on “Add Token”, and then enter the token contract address, symbol, and decimals. Metamask will then import the token and display the balance in your wallet.
Can I import tokens from different blockchains into Metamask?
No, Metamask is specifically designed for the Ethereum blockchain and does not support tokens from other blockchains.
Is it possible to import a large number of tokens into Metamask?
Yes, it is possible to import a large number of tokens into Metamask. You can use batch import tools or scripts to automate the process and save time.
Is it safe to import tokens into Metamask?
Importing tokens into Metamask is generally safe as long as you ensure that the tokens you are importing come from reputable sources. It is important to double-check the contract address and verify the authenticity of the tokens before importing them.

+ There are no comments
Add yours