


Welcome to our comprehensive guide on setting up and using Metamask, the popular cryptocurrency wallet and browser extension. Metamask is a powerful tool that allows users to interact with the Ethereum blockchain, enabling them to securely store and manage their digital assets.
Setting up Metamask is easy and straightforward. First, you’ll need to download and install the extension on your preferred web browser. Once installed, you’ll be guided through a simple setup process that includes creating a new wallet and setting a unique password. It is crucial to choose a strong password and to back up your wallet’s seed phrase in a safe place.
After the initial setup, you’ll have access to a variety of features and functionalities offered by Metamask. One of the key features is the ability to create and manage multiple Ethereum wallets, allowing you to keep your digital assets organized. Additionally, you can easily send and receive Ether and ERC-20 tokens, as well as interact with decentralized applications (DApps) directly from your wallet.
Metamask also provides users with a secure and seamless way to participate in Initial Coin Offerings (ICOs) and decentralized finance (DeFi) platforms. By using Metamask, you can securely connect your wallet to various applications and services, giving you access to a wide range of opportunities within the cryptocurrency ecosystem.
In conclusion, Metamask is an essential tool for anyone looking to navigate the world of cryptocurrency. Its user-friendly interface and robust security features make it a popular choice among both beginners and experienced users. Whether you’re a casual investor or an active participant in the Ethereum ecosystem, Metamask is a must-have tool for managing your digital assets and unlocking the full potential of decentralized finance.
Metamask Setup: Step-by-Step Guide
Setting up Metamask is an essential step to start using decentralized applications (DApps) and interacting with the Ethereum blockchain. Follow this step-by-step guide to get started with Metamask:
Step 1: Install the Metamask Extension
First, you need to install the Metamask browser extension. Metamask is available for popular browsers like Chrome, Firefox, Brave, and Edge. Simply search for “Metamask” in your browser’s extension store and click on the “Add to Chrome” (or your browser’s equivalent) button. Once the extension is installed, you will see the Metamask icon on your browser’s toolbar.
Step 2: Create a Wallet
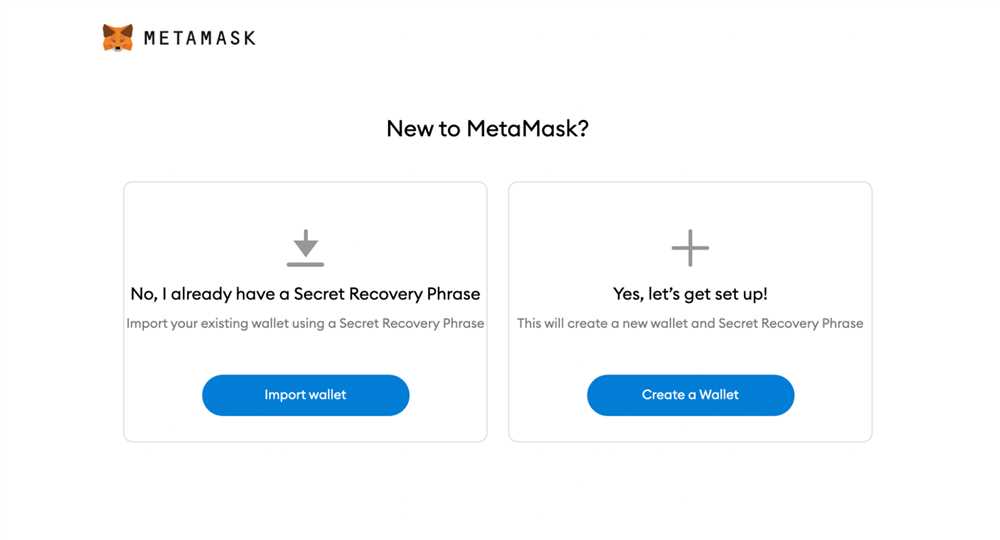
After installing the extension, click on the Metamask icon on your browser’s toolbar. A pop-up window will appear with the option to “Get Started”. Click on it and then select “Create a Wallet”.
Next, you will be prompted to set a password for your wallet. Make sure to choose a strong password and remember it as it will be required to access your funds. Confirm the password and click on “Create”.
Metamask will then generate a unique 12-word seed phrase. This phrase is extremely important as it serves as a backup for your wallet. Write it down and keep it in a safe place. Do not share it with anyone.
Step 3: Confirm the Seed Phrase
After writing down the seed phrase, Metamask will ask you to confirm it. This step is crucial to ensure that you have correctly written down the seed phrase. Select the words in the correct order and click on “Confirm” when you are done.
Step 4: Connect to a Network
Once the seed phrase is successfully confirmed, you will be prompted to connect to a network. Metamask supports various networks, the default being the Ethereum Mainnet. However, you can also connect to other networks like test networks or custom networks.
Choose the network you want to connect to and click on it. Metamask will connect to the selected network, and you will see a green dot indicating that you are connected.
Additionally, you can add custom networks by clicking on the network selection dropdown and selecting “Custom RPC”. Enter the network details and click on “Save” to connect to a custom network.
Step 5: Fund your Wallet
To start using Metamask, you need to have some cryptocurrency in your wallet. You can purchase cryptocurrencies like Ethereum using popular exchanges such as Coinbase or Binance. Once you have acquired some crypto, you can send it to your Metamask wallet address to fund it.
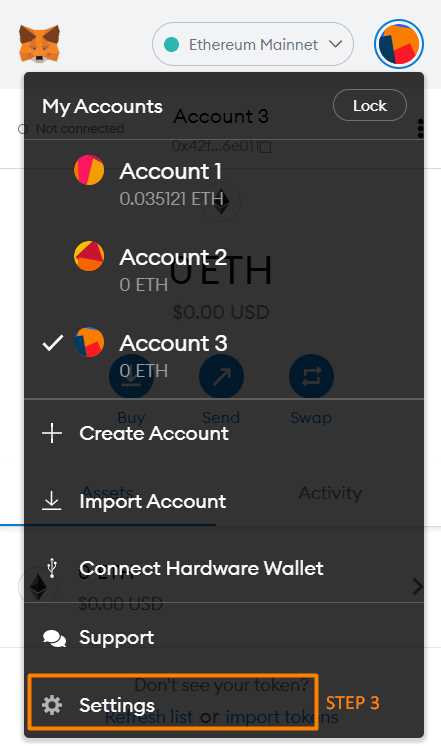
To find your wallet address, click on the Metamask extension icon and then click on the account avatar. A dropdown will appear, showing your wallet address. Copy the address and use it to receive funds from exchanges or other wallets.
Step 6: Explore DApps
With your Metamask wallet set up and funded, you are now ready to explore the world of decentralized applications. Visit DApp browsers like State of the DApps or Dapp.com to discover various applications built on the Ethereum blockchain. When you find a DApp you want to use, simply click on the “Connect Wallet” or “Connect Metamask” button and follow the prompts to connect your wallet.
Remember to always be cautious when interacting with DApps and only use trusted applications. Metamask provides an extra layer of security and enables seamless interactions with the Ethereum blockchain.
Congratulations! You have successfully set up and configured Metamask. Now you can enjoy the benefits of decentralized finance and start exploring the exciting world of blockchain technology!
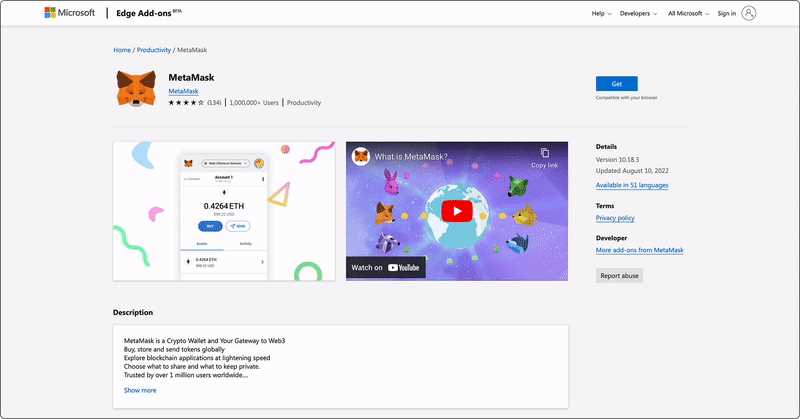
Downloading and Installing Metamask Extension
To start using Metamask, you will need to download and install the Metamask extension on your web browser. Follow the steps below to get started:
Step 1: Go to the Metamask website
Open your preferred web browser and visit the official Metamask website. You can search for “Metamask” on any search engine or directly enter the URL: https://metamask.io/
Step 2: Choose your web browser
On the Metamask website, you will find a list of supported web browsers. Click on the icon of the web browser you are currently using. Metamask supports Chrome, Firefox, Brave, and Edge browsers.
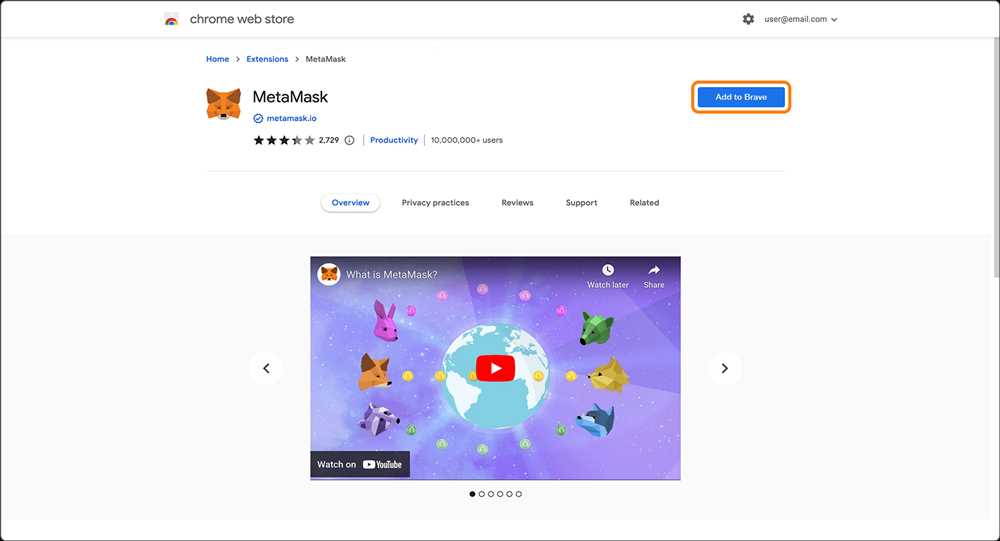
Step 3: Install the extension
Once you click on your preferred web browser icon, you will be redirected to the extension’s page in the respective browser’s web store. Click on the “Add to
If you are using Chrome, you may be asked to confirm the installation by clicking “Add Extension” on a pop-up window that appears.
Step 4: Set up your Metamask account
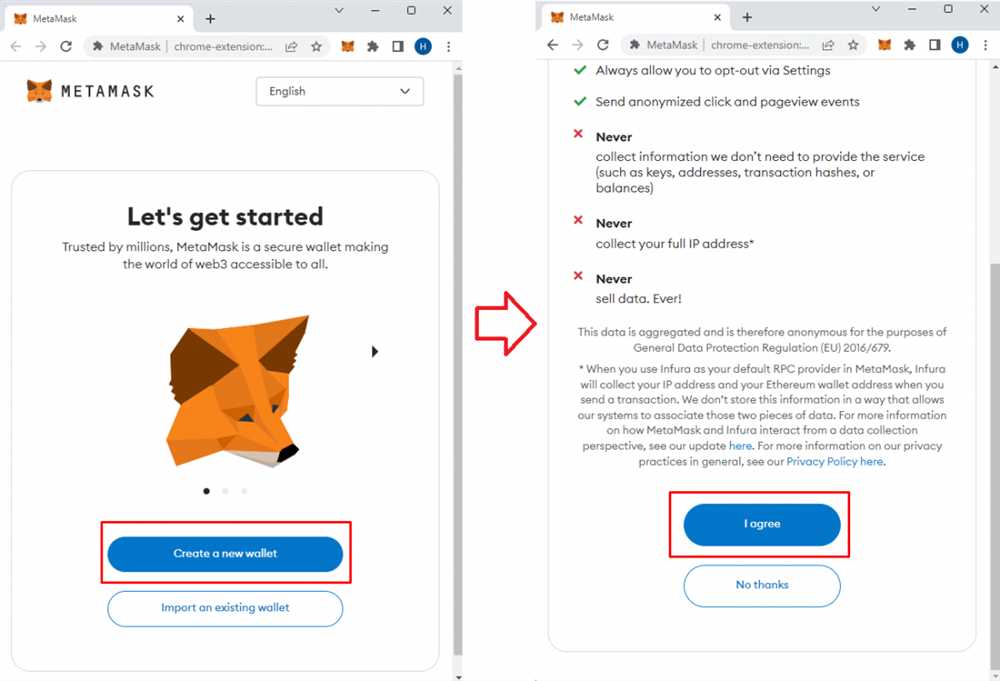
After the installation is complete, a new tab or window will open automatically, displaying the Metamask setup page. Click on the “Get Started” button to proceed.
Follow the on-screen instructions to create a new Metamask account. You will be asked to set a password and accept the privacy policy and terms of use.
Step 5: Back up your seed phrase
Once your account is created, Metamask will provide you with a unique set of words called a “seed phrase.” This phrase acts as a backup for your account and can be used to restore your wallet if needed. It is crucial to write down and store this seed phrase in a safe place. Do not share it with anyone!
| Note: |
|---|
| Creating a strong password and keeping your seed phrase secure are essential to protect your funds and personal information. |
With the Metamask extension successfully downloaded and installed, you are now ready to start using Metamask and explore the world of decentralized finance (DeFi) applications on the Ethereum blockchain.
Creating a New Wallet and Generating a Seed Phrase
To use MetaMask, you need to create a new wallet and generate a seed phrase. This seed phrase is a sequence of 12 or 24 words that can be used to recover your wallet in case you lose access to it.
Follow these steps to create a new wallet and generate a seed phrase:
- Download and install the MetaMask extension from the official website if you haven’t already.
- Once the extension is installed, click on the MetaMask icon in your browser’s toolbar.
- A new page will open where you can either import an existing wallet or create a new one. Click on “Create a Wallet”.
- Read the terms of service and click on “Accept”.
- In the next screen, you will see your generated seed phrase. It is crucial to write down this phrase and keep it in a safe place. Do not share it with anyone.
- After you have written down your seed phrase, you will need to confirm it by selecting the words shown in the correct order.
- Once confirmed, set a strong password for your wallet.
- Congratulations! You have successfully created a new wallet and generated a seed phrase. Make sure to keep your seed phrase and password safe and never share them with anyone.
With MetaMask, you can now manage and interact with Ethereum-based decentralized applications (dApps), securely store your cryptocurrencies, and participate in various blockchain activities.
Connecting Metamask to a DApp and Managing Accounts
Metamask allows users to connect their wallets to decentralized applications (DApps) and easily manage their accounts. Here’s a step-by-step guide on how to connect Metamask to a DApp and start managing your accounts:
- Make sure you have Metamask installed on your browser. If you haven’t installed it yet, visit the Metamask website and follow the instructions to install it.
- Open the DApp you want to connect to. Most DApps will have a “Connect with Metamask” button or a similar option.
- Click on the “Connect with Metamask” button. Metamask will open a pop-up window asking for permission to connect to the DApp.
- Authorize the connection by clicking on the “Connect” button in the Metamask pop-up window.
- Metamask will then connect to the DApp, and you’ll be able to see your connected accounts and balances.
Once you have connected Metamask to a DApp, you can start managing your accounts by:
- Viewing your account balances: Metamask will display the balances of your connected accounts. You can easily switch between accounts and view their respective balances.
- Sending and receiving tokens: Metamask allows you to send and receive tokens directly from within the DApp. Simply select the account you want to use, enter the recipient’s address, and enter the amount of tokens you want to send.
- Approving transactions: Some DApps may require you to approve transactions before they can be executed. Metamask will display a pop-up window asking for your confirmation and the ability to adjust gas fees before submitting the transaction.
- Signing messages: DApps may also require you to sign messages to prove ownership of your accounts. Metamask will display a pop-up window with the message to sign, and you can confirm the signature.
Remember, always be cautious when interacting with DApps and managing your accounts. Make sure to double-check the addresses and transaction details before confirming any transactions or signing messages. Keep your Metamask extension up to date, use secure passwords and backup your accounts to ensure the safety of your funds.
Frequently Asked Questions:
What is Metamask?
Metamask is a cryptocurrency wallet and a browser extension that allows users to interact with the Ethereum blockchain.
How do I set up Metamask?
To set up Metamask, you need to install the Metamask extension on your browser, create a new wallet, and securely store your seed phrase. Once your wallet is set up, you can connect it to various decentralized applications and start using it to manage your Ethereum assets.
Is Metamask safe to use?
Metamask is generally considered safe to use, but it’s important to follow certain security practices. This includes never sharing your seed phrase with anyone, making sure the website you’re interacting with is legitimate, and keeping your software and extensions up to date.
Can I use Metamask on mobile devices?
Yes, Metamask has a mobile app available for both iOS and Android devices. You can download it from the App Store or Google Play Store and use it to manage your Ethereum assets on the go.
What can I do with Metamask?
With Metamask, you can do a variety of things such as send and receive Ethereum and ERC-20 tokens, interact with decentralized applications (dApps), participate in token sales (ICOs), and manage your digital assets securely.
+ There are no comments
Add yours