


Metamask is a popular web-based wallet that allows users to interact with decentralized applications (dApps) on the blockchain. By default, Metamask is connected to the Ethereum network, but it is also possible to connect it to other networks, such as the Binance Smart Chain (BSC). This step-by-step guide will walk you through the process of connecting your Metamask wallet to the BSC network, allowing you to access and engage with BSC-based dApps and assets.
Step 1: Install and set up Metamask if you haven’t done so already. You can find the Metamask extension on the official Metamask website or on your browser’s extension store.
Step 2: Once installed, open Metamask and create or import a wallet. This will generate a unique mnemonic phrase that you should securely store.
Step 3: Click on the Metamask extension icon in your browser toolbar to open the wallet. If you already have a wallet, click on “Import Wallet” and enter your mnemonic phrase. If you are creating a new wallet, follow the instructions provided by Metamask.
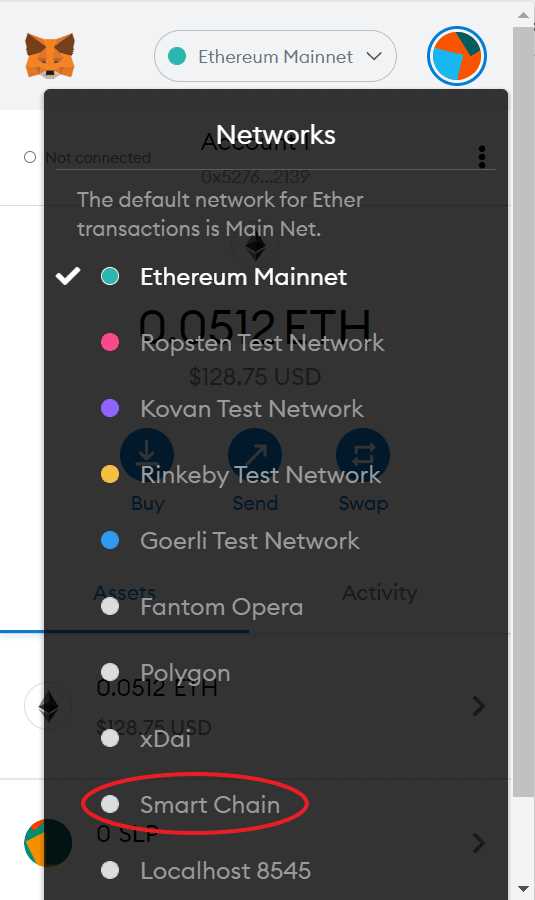
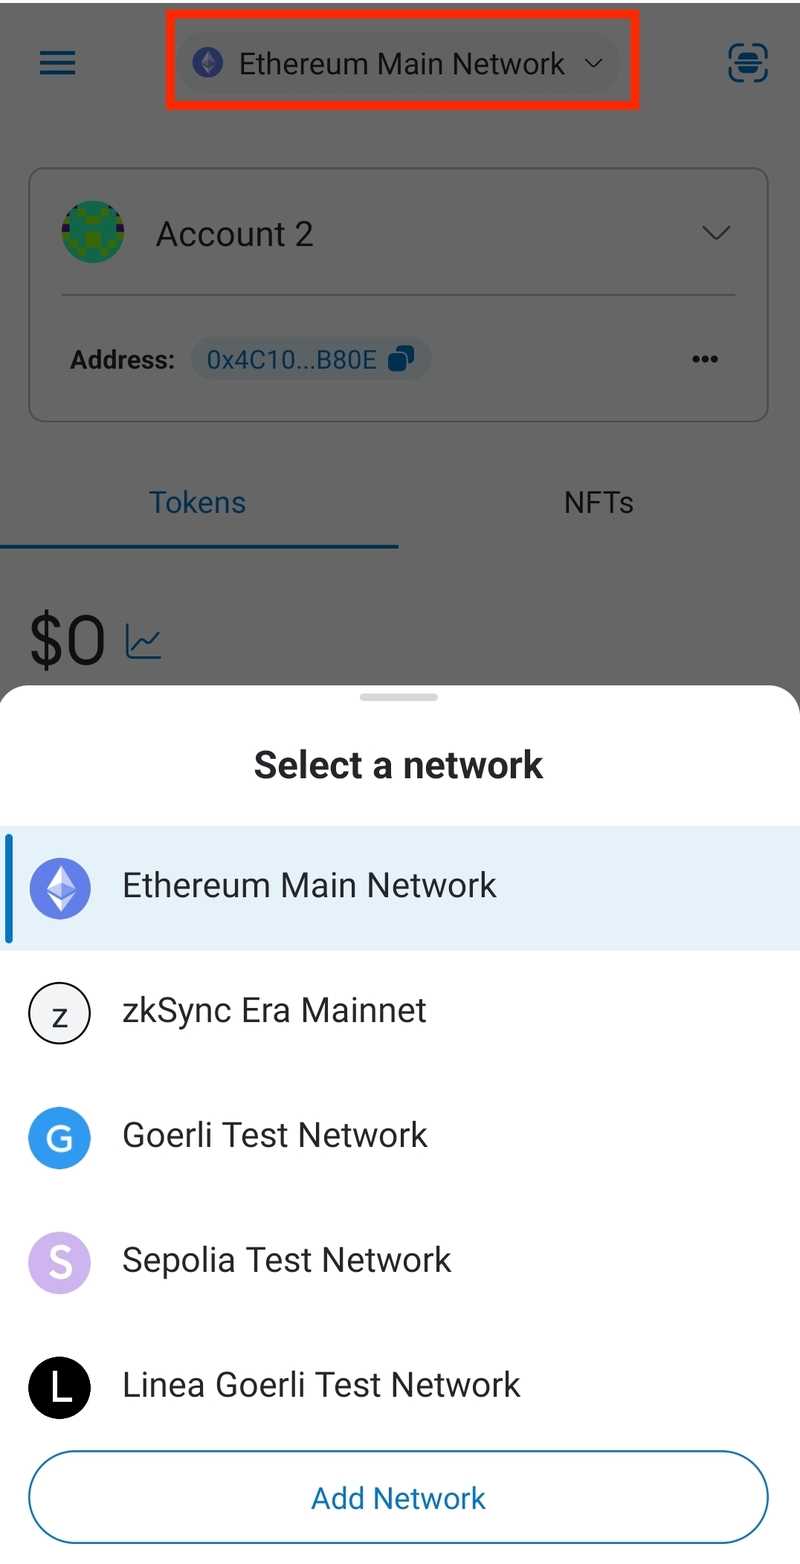
Step 4: With your Metamask wallet open, click on the network selection dropdown that displays “Ethereum Mainnet” by default. Scroll down and click on “Custom RPC” to manually add the BSC network.
Step 5: In the “New RPC URL” field, enter the BSC RPC URL. The BSC RPC URL for the Mainnet is “https://bsc-dataseed1.binance.org/”. Enter the URL and click on “Save” to add the BSC network to your Metamask wallet.
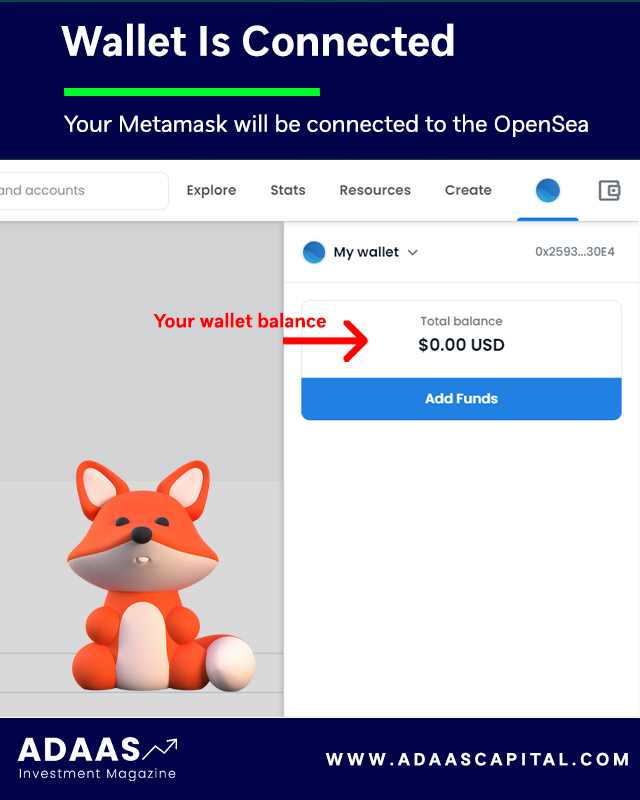
Step 6: Congratulations! You have successfully connected your Metamask wallet to the BSC network. You can now access BSC-based dApps, view and manage your BSC assets, and participate in various BSC activities.
Important note: It is crucial to exercise caution and conduct thorough research when interacting with any dApps or assets on the blockchain. Always verify the credibility and security of the platforms and projects before engaging with them.
Please note that this guide provides instructions for connecting BSC to Metamask at the time of its writing. The process may change or vary in the future due to updates or developments in the technology.
Step 1: Accessing Metamask Settings

To connect the BSC (Binance Smart Chain) network to your Metamask wallet, you will first need to access the settings of your Metamask extension. Follow the steps below:
1. Open Metamask
Click on the Metamask extension icon in your browser toolbar to open your Metamask wallet.
2. Access Settings
Once your Metamask wallet is open, click on the menu button in the top-right corner of the extension window. The menu button looks like three horizontal lines.
Note: In some versions of Metamask, the menu button may be represented by a different icon, such as a hamburger icon (three stacked horizontal lines) or a gear icon.
After clicking on the menu button, a drop-down menu will appear. Select “Settings” from the menu options.
3. Switch to Networks Tab
In the Metamask settings page, you will see different tabs at the top of the window. Click on the “Networks” tab to access the network settings.
By default, the “General” tab will be selected, which shows your account information. Switching to the “Networks” tab allows you to manage the networks connected to your wallet.
Follow these steps to access the settings of your Metamask wallet. In the next step, we will proceed to add the BSC network.
Step 2: Adding Bsc Network
After installing the MetaMask extension in your browser, follow these steps to add the Bsc network:
- Open the MetaMask extension by clicking on the icon in your browser’s toolbar.
- Click on the account icon at the top right corner of the extension.
- From the dropdown menu, select “Settings”.
- In the Settings menu, scroll down and click on “Networks”.
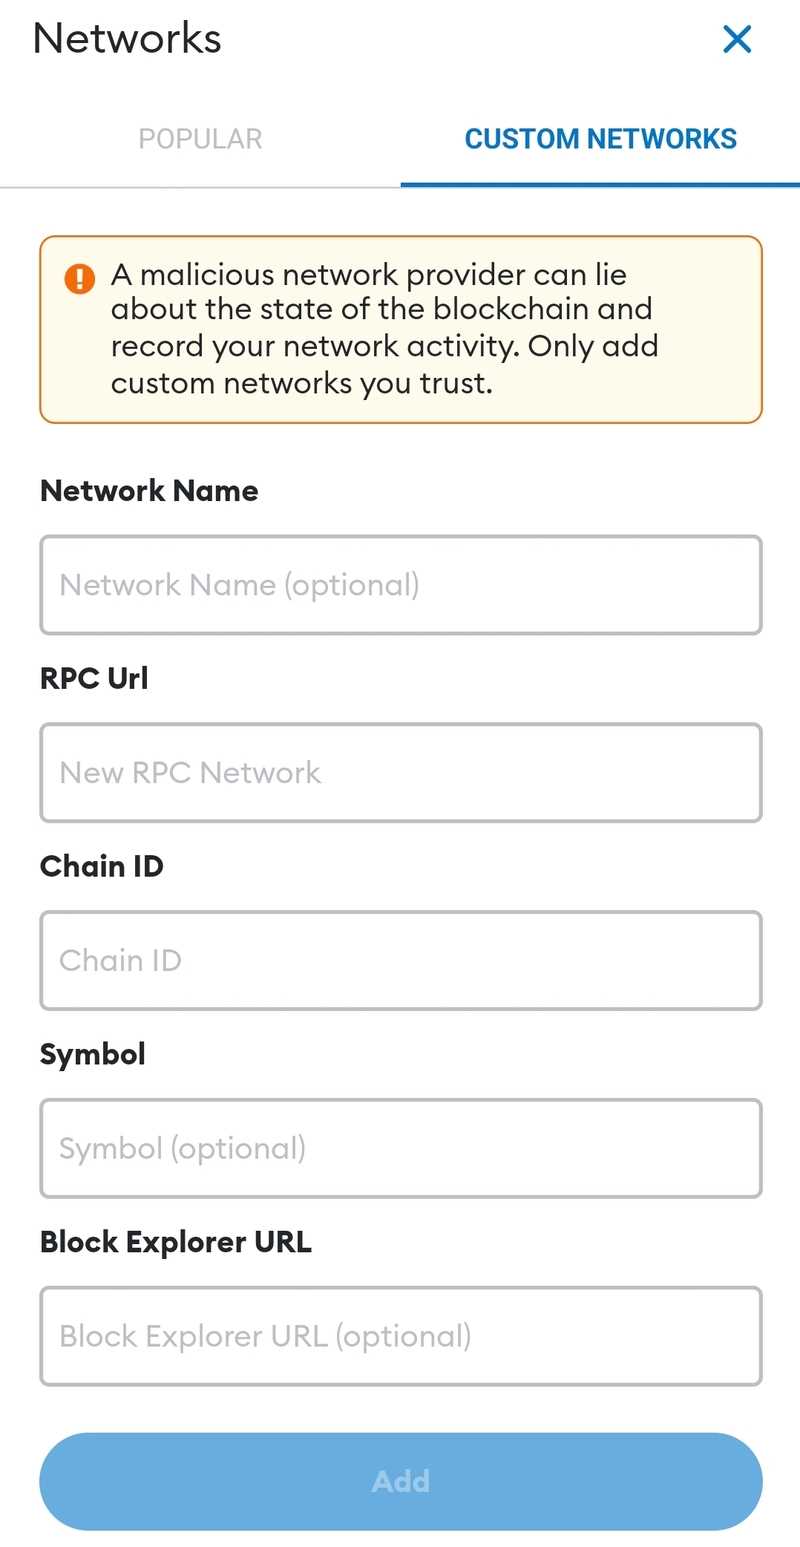
- Click on “Add Network” to add a new network.
- In the Network Name field, enter “Binance Smart Chain” or any preferred name for the Bsc network.
- In the New RPC URL field, enter the Bsc network’s RPC URL. For the Binance Smart Chain mainnet, enter “https://bsc-dataseed.binance.org/”. For the Binance Smart Chain testnet, enter “https://data-seed-prebsc-1-s1.binance.org:8545/”.
- In the ChainID field, enter “56” for the Binance Smart Chain mainnet or “97” for the Binance Smart Chain testnet.
- In the Symbol field, enter “BNB” to represent the network’s native cryptocurrency.
- Leave the Block Explorer URL field blank.
- Click on “Save” to add the Bsc network to MetaMask.
Congratulations! You have successfully added the Bsc network to your MetaMask extension. Now you can interact with decentralized applications (dApps) and perform transactions on the Binance Smart Chain.
+ There are no comments
Add yours