


Metamask is a popular web browser extension that allows users to securely store and manage their cryptocurrency assets. By default, Metamask supports the Ethereum network, but it also allows you to add other networks to your wallet for accessing tokens and performing transactions on different blockchains. In this step-by-step guide, we will walk you through the process of adding networks to Metamask, so you can easily switch between different networks and take full advantage of the decentralized finance ecosystem.
Step 1: Install Metamask
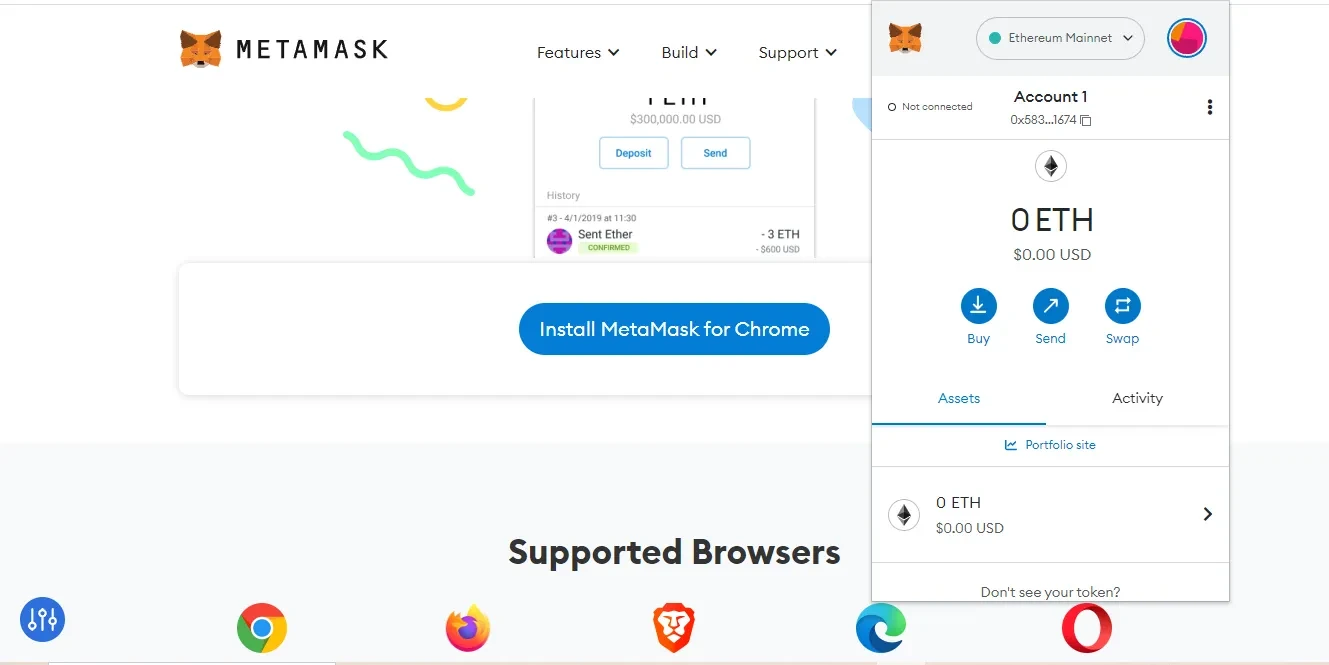
If you haven’t already, the first step is to install the Metamask extension on your web browser. Metamask is available for Chrome, Firefox, Brave, and other popular browsers. Simply visit the official Metamask website or search for “Metamask” in your browser’s extension store, and follow the instructions to add the extension to your browser.
Step 2: Set up and import your wallet
Once you have installed Metamask, you need to set up and import your existing wallet or create a new one. Metamask will generate a 12-word seed phrase that you must securely store as it can be used to restore your wallet in case of loss or device change. Follow the on-screen prompts to set up your wallet, and make sure to store your seed phrase in a safe and offline location.
Step 3: Access the network settings
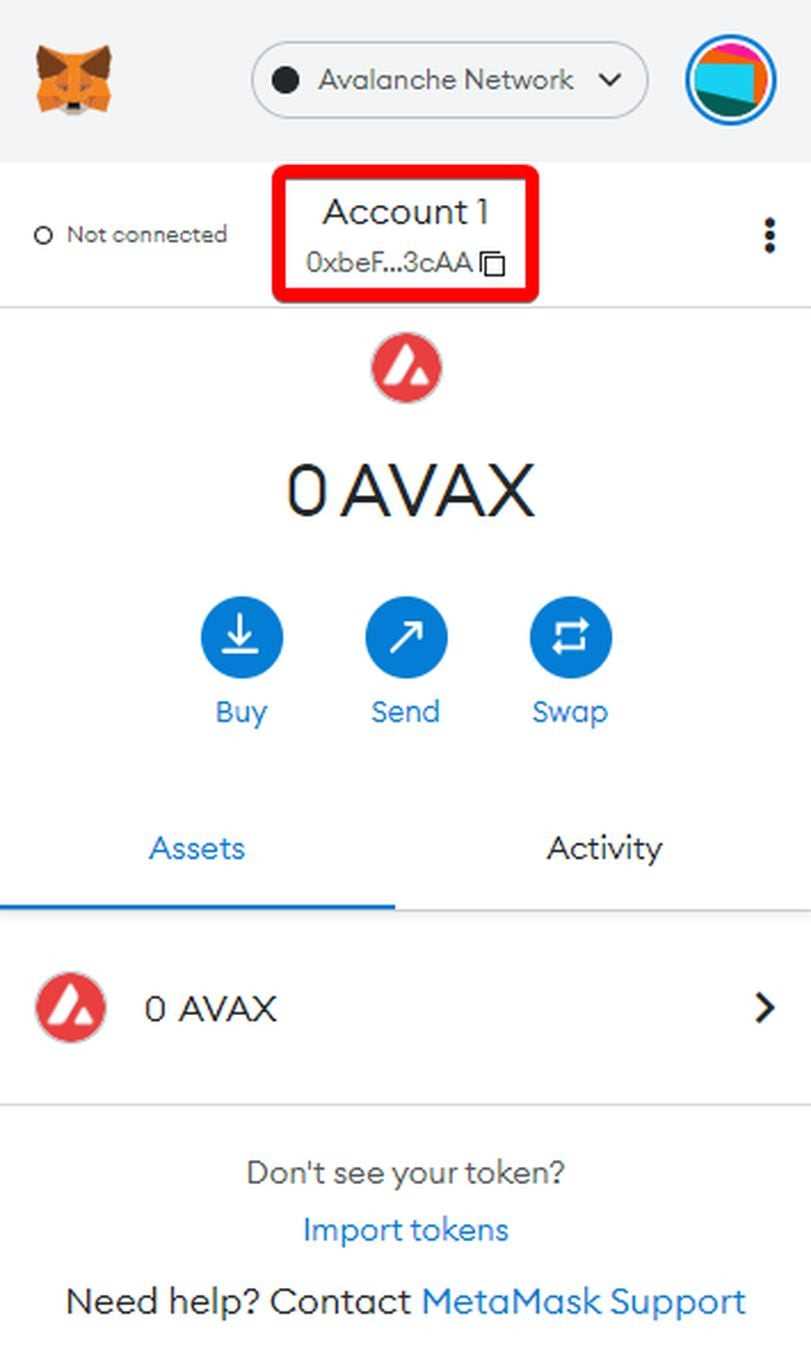
After setting up your wallet, you will be redirected to the Metamask interface. Look for the fox icon in your browser’s toolbar and click on it to access the wallet. Once the wallet interface is open, click on the network dropdown to reveal a list of supported networks and options.
Note: Adding custom networks requires changing the network dropdown to “Custom RPC.”
Step 4: Adding a new network
To add a new network to Metamask, click on the “Custom RPC” option in the network dropdown. A form will appear where you can enter the details of the network you want to add. This includes the network name, RPC URL, chain ID, symbol, and block explorer URL. Make sure to double-check the accuracy of the provided information and click “Save” to add the new network to your wallet.
Step 5: Switching networks
Once you have added multiple networks to Metamask, you can easily switch between them by selecting the desired network from the network dropdown. By switching networks, you will be able to access different decentralized applications and perform transactions on various blockchains without needing separate wallets.
By following this step-by-step guide, you can add networks to Metamask and experience the full potential of decentralized finance. Take advantage of the versatility of Metamask and explore different blockchain ecosystems to expand your cryptocurrency portfolio and participate in a wide range of projects and networks.
How to add a network to Metamask
Metamask is a popular browser extension wallet that allows users to manage their digital assets and interact with decentralized applications. By default, Metamask supports the Ethereum network. However, users can also add other networks to their Metamask wallet to transact with different cryptocurrencies.
To add a network to Metamask, follow these steps:
- Open the Metamask extension in your browser by clicking on the Metamask icon.
- Click on the account avatar in the top-right corner and select “Settings” from the dropdown menu.
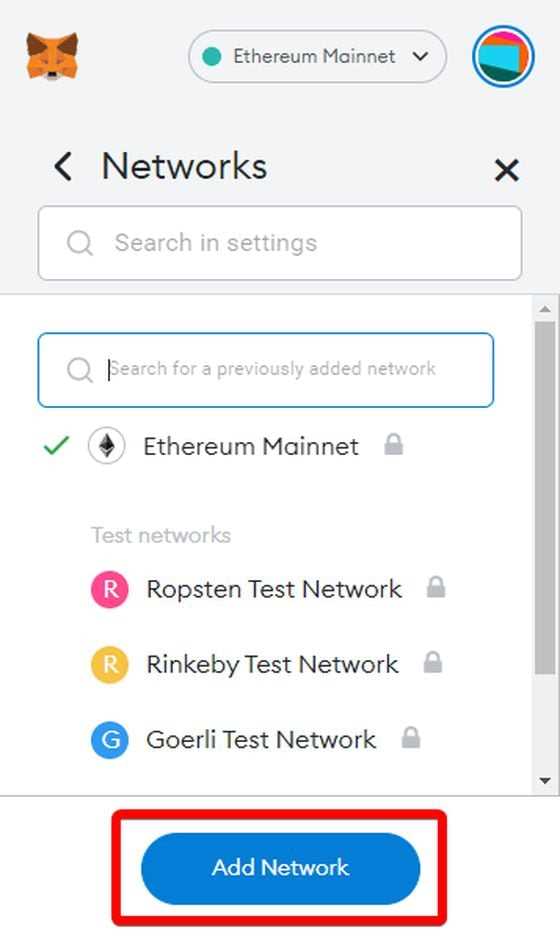
- In the Settings menu, click on the “Networks” tab.
- Scroll down and click on the “Add Network” button.
- You will be prompted to enter the network details:
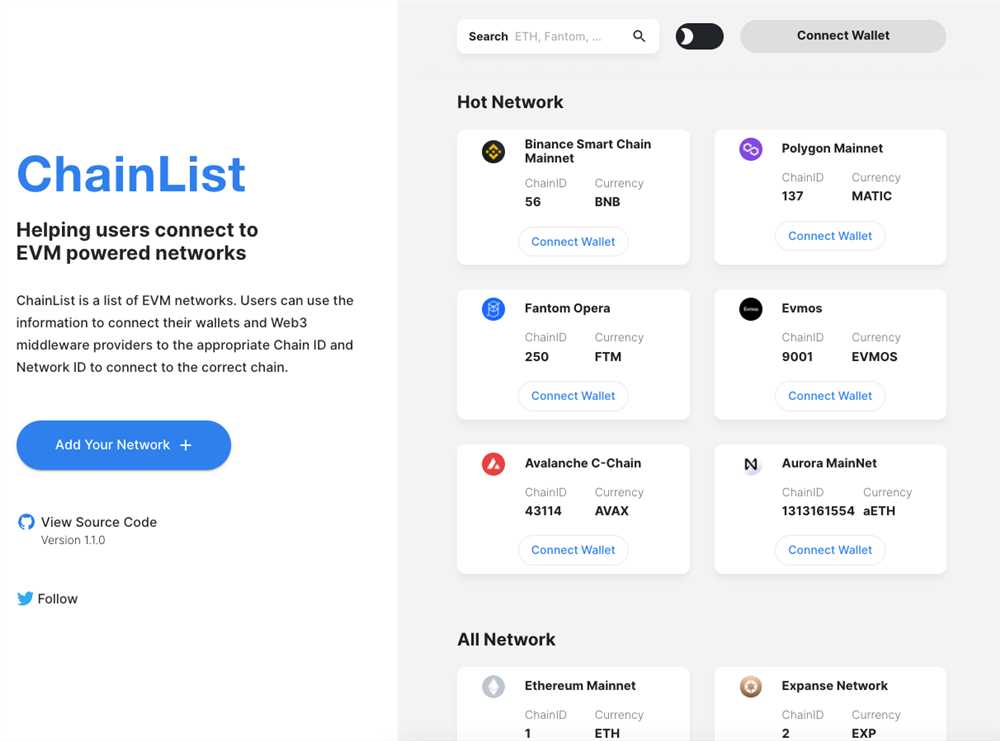
- Network Name: Enter the name of the network you want to add (e.g., Binance Smart Chain).
- New RPC URL: Enter the RPC URL for the network you want to add.
- Chain ID: Enter the unique identifier for the network (each network has its own Chain ID).
- Symbol: Enter the currency symbol for the network (e.g., BNB for Binance Smart Chain).
- Block Explorer URL: Enter the URL for the block explorer of the network (optional).
- After entering the network details, click on the “Save” button.
- The network should now appear in the Networks list in your Metamask wallet.
- You can switch between networks by clicking on the network name in the top-center of the Metamask extension and selecting the desired network from the dropdown menu.
By adding networks to your Metamask wallet, you can easily transact with different cryptocurrencies and decentralized applications across multiple blockchain networks.
Note that adding networks to Metamask does not affect your existing Ethereum account. Each network will have its own set of accounts and balances within the Metamask wallet.
Setting up custom RPC for a new network in Metamask
Metamask allows you to connect to various networks, including custom networks, for your cryptocurrency transactions. Here is a step-by-step guide on setting up a custom RPC (Remote Procedure Call) for a new network in Metamask.
Step 1: Open Metamask
Open the Metamask extension or application on your device, and make sure you are logged in to your account.
Step 2: Access the Settings
Click on the Metamask icon to open the extension, and then click on the three dots in the top-right corner. From the drop-down menu, select “Settings”.
Step 3: Add Network
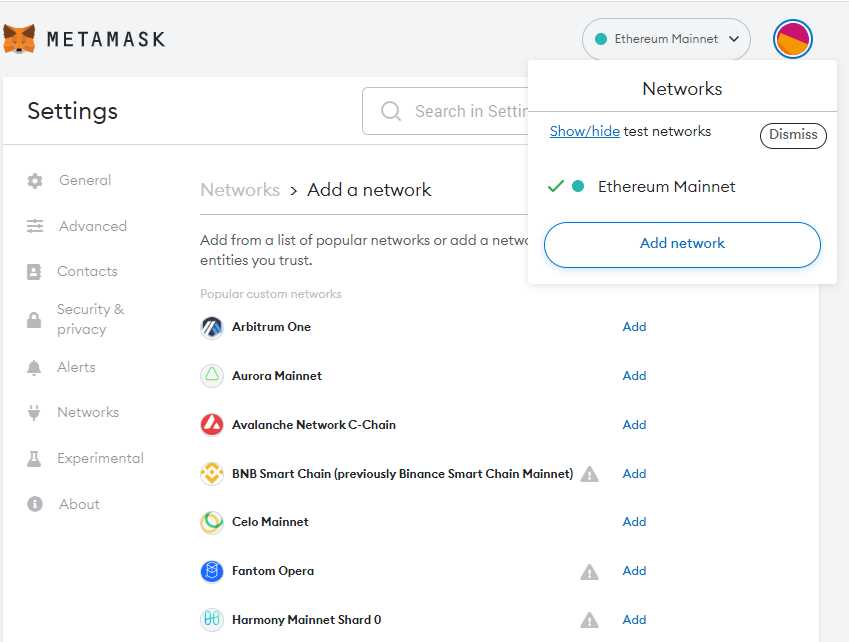
In the Metamask settings, click on the “Networks” tab. Scroll down to the bottom of the page and click on the “Add Network” button.
Step 4: Fill in Network Details
In the “New RPC URL” field, enter the URL of the network you want to add. Make sure you have the correct URL for the network you wish to connect to.
Next, enter a network name in the “Network Name” field. This can be any name you prefer, as it is for your reference.
You can also provide a symbol and a block explorer URL, but these are optional. Click on the “Save” button when you have finished entering the details.
Step 5: Switch to the Custom Network
Now that you have added the custom network, you can switch to it by clicking on the network dropdown in the Metamask extension/app and selecting your newly added network from the list.
You are now connected to the custom network and can perform cryptocurrency transactions on that network using Metamask.
Setting up a custom RPC for a new network in Metamask is a simple process that allows you to connect to different networks beyond the default options. Make sure you have the correct network details before adding a new network to Metamask. Happy transacting!
Configuring network options for seamless cryptocurrency transactions
When using Metamask for cryptocurrency transactions, it is essential to configure the network options correctly to ensure a smooth and seamless experience. Follow the step-by-step guide below to add networks to Metamask:
Step 1: Accessing the network settings
Open the Metamask extension on your browser and click on the icon located at the top right corner of your screen. From the dropdown menu, select “Settings” to access the network settings.
Step 2: Adding a custom network
In the network settings, scroll down until you find the “Networks” section. Click on the “+Add Network” button to add a custom network.
Step 3: Configuring network details
Enter the network details in the provided fields. These details include the network name, RPC URL, chain ID, symbol, and block explorer URL. Make sure to enter the correct information from a reliable source. You can also select the currency symbol and decimals to complete the network configuration.
Step 4: Saving and switching networks
After entering the network details, click on the “Save” button to save the network configuration. The newly added network will now appear in the network selection dropdown menu. You can switch between different networks by selecting the desired network from the dropdown menu.
By correctly configuring the network options in Metamask, you can seamlessly perform cryptocurrency transactions on different networks and explore various decentralized applications (Dapps) without any hassle.
Remember to be cautious when adding networks and only add trusted networks from reliable sources to ensure the security of your funds.
+ There are no comments
Add yours