


Metamask is a popular Ethereum wallet and dApp browser that allows users to interact with the Ethereum network. However, with the rise of other blockchain networks like Tron, many users are now looking to add additional networks to their Metamask wallets. This step-by-step guide will walk you through the process of adding the Tron network to Metamask, allowing you to seamlessly switch between Ethereum and Tron.
Step 1: Install Metamask
If you haven’t already, install Metamask as a browser extension or mobile app. Metamask is available for Chrome, Firefox, and Brave browsers, as well as for iOS and Android devices. Once installed, create a new Metamask wallet or import an existing one.
Step 2: Access Metamask Settings
In your browser, click on the Metamask extension icon to open the Metamask interface. From the interface, click on the user icon located at the top right corner, and then select “Settings” from the dropdown menu.
Step 3: Add Custom Network
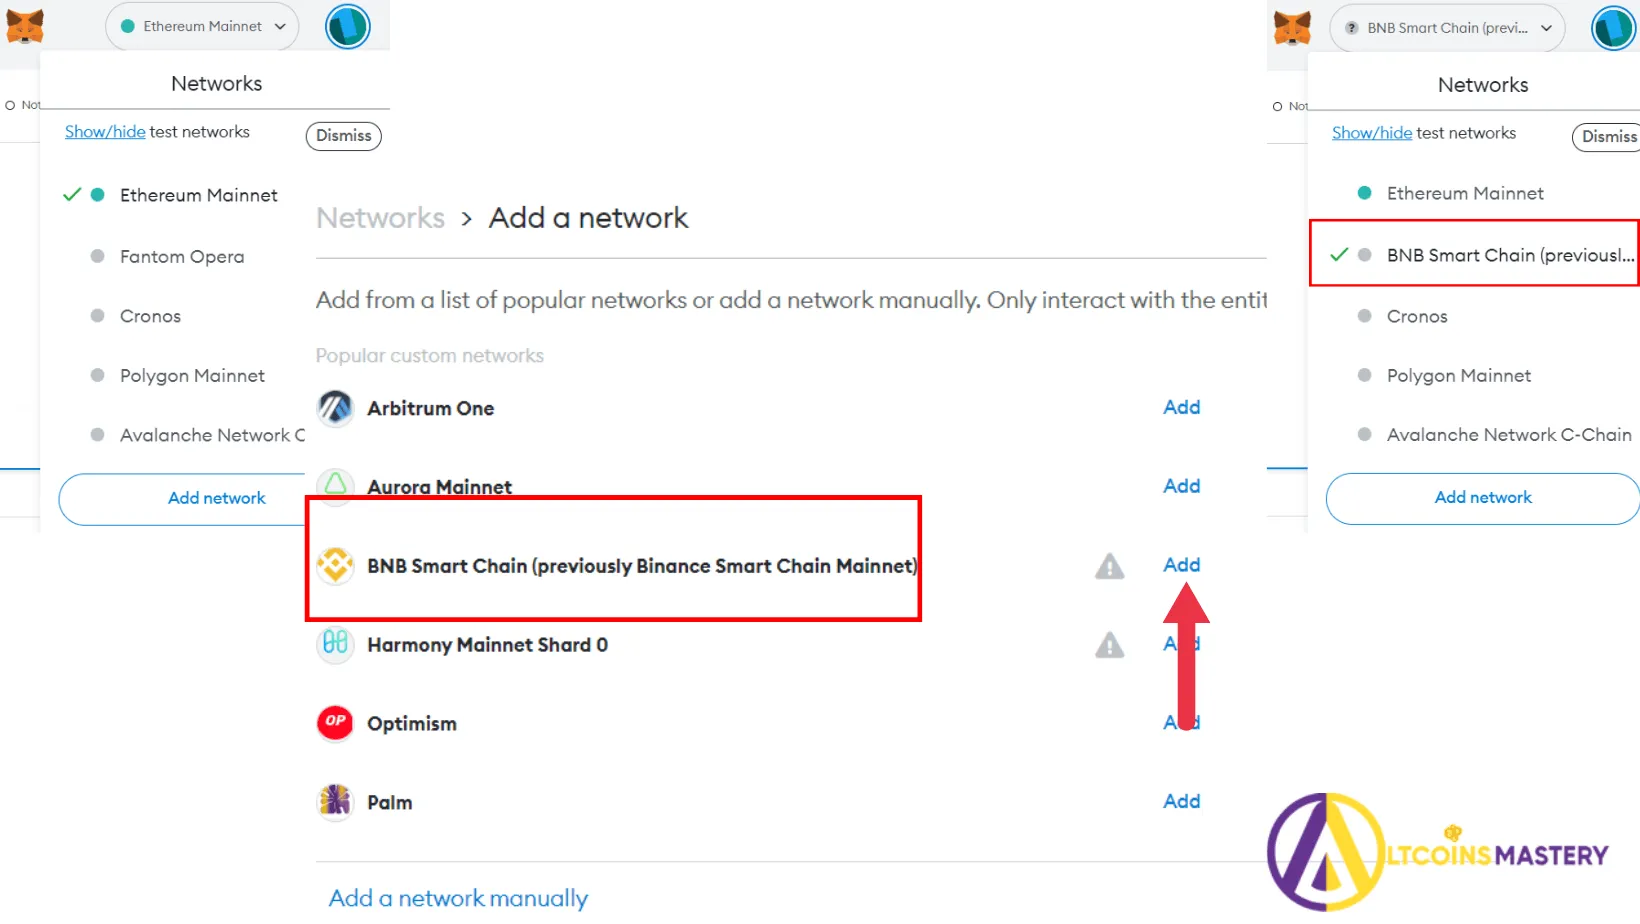
In the settings menu, click on the “Networks” tab. Scroll down to the bottom of the page and click on the “Add Network” button to add a custom network. This will allow you to add the Tron network to your Metamask wallet.
Step 4: Fill in Tron Network Details
Fill in the following details to add the Tron network:
Network Name: Tron Mainnet
New RPC URL: https://api.trongrid.io
Chain ID: 1
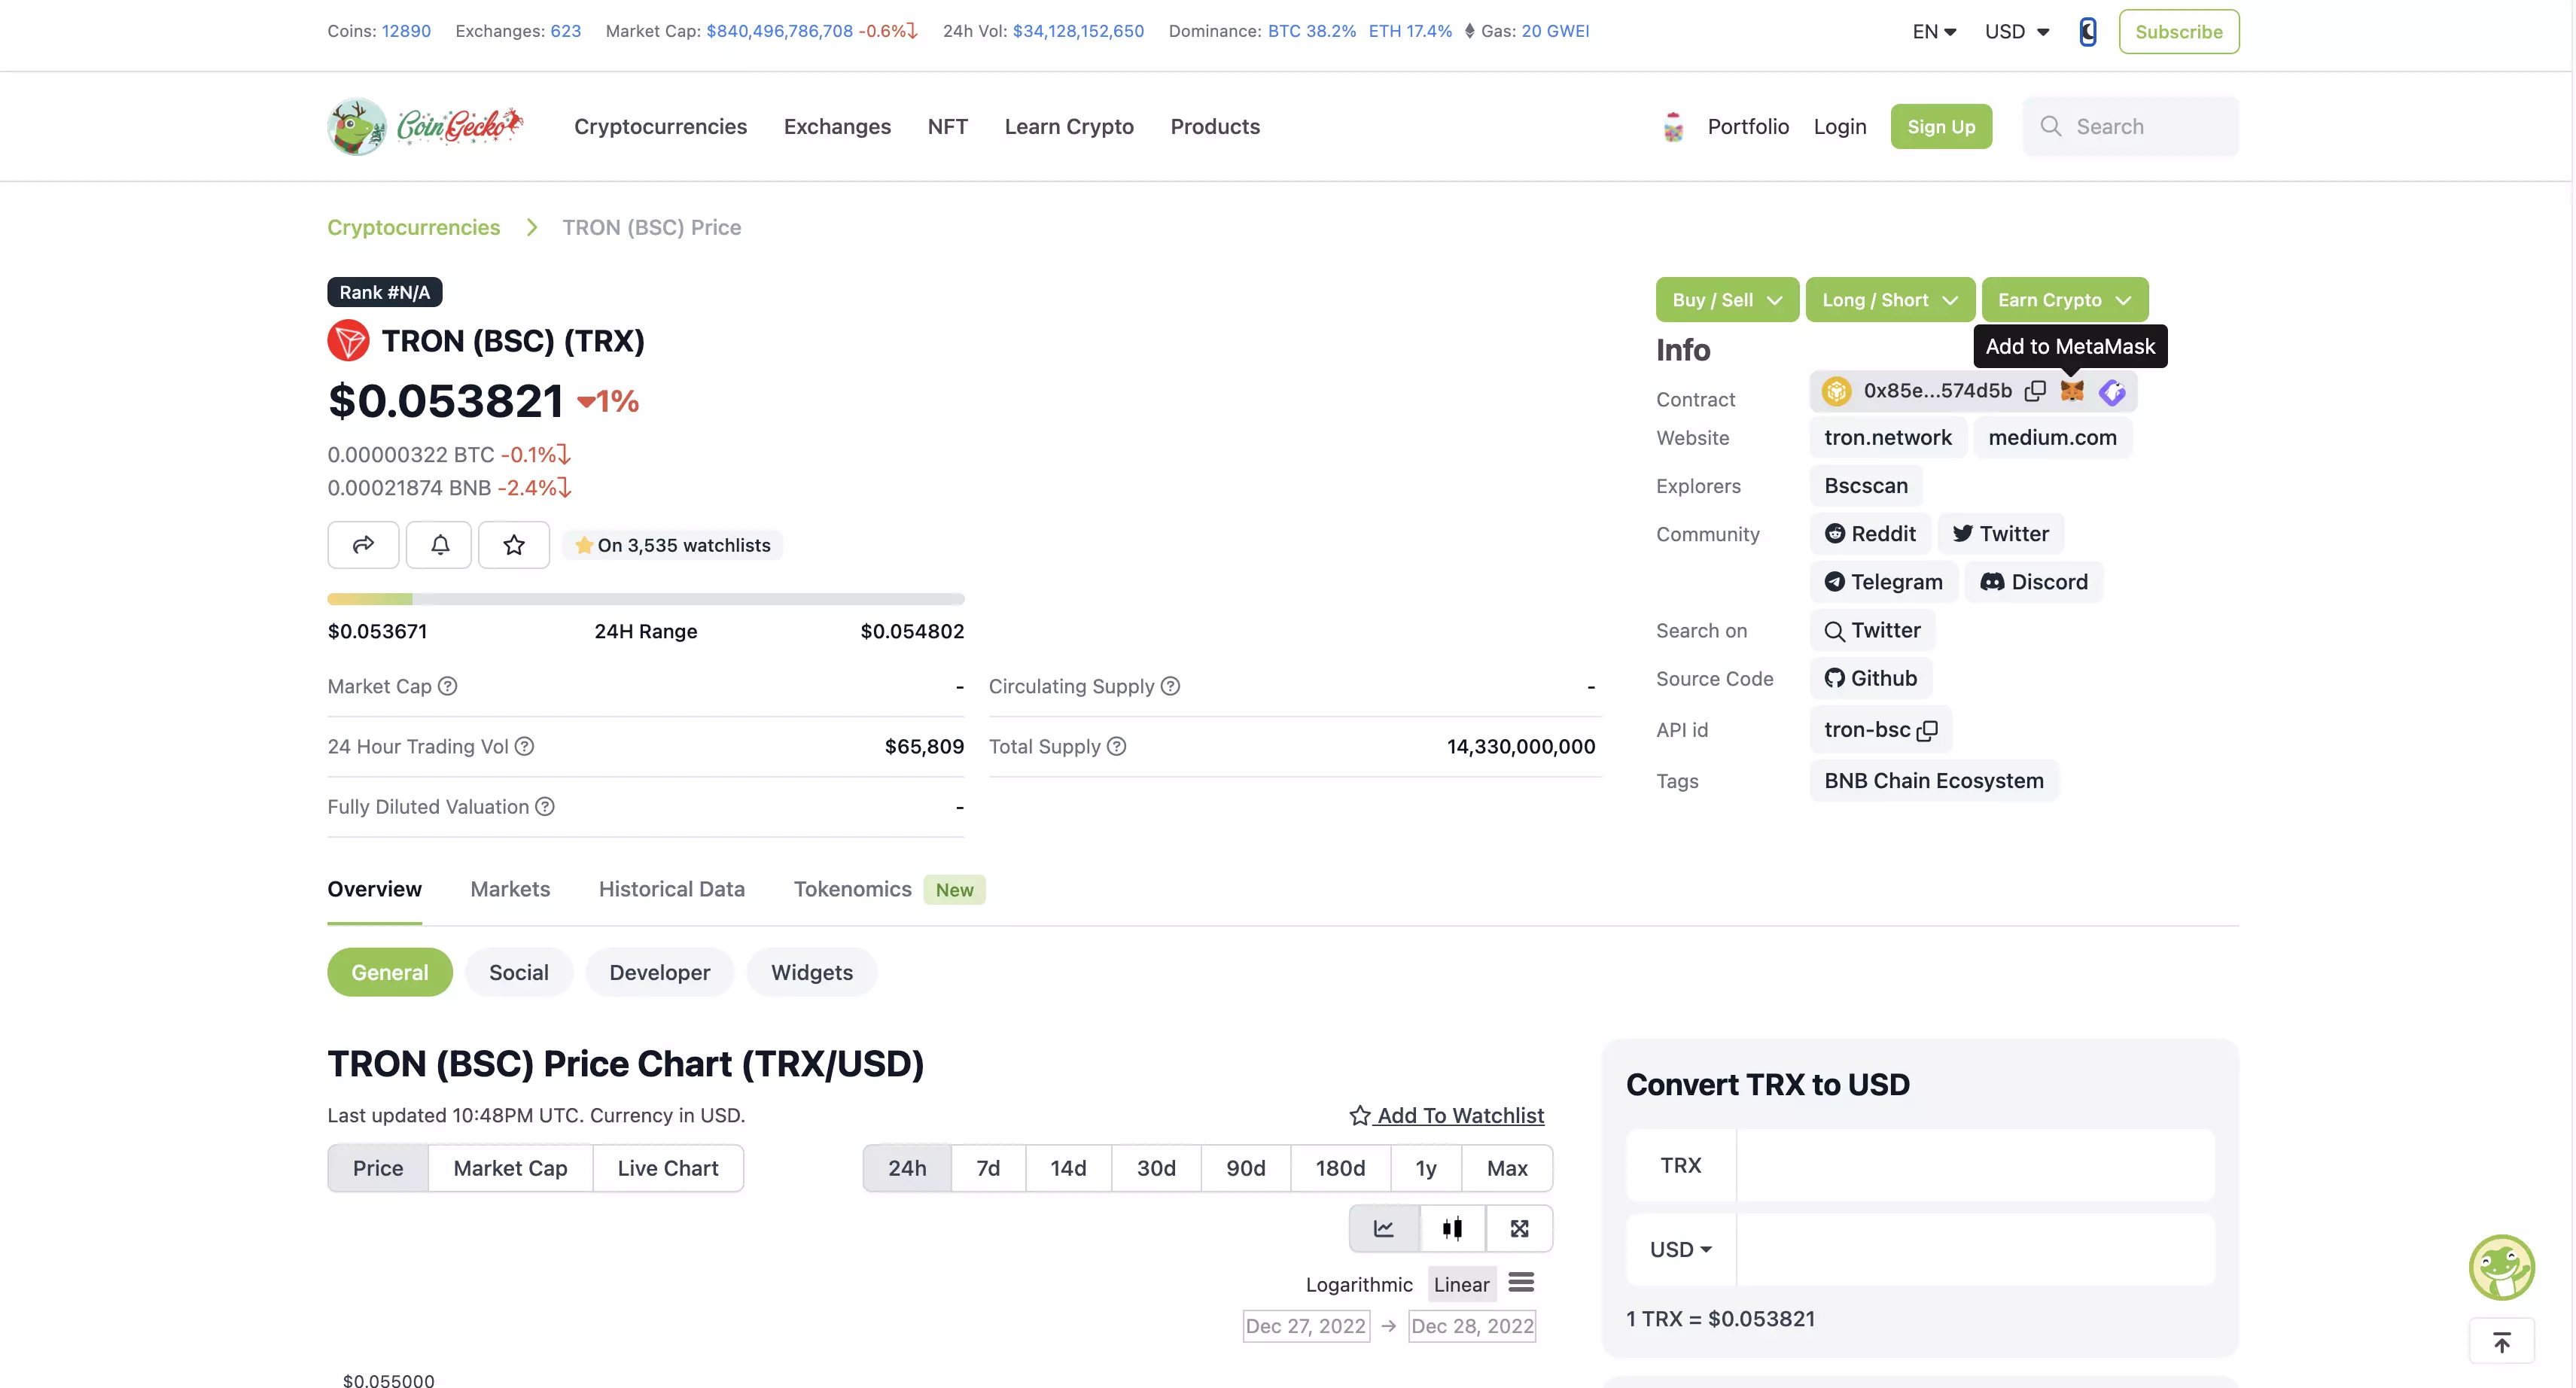
Symbol: TRX
Explorer URL: https://tronscan.org
Step 5: Save and Switch Networks
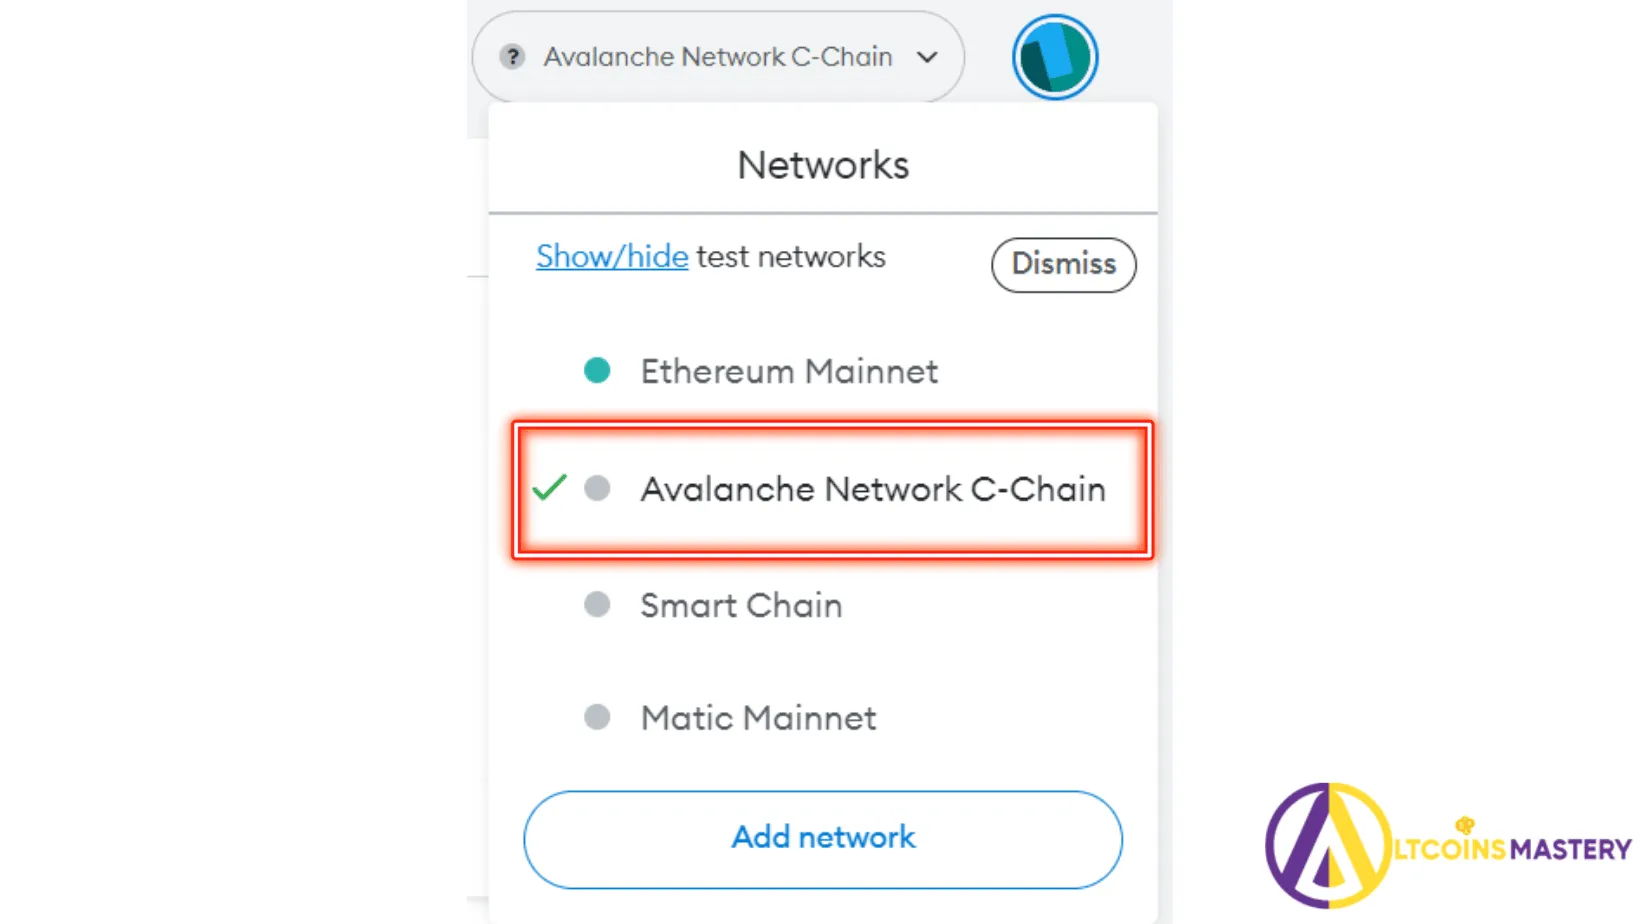
After filling in the Tron network details, click on the “Save” button to add the Tron network to Metamask. You can now switch between Ethereum and Tron networks by clicking on the network dropdown in the Metamask interface and selecting the desired network.
By following these simple steps, you can easily add the Tron network to your Metamask wallet and enjoy seamless integration with both Ethereum and Tron ecosystems. Now you can explore and interact with dApps and tokens on both networks using the same familiar Metamask interface.
Step 1: Install Metamask Extension
To begin the process of adding the Tron Network to your Metamask wallet, you will first need to install the Metamask extension on your browser.
Follow these steps to install Metamask:
- Open the web browser of your choice (Chrome, Firefox, Brave, etc.)
- Go to the official Metamask website or search for “Metamask extension” in your preferred search engine
- Click on the “Get Chrome Extension” or “Install Metamask” button
- A new tab will open, showing the extension in the Chrome Web Store or the Firefox Add-ons website
- Click “Add to Chrome” or “Add to Firefox” to start the installation process
- A pop-up may appear asking for confirmation, click “Add extension” to proceed
- The extension will begin downloading and installing
- Once the installation is complete, the Metamask icon will appear in the top-right corner of your browser
With the Metamask extension successfully installed, you are now ready to move on to the next step of adding the Tron Network to your wallet.
Step-by-step instructions to add Tron Network to Metamask
If you are using Metamask and want to add Tron Network to your wallet, follow these step-by-step instructions:
Step 1: Install and Set Up Metamask
If you haven’t already, install the Metamask extension for your browser and create a new wallet or import an existing one.
Step 2: Open Metamask and Go to Network Settings
Once Metamask is installed, open the extension and click on the network selector at the top of the window. Then, click on “Custom RPC” to add a custom network.
Step 3: Add Tron Network Details
In the “New Network” form, enter the following details to add Tron Network:
Network Name: Tron Network
New RPC URL: https://api.trongrid.io
Chain ID: 1
Symbol: TRX
Block Explorer URL: https://tronscan.org
Step 4: Save and Switch to Tron Network
Click on the “Save” button to save the Tron Network settings. Then, click on the network selector again and select “Tron Network” from the dropdown menu to switch to the Tron Network.
Note: Before interacting with Tron Network, make sure you have some TRX tokens in your Metamask wallet.
Congratulations! You have successfully added Tron Network to Metamask. Now, you can explore and interact with Tron decentralized applications and manage your TRX tokens using Metamask.
Step 2: Create a New Tron Wallet
Once you have successfully added the Tron Network to your Metamask wallet, the next step is to create a new Tron wallet.
To create a new Tron wallet, follow the steps below:
- Open Metamask in your browser and click on the account icon located at the top right corner of the screen. This will open the account menu.
- From the account menu, click on “Create Account”.
- A popup will appear asking you to set a password for your new Tron wallet. Enter a strong password that you can remember and click on “Create”.
- After creating your password, Metamask will generate a new Tron wallet for you. You will be provided with a 12-word seed phrase. It is important to write down this seed phrase and keep it in a safe place as it will be needed to access your wallet in case you forget your password or need to recover your wallet.
- Once you have written down your seed phrase, click on “I’ve copied it somewhere safe”.
- Congratulations! You have successfully created a new Tron wallet using Metamask. You can now use this wallet to interact with the Tron Network and perform various transactions.
Remember to never share your seed phrase or private key with anyone and keep it confidential to ensure the security of your funds.
Learn how to create a Tron wallet on Metamask
If you want to interact with the Tron network using Metamask, you’ll need to create a Tron wallet first. Follow these steps to create your Tron wallet on Metamask:
Step 1: Install Metamask
If you haven’t already, install the Metamask extension for your web browser. Metamask is available for Chrome, Firefox, Brave, and Edge.
Step 2: Set up an Ethereum wallet
Once Metamask is installed, launch it and set up an Ethereum wallet. This wallet will be used to store your Tron wallet as well.
Step 3: Add Tron network to Metamask
In the Metamask interface, click on the network selector at the top of the screen and choose “Custom RPC” from the dropdown menu.
In the “New RPC URL” field, enter the Tron network endpoint: https://api.trongrid.io/.
Click “Save” to add the Tron network to Metamask.
Step 4: Import Tron wallet
Now that the Tron network is added to Metamask, click on the account avatar at the top right corner and choose “Import Account”.
In the “Private Key” field, enter your Tron wallet’s private key and click “Import”.
Congratulations! You’ve successfully created a Tron wallet on Metamask. You can now start interacting with the Tron network using Metamask!
Step 3: Connect Metamask to Tron Network
Now that you have added the Tron Network extension to your Metamask wallet, it’s time to connect it to the Tron network.
Follow these steps:
1. Open the Metamask extension in your browser.
2. Click on the Metamask icon at the top right corner of your browser to open the extension.
3. Click on the account icon at the top right corner of the extension and select “Settings” from the dropdown menu.
4. In the settings menu, click on “Networks” from the left sidebar.
5. Click on “Add Network” at the bottom of the networks list.
6. Fill in the following details for the Tron network:
– Network Name: Tron Network
– New RPC URL: https://api.trongrid.io
– Chain ID: 1
– Symbol: TRX
– Block Explorer URL: https://tronscan.org
7. Once you have filled in all the details, click “Save” to add the Tron network to Metamask.
8. You should now see the Tron network listed in your Metamask extension. Make sure it is selected as the current network.
Congratulations! You have successfully connected Metamask to the Tron network. You can now use your Metamask wallet to interact with Tron decentralized applications (dApps) and manage your TRX tokens.
Connect your Metamask wallet to the Tron Network

In order to add the Tron Network to your Metamask wallet and start using TRX, follow the step-by-step instructions below:
Step 1: Make sure you have the latest version of Metamask installed and set up with your Ethereum wallet.
Note: If you don’t have Metamask installed, you can download it from the official website and follow the setup instructions provided.
Step 2: Click on the Metamask extension icon in your browser to open the Metamask wallet.
Step 3: At the top right corner of the Metamask wallet, click on the account icon.
Step 4: From the account dropdown menu, select “Settings”.
Step 5: In the settings menu, scroll down and click on the “Networks” option.
Step 6: Under the Networks section, click on the “Add Network” button.
Step 7: Now, you need to provide the following information to add the Tron Network:
Network Name: Tron
New RPC URL: https://api.trongrid.io
Chain ID: 1
Symbol: TRX
Block Explorer URL: https://tronscan.org
Step 8: After filling in the required details, click on the “Save” button to add the Tron Network to your Metamask wallet.
Step 9: Congratulations! You have successfully connected your Metamask wallet to the Tron Network. You can now send and receive TRX and interact with decentralized applications on the Tron Network.
Note: Make sure to switch to the Tron Network in your Metamask wallet in order to see your TRX balance and perform Tron transactions.
Frequently Asked Questions:
What is Tron Network?
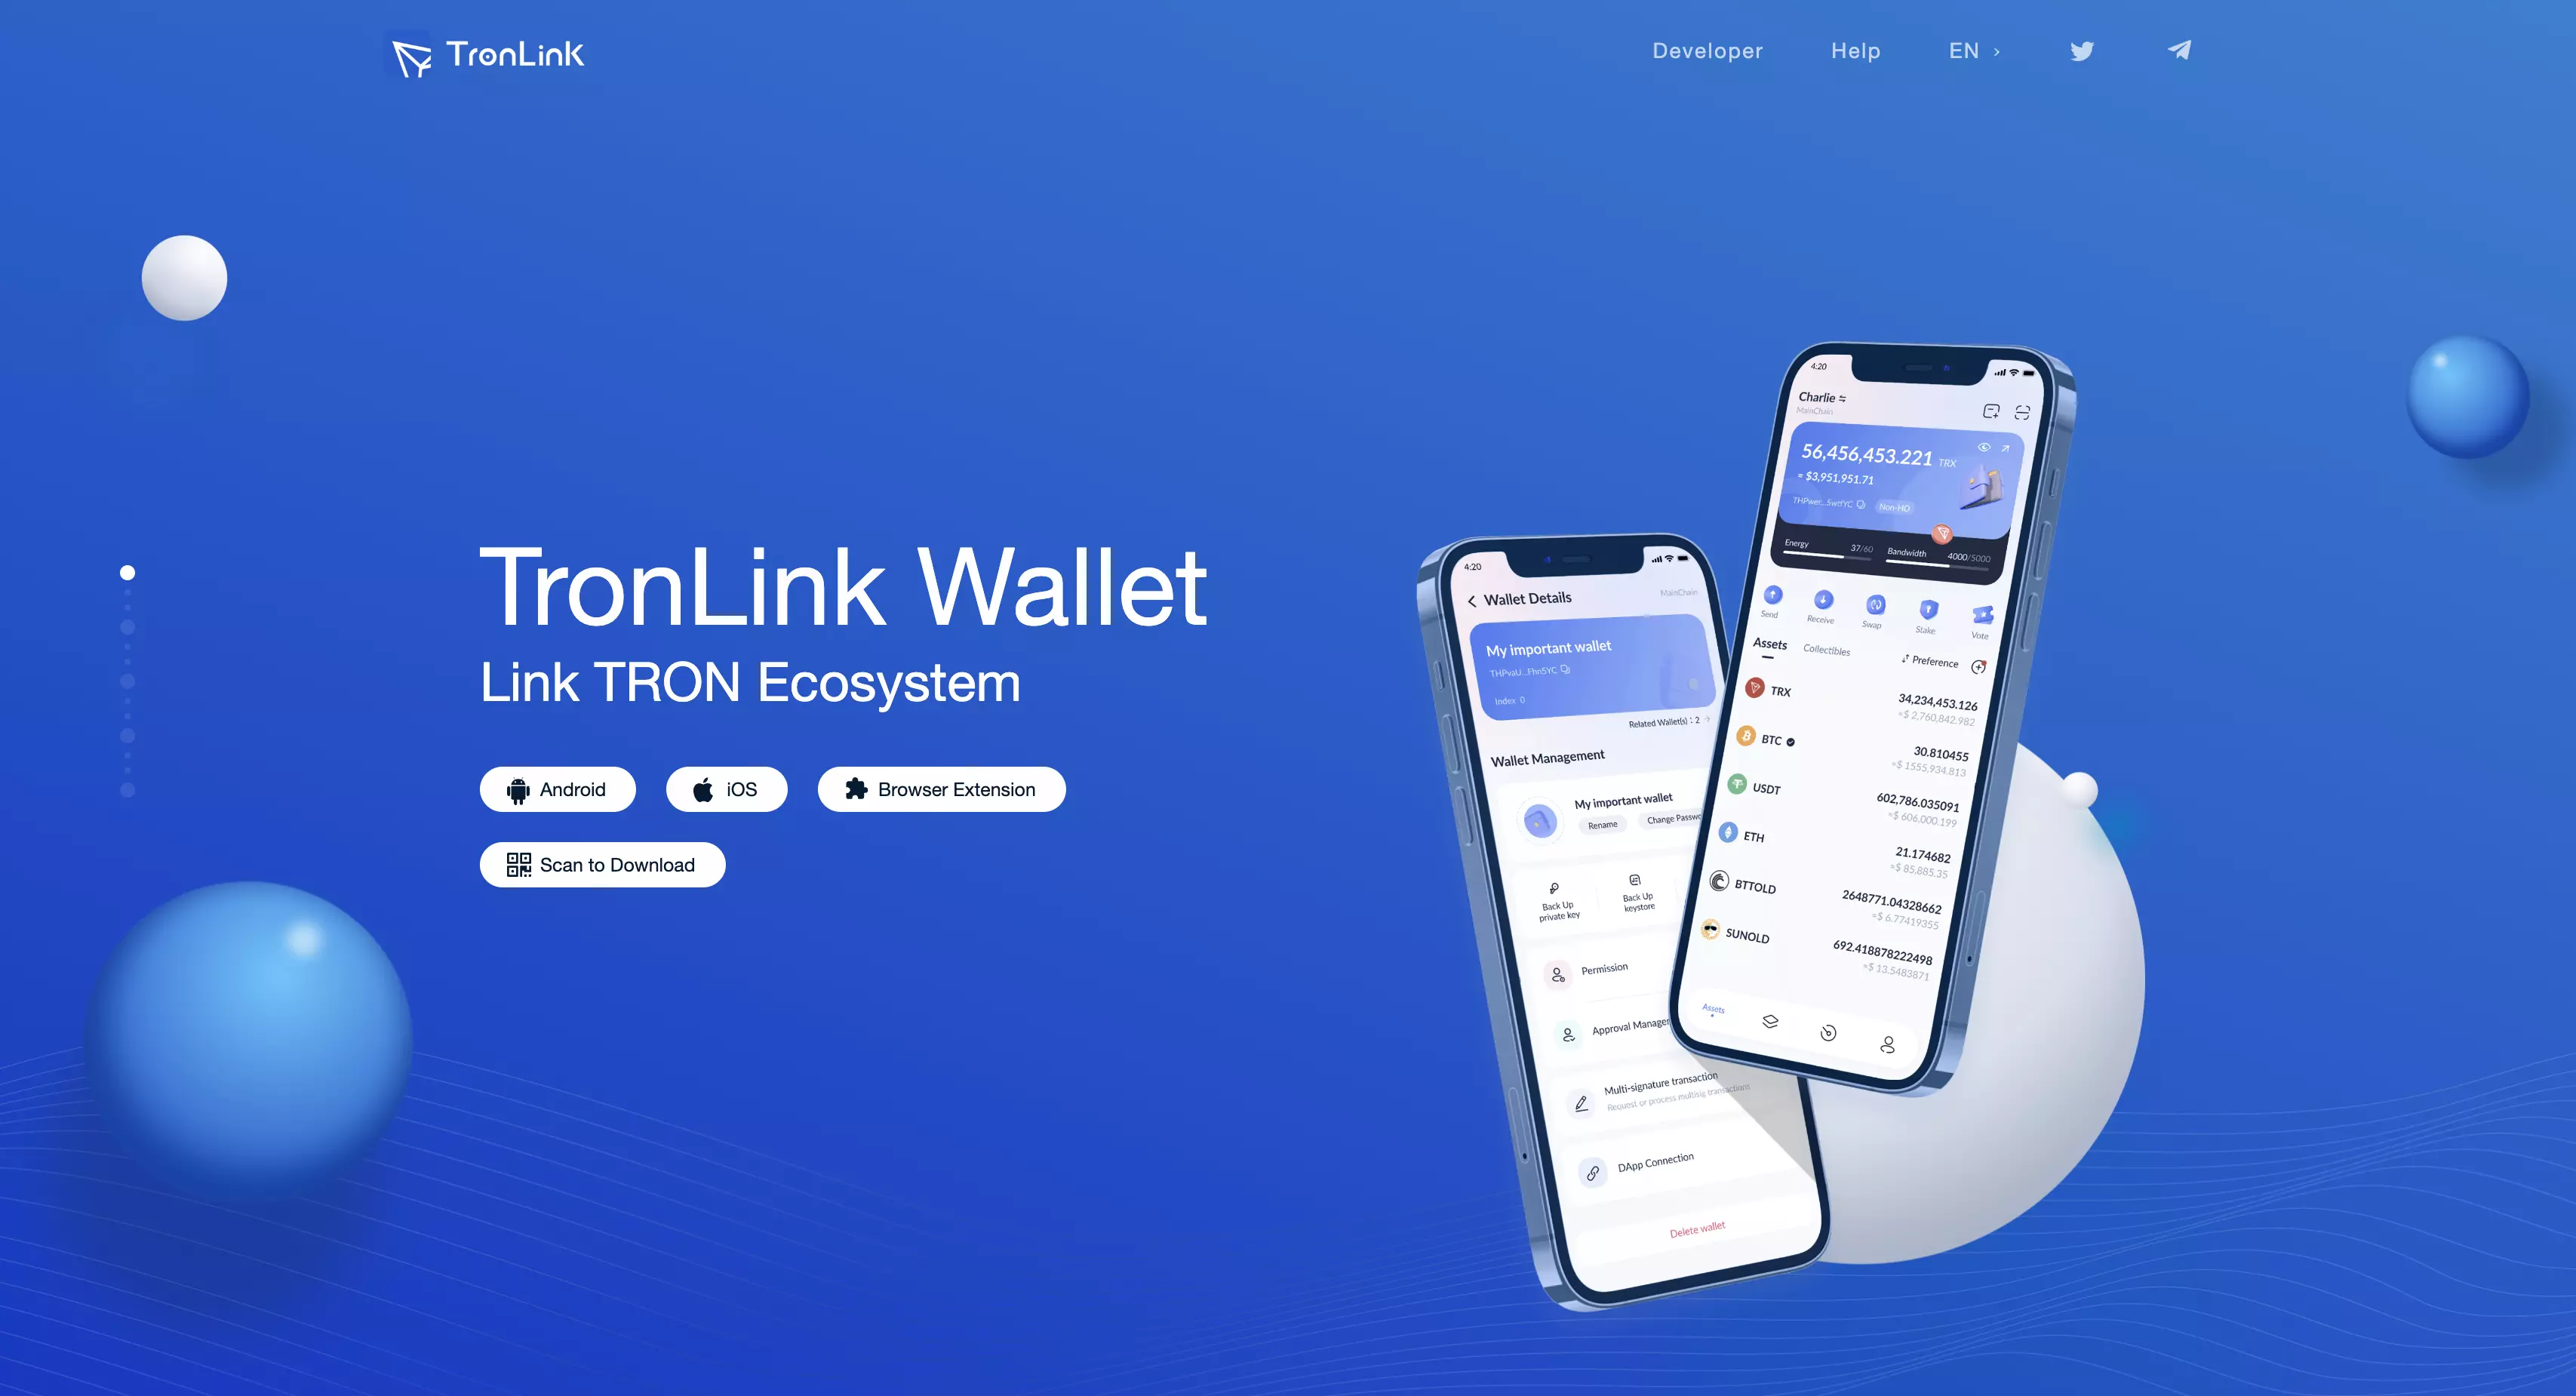
Tron Network is a blockchain-based decentralized platform that aims to build a free, global digital content entertainment system with distributed storage technology, and allows easy and cost-effective sharing of digital content.
Why would I want to add Tron Network to Metamask?
Adding Tron Network to Metamask allows you to access and interact with Tron-based decentralized applications (DApps) and manage your TRX (Tron) tokens directly from Metamask.
Can I use the Tron Network on other wallet applications?
Yes, Tron Network can be used with other wallet applications that support custom RPC networks. However, the steps to add Tron Network may vary depending on the wallet application. It is recommended to refer to the specific documentation or support resources of the wallet application you are using.

+ There are no comments
Add yours