


Welcome to the world of cryptocurrency! If you’ve recently entered the exciting realm of digital currencies and are using MetaMask as your wallet, you might be wondering how to cash out your cryptocurrency and convert it into traditional fiat currency. In this step-by-step guide, we will walk you through the process, helping you navigate the world of cashing out with MetaMask.
Step 1: Ensure Your MetaMask Wallet is Connected
Before you can cash out, it’s crucial to make sure your MetaMask wallet is properly connected. Open your MetaMask extension or mobile app and ensure that you are logged in and connected to the desired network (e.g., Ethereum). This will allow you to access and manage your funds.
Step 2: Choose the Exchange Platform
Next, you’ll need to select a reputable exchange platform where you can convert your cryptocurrency into fiat currency. It’s essential to choose a trusted platform that offers a seamless cash-out process and reasonable fees. Some popular options include Coinbase, Binance, and Kraken. Do your research and compare the platforms before selecting one.
Step 3: Deposit Your Cryptocurrency
Once you’ve chosen an exchange platform, you’ll need to deposit your cryptocurrency into your account. Navigate to the deposit section of the chosen platform and select the cryptocurrency you want to cash out. Copy your wallet address from the exchange platform and then transfer the cryptocurrency from your MetaMask wallet to the exchange platform.
Step 4: Convert Cryptocurrency to Fiat
After your cryptocurrency has been successfully deposited into the exchange platform, you can convert it to fiat currency. Select the trading pair that corresponds to your cryptocurrency and the fiat currency you want to receive. Enter the amount you wish to cash out, review the transaction details, and complete the conversion.
Step 5: Withdraw Your Funds
Once your cryptocurrency has been converted into fiat currency on the exchange platform, it’s time to withdraw your funds. Navigate to the withdrawal section of the platform, enter your bank account details or select another preferred withdrawal method, review the withdrawal details, and initiate the withdrawal process.
Step 6: Verify and Wait
Finally, you may need to go through a verification process to comply with anti-money laundering (AML) and Know Your Customer (KYC) regulations. This may include providing identification documents or completing additional verification steps. Once the verification is complete, you’ll need to wait for the funds to be transferred to your bank account or chosen withdrawal method, which may take some time depending on the platform and your location.
With this step-by-step guide, you’re now equipped with the knowledge to cash out your cryptocurrency using MetaMask. Remember, always exercise caution and double-check all the details before proceeding with any transaction. Happy cashing out!
Setting Up Your MetaMask Wallet
To start using MetaMask, you’ll first need to set up your wallet. Here’s a step-by-step guide to help you get started:
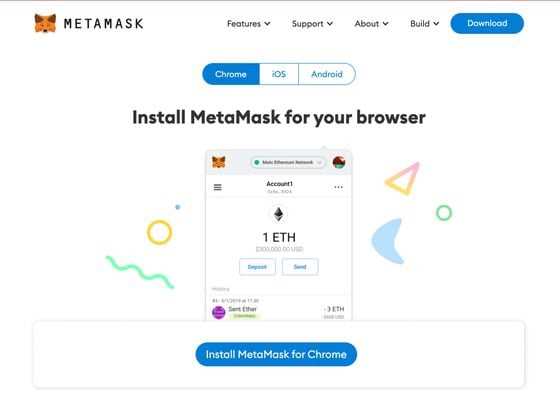
Step 1:
Go to the MetaMask website and click on the “Download” button to install the extension for your web browser.
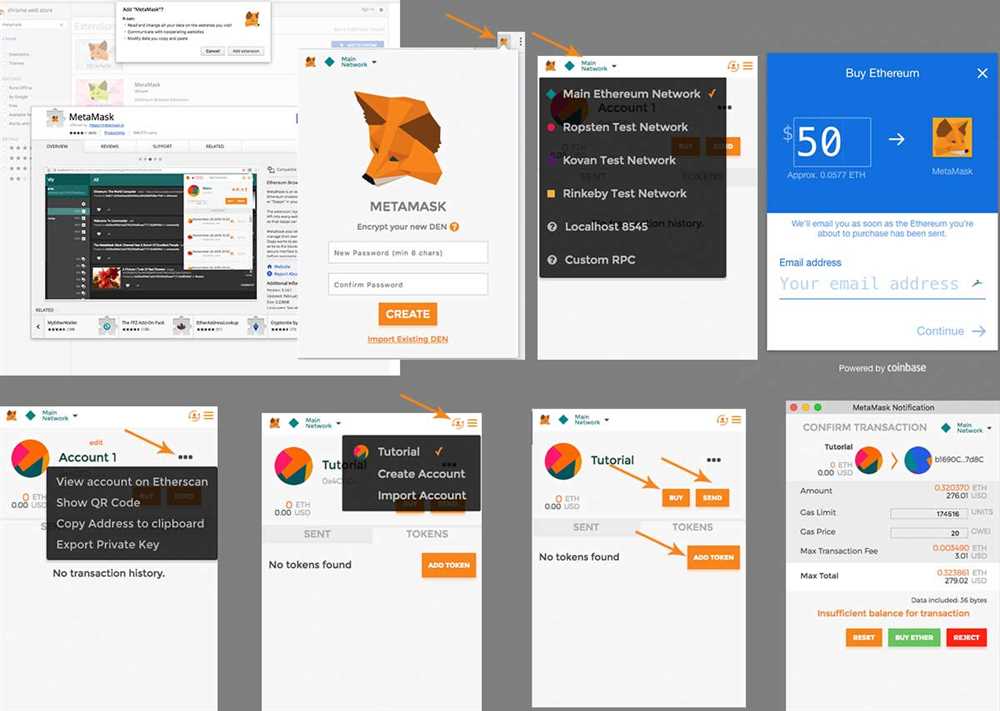
Step 2:
Once the download is complete, click on the MetaMask icon in your browser’s toolbar to open the extension.
Step 3:
Click on the “Get Started” button to create a new wallet.
Step 4:
Read and accept the terms of use, and then click on the “Next” button.
Step 5:
Create a strong password for your wallet. Make sure it’s a combination of uppercase and lowercase letters, numbers, and special characters. Confirm your password and click on the “Create” button.
Step 6:
Back up your secret recovery phrase. This phrase is important as it can be used to recover your wallet in case you forget your password or your device gets lost. Write down the phrase on a piece of paper and keep it in a secure place. Do not share this phrase with anyone as it can be used to access your funds.
Step 7:
Confirm your secret recovery phrase by selecting the words in the correct order. This is a security measure to ensure that you have properly recorded your phrase.
Step 8:
Once you have confirmed your phrase, your wallet will be created. You can now choose to import an existing wallet or add funds to your new wallet.
That’s it! You’ve successfully set up your MetaMask wallet. Now you’re ready to start using it to interact with decentralized applications and manage your digital assets.
Connecting MetaMask to Your Exchange Account
Once you have set up and installed MetaMask on your browser, the next step is to connect it to your exchange account. This will allow you to seamlessly transfer funds between MetaMask and your exchange.
Step 1: Log In to Your Exchange Account
Open your preferred exchange platform and log in to your account using your username and password.
Step 2: Go to Account Settings
Once you are logged in, navigate to the account settings or profile section of the exchange platform. Look for any options related to connecting external wallets or accounts.
Step 3: Select MetaMask as Your Wallet
In the account settings, you should find an option to add or connect a new wallet. Select MetaMask as your preferred wallet.
Step 4: Authorize MetaMask Access
After selecting MetaMask, the exchange platform will prompt you to authorize the connection. Click on the “Authorize” or “Connect” button to grant permission for MetaMask to access your account.
Step 5: Confirm the Connection

Once you have given authorization, the exchange platform will display a confirmation message. Check the details of the connection, such as the wallet address, to ensure it matches your MetaMask account. Click on the “Confirm” or “Accept” button to complete the connection.
Step 6: Enable Funds Transfer
After connecting MetaMask to your exchange account, you may need to enable funds transfer or withdrawals from your exchange wallet. This step is typically done for security reasons, so make sure to follow any additional verification steps required by the exchange platform.
Once you have completed these steps, you have successfully connected MetaMask to your exchange account. Now you can easily transfer funds between MetaMask and your exchange, allowing for seamless buying, selling, and cashing out of cryptocurrencies.
| Tip: | Remember to double-check the authenticity of the exchange platform before connecting your MetaMask wallet. Verify that you are on the official website and look for any security indicators, such as SSL certificates. |
|---|
Cashing Out Your Cryptocurrency with MetaMask
MetaMask is a popular cryptocurrency wallet that allows you to securely store and manage your digital assets. In addition to storing your cryptocurrencies, MetaMask also enables you to easily cash out and convert your tokens into traditional currency. This step-by-step guide will walk you through the process of cashing out your cryptocurrency with MetaMask.
Step 1: Open MetaMask
If you haven’t already done so, download and install the MetaMask extension for your preferred web browser. Once installed, click on the MetaMask icon in your browser’s toolbar to open the wallet.
Step 2: Connect MetaMask to an Exchange
Next, you’ll need to connect your MetaMask wallet to a cryptocurrency exchange that supports cashing out. Some popular exchanges that integrate with MetaMask include Coinbase, Binance, and Kraken.
Step 3: Transfer Your Cryptocurrency

After connecting your MetaMask wallet to an exchange, you’ll need to transfer your desired cryptocurrency from your MetaMask wallet to the exchange. To do this, open MetaMask and select the cryptocurrency you want to cash out. Click on the “Send” button, enter the exchange’s wallet address, and specify the amount you wish to transfer. Confirm the transaction and wait for it to be confirmed on the blockchain.
Step 4: Sell Your Cryptocurrency

Once your cryptocurrency has been successfully transferred to the exchange, you can sell it for traditional currency. Visit the exchange’s trading platform and navigate to the trading pair that corresponds to your cryptocurrency and the currency you want to cash out to. Place a sell order by specifying the amount of cryptocurrency you want to sell and the price at which you want to sell it.
Step 5: Withdraw Your Funds
After your sell order has been executed, you will have traditional currency in your exchange account. To withdraw these funds, navigate to the withdrawal page on the exchange, select your desired withdrawal method (such as bank transfer or PayPal), and enter the relevant details. Follow the instructions to finalize the withdrawal and wait for the funds to be transferred to your chosen account.
Cashing out your cryptocurrency with MetaMask is a straightforward process, but always exercise caution and ensure that you are using trusted exchanges. Keep an eye on transaction fees and market prices to maximize your earnings.
| Step | Description |
|---|---|
| Step 1 | Open MetaMask |
| Step 2 | Connect MetaMask to an Exchange |
| Step 3 | Transfer Your Cryptocurrency |
| Step 4 | Sell Your Cryptocurrency |
| Step 5 | Withdraw Your Funds |
Frequently Asked Questions:
What is MetaMask?
MetaMask is a cryptocurrency wallet that allows users to securely store, manage, and transfer their Ethereum-based tokens. It is a browser extension that can be installed on popular browsers like Chrome, Firefox, and Brave.
What is a gas fee and how do I set it?
A gas fee is a small amount of Ethereum that you need to pay to complete a transaction on the Ethereum network. It is used to incentivize miners to include your transaction in a block. To set a gas fee in MetaMask, you can adjust the “Gas Fee” slider when sending a transaction. Higher gas fees result in faster transaction confirmation, but they can also be more expensive.
+ There are no comments
Add yours