


If you’re new to the world of cryptocurrencies, you may have heard of MetaMask and Coinbase. Both are popular platforms that allow users to manage, store, and trade cryptocurrencies such as Ethereum (ETH). In this step-by-step guide, we will walk you through the process of transferring ETH from your MetaMask wallet to your Coinbase account.
Step 1: Set Up a MetaMask Wallet
Before you can transfer ETH from MetaMask to Coinbase, you need to have a MetaMask wallet. If you haven’t already done so, you can download and install the MetaMask extension for your web browser. Follow the instructions to create a new wallet and securely store your recovery phrase. Once your wallet is set up, you can proceed to the next step.
Step 2: Connect MetaMask to Coinbase
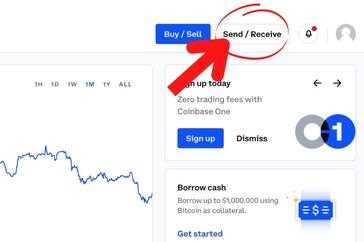
After setting up your MetaMask wallet, you’ll need to connect it to your Coinbase account. Log in to your Coinbase account and navigate to the “Accounts” section. Select your Ethereum wallet and click on the “Receive” button. You will see an option to connect a wallet. Click on this option and choose MetaMask from the list of available wallets. Approve the connection in MetaMask, and you’re ready to proceed.
Step 3: Transfer ETH from MetaMask to Coinbase
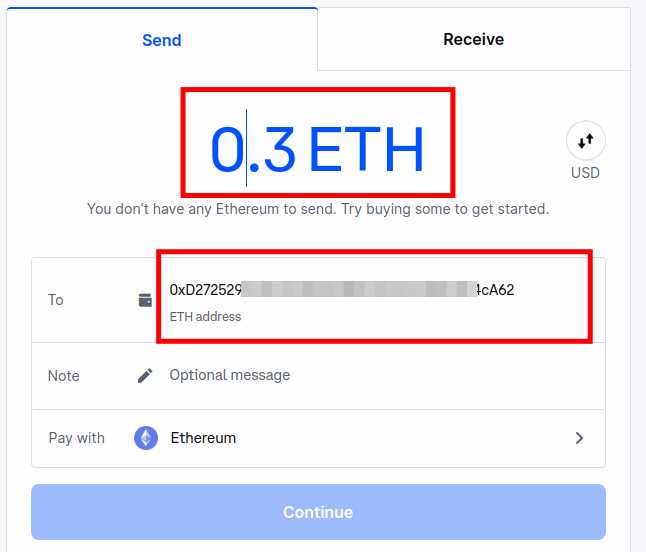
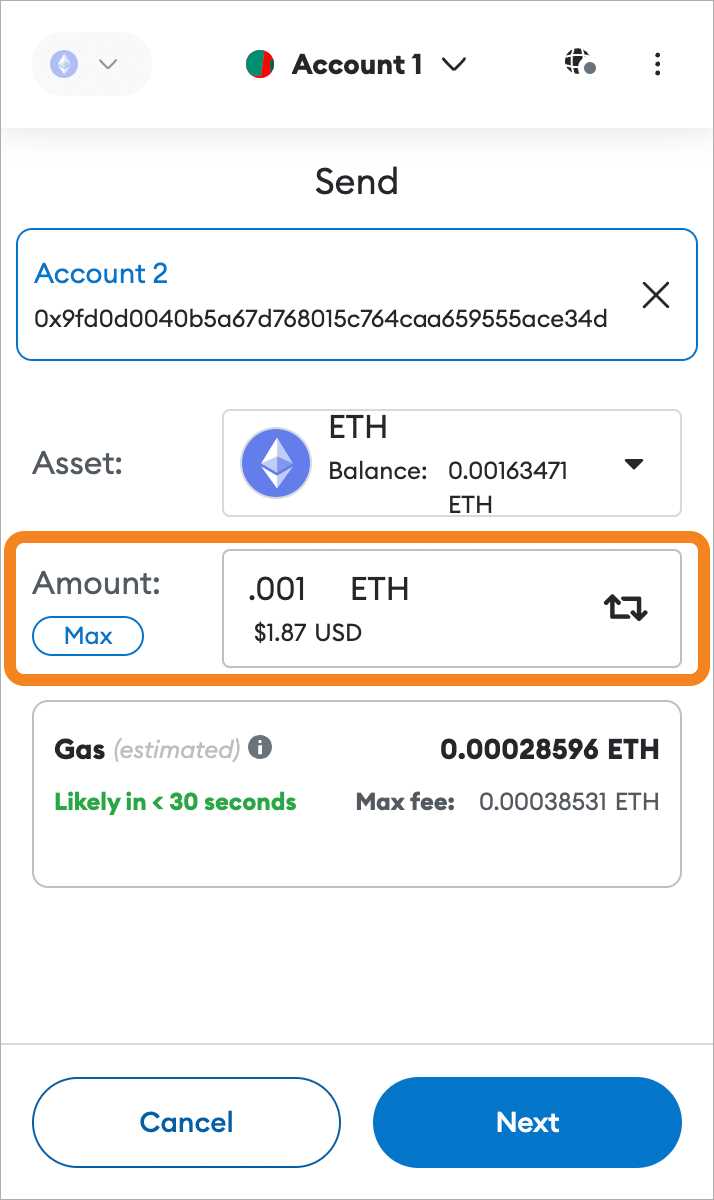
Now that your MetaMask wallet is connected to Coinbase, you can transfer ETH between the two platforms. In your MetaMask wallet, click on the “Send” button. Enter your Coinbase ETH wallet address as the recipient address and the amount of ETH you want to transfer. Double-check all the details, including the transaction fee, and click on “Confirm” to initiate the transfer. The transaction will be broadcasted to the Ethereum network, and you can monitor its progress on both MetaMask and Coinbase.
Step 4: Confirm the Transfer
Once the transaction is confirmed on the Ethereum network, you will see the transferred ETH reflected in your Coinbase account. Depending on network congestion, this process may take a few minutes or longer. You can verify the status of the transaction by checking the transaction hash on an Ethereum blockchain explorer.
Transferring ETH from MetaMask to Coinbase is a straightforward process that allows you to consolidate your funds or take advantage of Coinbase’s trading features. By following this step-by-step guide, you can confidently move your ETH between the two platforms.
Step-by-Step Guide: Transferring ETH from Metamask to Coinbase
Transferring your Ethereum (ETH) from Metamask to Coinbase is a straightforward process. Follow the steps below to complete the transfer:
Step 1: Open your Metamask wallet and ensure that you have enough ETH available to send to your Coinbase account.
Step 2: If you haven’t connected your Metamask wallet to Coinbase yet, go to the Coinbase website and log in to your account. From the main dashboard, click on the “Portfolio” tab.
Step 3: Scroll down to find the Ethereum section and click on “Receive.” This will generate your Coinbase ETH wallet address.
Step 4: Copy the generated wallet address to your clipboard.
Step 5: Go back to your Metamask wallet and click on the “Send” button.
Step 6: Paste the Coinbase wallet address (from your clipboard) into the “Recipient Address” field.
Step 7: Enter the amount of ETH you want to transfer to Coinbase. Double-check the amount to ensure accuracy.
Step 8: Adjust the gas fees according to your preference. Higher fees will result in faster transactions.
Step 9: Review the transaction details and ensure everything is correct.
Step 10: Click on the “Confirm” button to initiate the transfer.
It may take some time for the transaction to be processed and confirmed on the Ethereum network. You can track the progress of the transfer by using a blockchain explorer like Etherscan.
Once the transaction is confirmed, you will see the ETH balance reflected in your Coinbase account. You can now use your ETH on Coinbase for trading, investing, or any other purposes supported by the platform.
Note: Always double-check the wallet address before initiating any transaction to avoid any potential loss of funds.
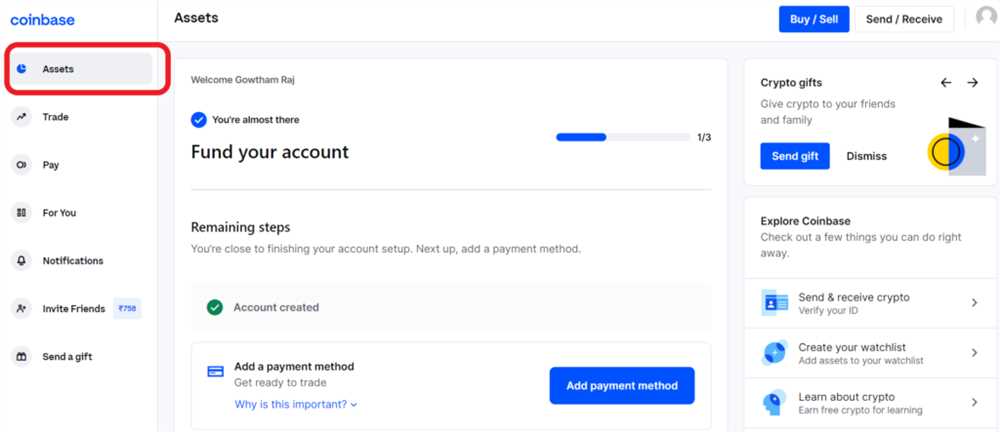
Creating a Coinbase Account
Before you can transfer your ETH from Metamask to Coinbase, you need to have a Coinbase account. Here are the steps to create an account:
Step 1: Visit the Coinbase website
Open a web browser and visit the Coinbase website at www.coinbase.com.
Step 2: Sign up
Click on the “Sign Up” button located at the top right corner of the website.
Next, you will be prompted to provide your email address and create a password for your account. Make sure to choose a strong password that includes a combination of letters, numbers, and special characters to protect your account.
Step 3: Verify your email address
After signing up, Coinbase will send a verification email to the address you provided. Check your email inbox and click on the verification link to confirm your email address.
If you don’t see the email, make sure to check your spam or junk folder.
Step 4: Complete your account setup
Once you have verified your email address, you will be redirected back to Coinbase. Complete the remaining steps to set up your account, which may include providing personal information, such as your full name, date of birth, and phone number. Coinbase is required to collect this information for regulatory purposes.
Make sure to review and accept Coinbase’s terms of service and privacy policy before proceeding.
Step 5: Secure your account
It is essential to secure your Coinbase account to protect your funds. Coinbase offers several security features, such as two-factor authentication (2FA) and the ability to use a hardware wallet.
We highly recommend enabling 2FA, which adds an extra layer of security to your account. You can choose between text message or authentication app-based 2FA.
Additionally, consider enabling withdrawal whitelisting, which requires you to approve any withdrawal requests via email.
With these security measures in place, your Coinbase account will be better protected from unauthorized access.
Once your Coinbase account setup is complete, you can proceed with transferring your ETH from Metamask to Coinbase.
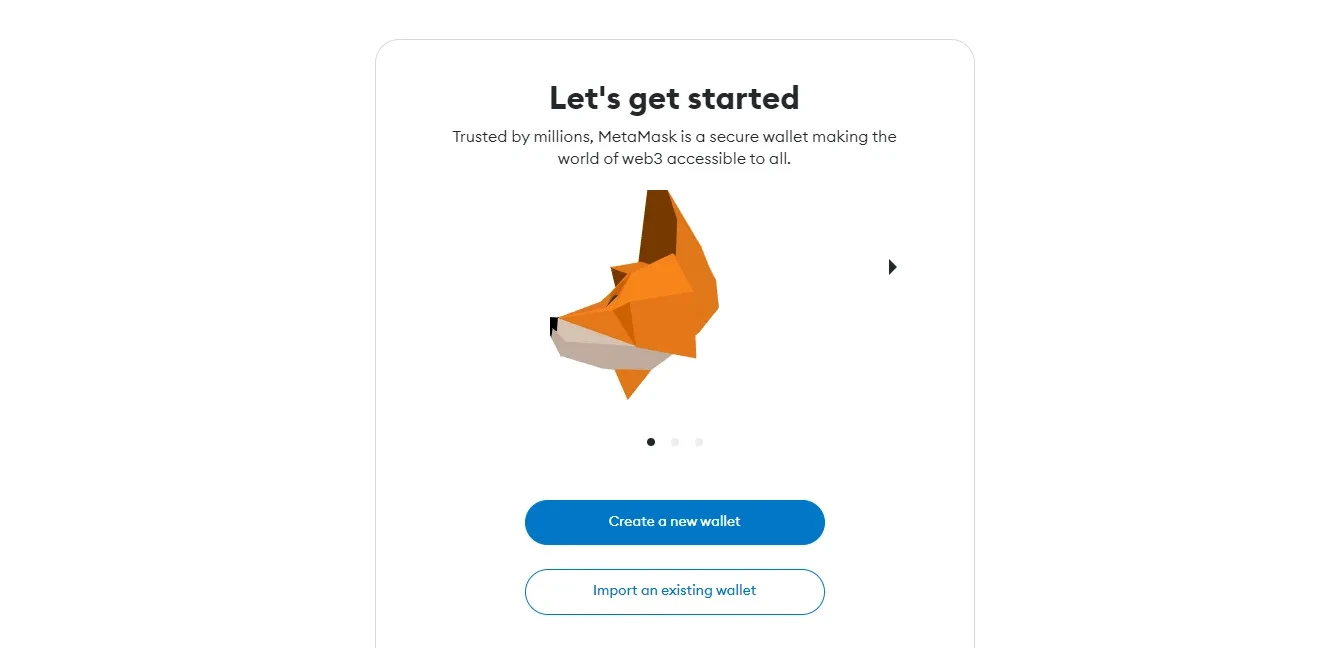
Installing and Setting Up Metamask
Step 1: Go to the official Metamask website and download the extension for your preferred browser.
Step 2: Once the extension is downloaded, click on the file to install it.
Step 3: Follow the on-screen prompts to complete the installation process.
Step 4: After the installation is complete, you will see the Metamask icon on your browser’s toolbar.
Step 5: Click on the Metamask icon to open the extension.
Step 6: Click on “Get Started” to create a new Metamask wallet.
Step 7: Read and accept the terms of use and privacy policy.
Step 8: Set up a strong password for your Metamask wallet.
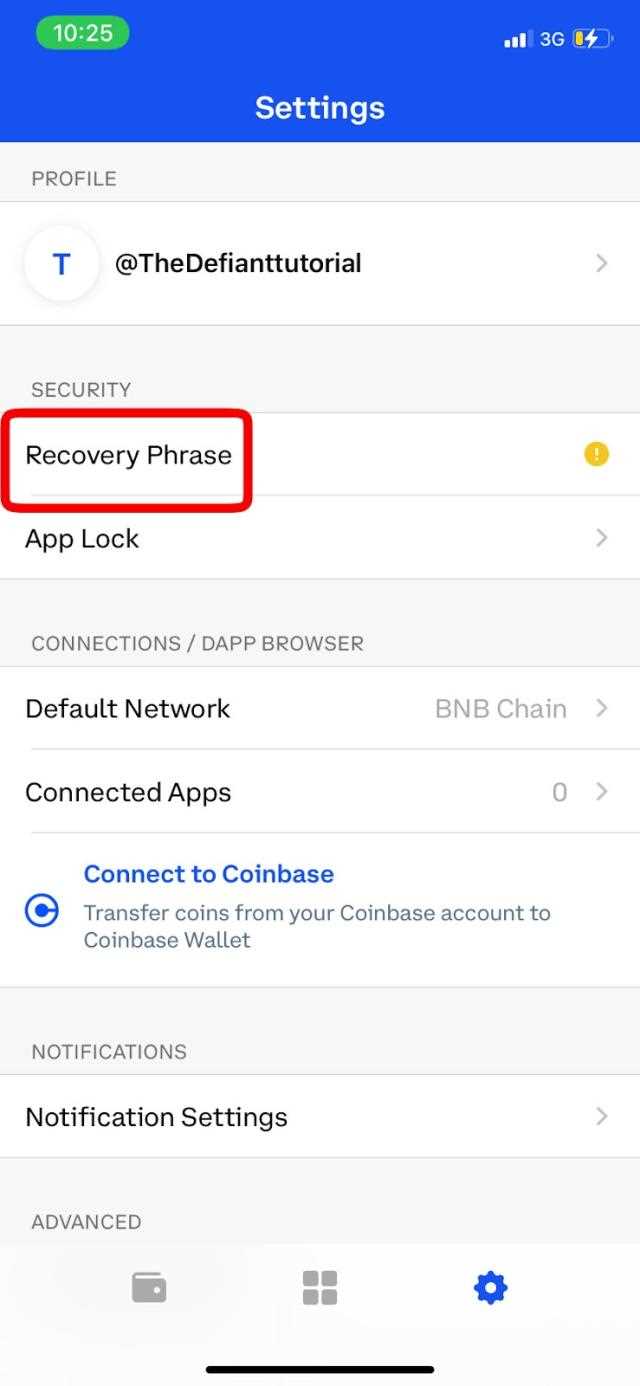
Step 9: In the next step, you will be shown a 12-word seed phrase. Write down this seed phrase and keep it in a safe place. This phrase can be used to restore your wallet in case you lose access to it.
Step 10: Confirm your seed phrase by selecting the words in the correct order.
Step 11: Congratulations! You have successfully installed and set up Metamask. Now you can connect your wallet to Coinbase to transfer ETH.
Connecting Your Metamask Wallet to Coinbase
Before you can transfer your ETH from Metamask to Coinbase, you’ll need to connect your Metamask wallet to your Coinbase account. Here’s how you can do it:
Step 1: Open Coinbase and log in
Go to the Coinbase website and log in to your account using your credentials.
Step 2: Navigate to “Settings”
Once you’re logged in, navigate to the “Settings” tab. This can usually be found by clicking on your profile icon in the top right corner of the site.
Step 3: Click on “Connected Accounts”
In the “Settings” menu, locate the “Connected Accounts” section and click on it.
Step 4: Click on “Connect Wallet”
In the “Connected Accounts” section, you’ll see a list of supported wallets. Find the Metamask logo and click on the “Connect Wallet” button next to it.
Step 5: Authorize the connection
A pop-up window will appear asking for your permission to connect your Metamask wallet to Coinbase. Confirm the connection by clicking on the “Connect” button.
Once the connection is established, you’ll be able to see your Metamask wallet listed under the “Connected Accounts” section in your Coinbase settings.
Now that your Metamask wallet is connected to Coinbase, you can proceed to transfer your ETH from Metamask to Coinbase following the step-by-step guide.
Transferring ETH from Metamask to Coinbase
If you have Ethereum (ETH) stored in your Metamask wallet and you want to transfer it to your Coinbase account, you can follow the step-by-step guide below:
Step 1: Open Coinbase and Sign In
Go to the Coinbase website and sign in to your account using your credentials. If you don’t have a Coinbase account, you will need to create one before proceeding.
Step 2: Navigate to Your Ethereum Wallet
Once you’re signed in, navigate to your Coinbase account and find the Ethereum wallet. Click on it to access the wallet details.
Step 3: Obtain Your Coinbase Ethereum Address
In the Ethereum wallet details, you will find your unique Ethereum address. This address is what you will need to transfer your ETH from Metamask.
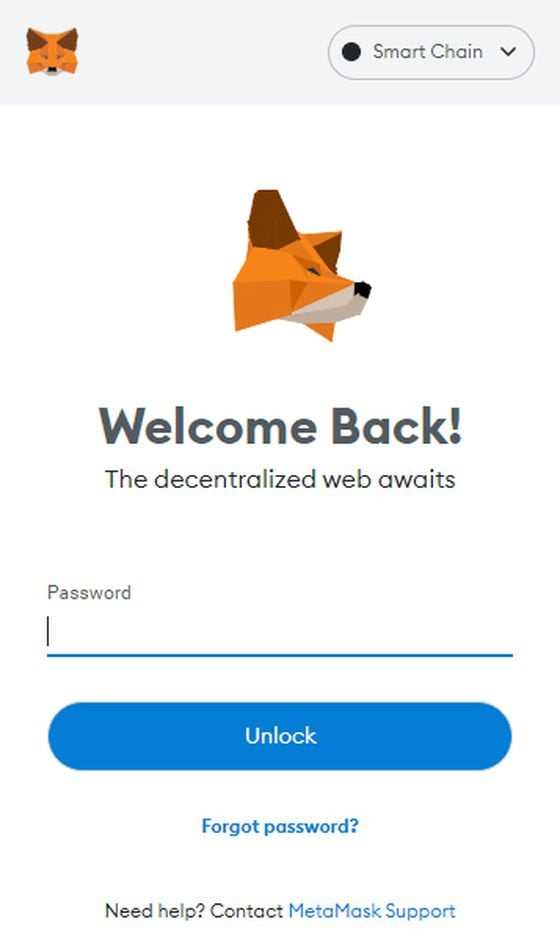
Step 4: Open Metamask and Sign In
Open the Metamask browser extension and sign in to your account using your credentials.
Step 5: Select the ETH Wallet
In the Metamask extension, select the Ethereum wallet that contains the ETH you want to transfer. Make sure you have enough funds in this wallet for the transfer.
Step 6: Click on the “Send” Button
In the Ethereum wallet, look for the “Send” button and click on it to initiate the transfer process.
Step 7: Fill in the Transfer Details
In the transfer form, enter the recipient address, which is your Coinbase Ethereum address obtained in Step 3. Also, enter the amount of ETH you want to transfer.
Step 8: Confirm the Transfer
After verifying the recipient address and the amount, click on the “Confirm” button to proceed with the transfer.
Step 9: Wait for Confirmation
Once the transfer is initiated, you will need to wait for the Ethereum network to process the transaction. This may take a few minutes or longer, depending on network congestion.
Step 10: Check Your Coinbase Account
After the transfer is confirmed on the Ethereum network, you can check your Coinbase account to see if the ETH has been successfully transferred. It should appear in your Ethereum wallet balance.
That’s it! You have successfully transferred Ethereum from your Metamask wallet to your Coinbase account.
Frequently Asked Questions:
What is Metamask?
Metamask is a browser extension wallet that allows you to interact with the Ethereum blockchain. It enables users to securely store, send, and receive Ether (ETH) and ERC-20 tokens.
How do I transfer ETH from Metamask to Coinbase?
To transfer ETH from Metamask to Coinbase, you need to open your Coinbase account and find your Ethereum wallet address. Then, from your Metamask wallet, click on the “Send” button, paste the Coinbase address, choose the amount of ETH you want to transfer, and click on “Next” to confirm the transaction. Make sure to review the details and gas fees before proceeding.
Can I transfer other cryptocurrencies from Metamask to Coinbase?
No, you cannot transfer other cryptocurrencies directly from Metamask to Coinbase. Coinbase supports a limited number of cryptocurrencies, so you will need to convert your other cryptocurrencies to ETH or one of the supported assets before transferring them to Coinbase.
What are gas fees and how much should I pay?
Gas fees are the costs associated with executing transactions on the Ethereum blockchain. The amount you should pay depends on the current network congestion and the speed at which you want your transaction to be processed. You can adjust the gas fees in Metamask to prioritize speed or cost-effectiveness.
What happens if I send ETH to the wrong address?
If you send ETH to the wrong address, the transaction cannot be reversed. It is crucial to double-check the recipient’s address before confirming the transaction. Verify the address character by character and make sure it is the correct address associated with your Coinbase account.
+ There are no comments
Add yours