


Are you ready to send your Ethereum from Metamask to Coinbase but not sure how to do it? Don’t worry! In this tutorial, we will guide you through the process step by step, making it easy and hassle-free for you.
Step 1: Open Metamask and select your Ethereum wallet. If you don’t have Metamask installed, make sure to download and set it up first. Once you’re in, choose the Ethereum wallet that you want to send funds from.
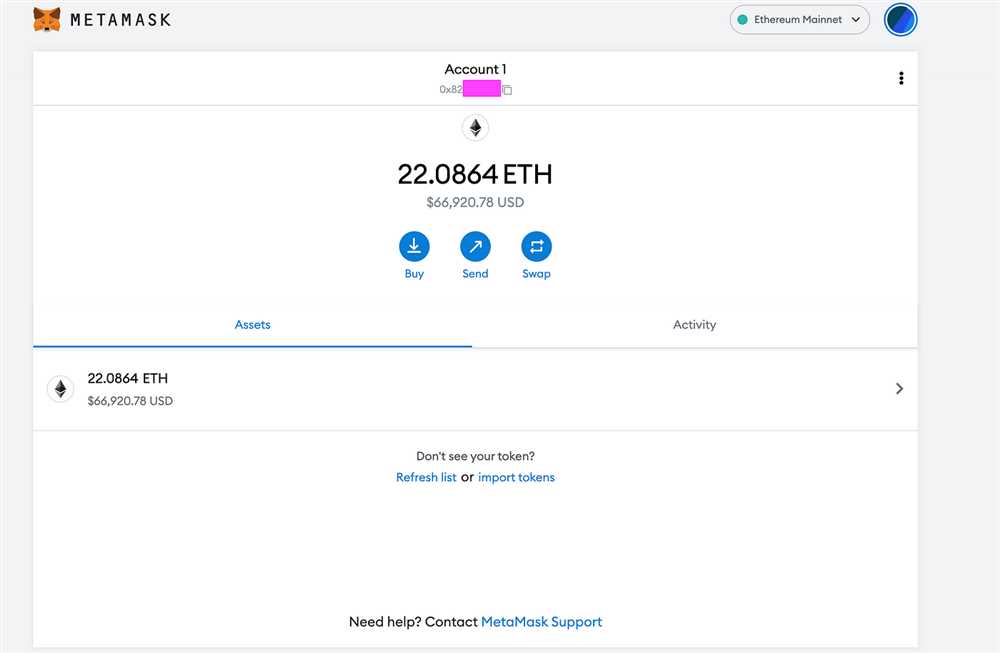
Step 2: Click on the “Send” button. You will find it on the Metamask interface. This will open up a new window where you can enter the recipient’s address, which will be your Coinbase Ethereum wallet address.
Step 3: Enter the recipient’s Coinbase Ethereum wallet address. Make sure to double-check the address to avoid any mistakes. Sending cryptocurrencies to the wrong address can result in permanent loss of funds.
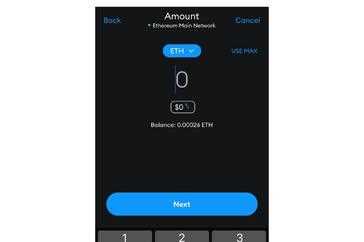
Step 4: Specify the amount of Ethereum you want to send. Enter the exact amount you wish to transfer from your Metamask wallet to Coinbase. Take into account the transaction fees, as they will be deducted from the total amount.
Step 5: Review the transaction details. Make sure all the information is correct before proceeding. Once you’re satisfied with the details, click on the “Confirm” button to initiate the transaction.
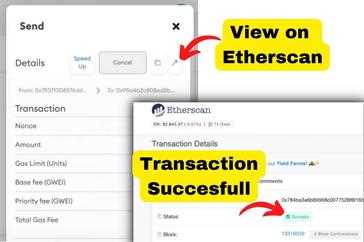
Step 6: Wait for the transaction to be confirmed. This may take a few minutes, depending on the Ethereum network congestion. You can track the progress of your transaction on Metamask or through an Ethereum blockchain explorer.
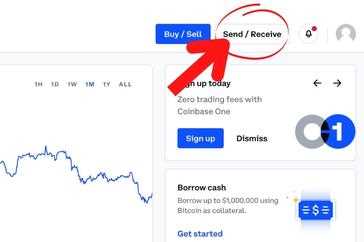
Step 7: Check your Coinbase Ethereum wallet. Once the transaction is confirmed, you should see the transferred Ethereum in your Coinbase wallet. Congratulations! You have successfully sent Ethereum from Metamask to Coinbase.
Remember to always practice caution when sending cryptocurrencies. Ensure that you’re using trusted wallets and double-check all the addresses and transaction details to avoid any mishaps.
Disclaimer: This tutorial is for informational purposes only and should not be considered as financial advice. Always do your own research and consult with a professional advisor before making any investment or financial decisions.
Benefits of Using Metamask with Coinbase
Metamask and Coinbase are two popular platforms used by cryptocurrency enthusiasts. When used together, they offer a seamless experience for sending and receiving Ethereum.
1. Enhanced Security
By using Metamask with Coinbase, you can add an extra layer of security to your transactions. Metamask acts as a digital wallet that stores your private keys locally on your device, ensuring that only you have access to your funds. This eliminates the risk of a centralized exchange getting hacked and your funds being stolen.
2. Convenient and User-Friendly
Metamask provides a user-friendly interface that makes it easy for both beginners and experienced users to interact with the Ethereum blockchain. By integrating it with Coinbase, you can seamlessly manage your assets and move them between platforms without any hassle. The step-by-step tutorial provided ensures that even the most novice users can navigate the process with ease.
Whether you are sending Ethereum to Coinbase for trading or withdrawing it from Coinbase to your Metamask wallet, the integration between the two platforms streamlines the process and saves you valuable time.
Conclusion:
Using Metamask with Coinbase offers numerous benefits for Ethereum users. It enhances security, provides a user-friendly experience, and makes managing your assets more convenient than ever before. Whether you are a beginner or an experienced user, this integration is a valuable tool in your cryptocurrency journey.
Start using Metamask with Coinbase today and experience the convenience and security it offers!
Easy and Secure Connection
At Metamask, we understand the importance of making your Ethereum transactions both easy and secure. With our step-by-step tutorial, you can easily send Ethereum from your Metamask wallet to Coinbase. Here’s how:
| Step 1: | Make sure you have both the Metamask and Coinbase applications installed on your device. |
| Step 2: | Open the Metamask application and log in to your wallet using your secure passphrase. |
| Step 3: | In the Metamask interface, select the Ethereum account from which you want to send funds. |
| Step 4: | Click on the “Send” button in the Metamask interface to initiate the transaction. |
| Step 5: | Enter the recipient’s wallet address as provided by Coinbase. |
| Step 6: | Specify the amount of Ethereum you want to send and review the transaction details. |
| Step 7: | Confirm the transaction by clicking on the “Send” button in Metamask. |
| Step 8: | Wait for the transaction to be confirmed on the Ethereum network. This may take a few minutes. |
| Step 9: | Once the transaction is confirmed, you will see the Ethereum balance reflected in your Coinbase wallet. |
By following these step-by-step instructions, you can easily and securely send Ethereum from Metamask to Coinbase.
Step-by-Step Tutorial
In this step-by-step tutorial, we will guide you on how to send Ethereum from Metamask to Coinbase easily. Whether you are new to cryptocurrency or an experienced user, our clear and concise instructions will help you navigate through the process seamlessly.
Step 1: Install and Set Up Metamask
If you haven’t already, start by installing the Metamask browser extension and create your account. Metamask is a popular cryptocurrency wallet that allows you to securely store and manage your Ethereum. Once installed, set up your Metamask account by following the provided instructions.
Step 2: Connect Metamask to Coinbase

Next, open your Metamask extension and select the option to connect to Coinbase. This will establish a secure connection between your Metamask wallet and your Coinbase account. Follow the prompts and authorize the connection.
Step 3: Transfer Ethereum from Metamask to Coinbase
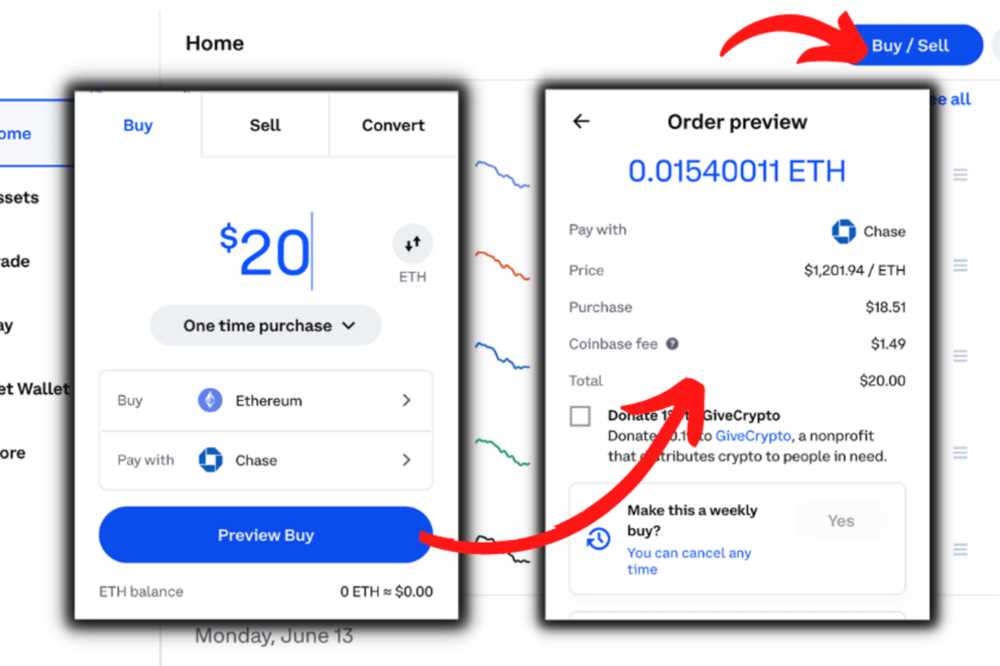
Now that your Metamask and Coinbase accounts are connected, it’s time to transfer your Ethereum. Open your Metamask wallet and navigate to the “Send” or “Transfer” section. Enter your Coinbase Ethereum wallet address as the recipient and specify the amount you wish to send. Double-check all the details and confirm the transaction.
It may take a few minutes for the transaction to be completed and reflected in your Coinbase account. Once the transfer is successful, you can use your Ethereum on Coinbase to buy, sell, or trade other cryptocurrencies or convert it back to fiat currency.
Congratulations! You have successfully sent Ethereum from Metamask to Coinbase. Remember to keep your wallet and account information secure and regularly update your passwords to ensure the safety of your funds.
For more detailed instructions or troubleshooting tips, refer to the official documentation provided by Metamask and Coinbase.
Sending Ethereum from Metamask to Coinbase
Once you have setup your Ethereum wallet in Metamask and purchased Ethereum, you may want to transfer some of your Ethereum to your Coinbase account. This can be done easily in just a few steps:
Step 1: Login to Metamask
Open the Metamask extension in your browser and enter your password to unlock your wallet.
Step 2: Select the Ethereum Account
From the dropdown menu in Metamask, select the Ethereum account that contains the Ethereum you wish to send to Coinbase.
Step 3: Click on the “Send” Button
In the Metamask interface, click on the “Send” button to initiate the transaction.
Step 4: Enter Coinbase Wallet Address
Enter the wallet address of your Coinbase account in the “Recipient Address” field. Make sure to double-check the address to avoid any errors.
Step 5: Enter the Amount
Specify the amount of Ethereum you want to send to Coinbase in the “Amount” field. You can enter either the value in Ethereum or the equivalent USD amount.
Step 6: Set Gas Fee
Adjust the gas fee according to your preference. Higher gas fees result in faster transaction confirmation but are more expensive.
Step 7: Confirm and Send
Review all the details of the transaction and click on the “Confirm” or “Send” button to complete the transfer.
Once the transaction is confirmed, you can verify the transfer by checking your Coinbase account. The Ethereum should appear in your Coinbase wallet shortly.
It’s important to note that the transfer may take some time depending on the network congestion and gas fee selected. Always double-check the recipient address and the transaction details before confirming the transfer.
| Step | Description |
|---|---|
| Step 1 | Login to Metamask |
| Step 2 | Select the Ethereum Account |
| Step 3 | Click on the “Send” Button |
| Step 4 | Enter Coinbase Wallet Address |
| Step 5 | Enter the Amount |
| Step 6 | Set Gas Fee |
| Step 7 | Confirm and Send |
Frequently Asked Questions:
Can I transfer Ethereum from Metamask to Coinbase?
Yes, you can transfer Ethereum from Metamask to Coinbase. It is a straightforward process that can be done within a few steps.
How do I send Ethereum from Metamask to Coinbase?
Sending Ethereum from Metamask to Coinbase is easy. First, open your Metamask wallet. Then, click on the “Send” button. Next, enter the amount of Ethereum you want to send and the recipient’s Coinbase address. Finally, click on “Send” to complete the transfer.
Is there a fee for transferring Ethereum from Metamask to Coinbase?
Yes, there may be a fee for transferring Ethereum from Metamask to Coinbase. The fee amount depends on the network congestion and gas prices at the time of the transaction. You can check the current gas prices on the Ethereum network to get an idea of the fee.
How long does it take to transfer Ethereum from Metamask to Coinbase?
The time it takes to transfer Ethereum from Metamask to Coinbase can vary. It depends on the network congestion and the gas fee you set for the transaction. Generally, Ethereum transactions are quite fast, and you should see the funds in your Coinbase account within a few minutes to an hour.

+ There are no comments
Add yours