


Welcome to the ultimate beginner’s guide to setting up a Metamask wallet! If you’re new to the world of cryptocurrencies and want a secure and convenient way to manage your Ethereum-based assets, then you’re in the right place. Metamask is a popular wallet that allows you to store, send, and receive Ethereum and other ERC-20 tokens.
Before we dive into the step-by-step process of setting up your Metamask wallet, let’s briefly discuss what exactly it is and why it’s worth considering. Metamask is a browser extension wallet that acts as a bridge between your browser and the Ethereum blockchain. It not only allows you to store and manage your digital assets, but also enables you to interact with decentralized applications (DApps) seamlessly.
Setting up a Metamask wallet is quick and easy. To get started, you’ll need to install the Metamask extension for your preferred browser. Once installed, you’ll be guided through a simple setup process that includes creating a new wallet and securely storing your seed phrase. Your seed phrase is a set of 12 or 24 randomly generated words that acts as a backup for your wallet. It’s crucial to keep this phrase safe and secure, as anyone with access to it can gain control of your funds.
Once your wallet is set up, you can start using Metamask to interact with the Ethereum ecosystem. You can send and receive Ethereum and ERC-20 tokens, view your transaction history, and connect with various DApps. Metamask also provides you with a built-in decentralized exchange, allowing you to swap different tokens directly from your wallet.
Now that you have a basic understanding of Metamask and its features, it’s time to dip your toes into the world of decentralized finance (DeFi), NFTs, and more. With your Metamask wallet, you’ll have the power to explore and participate in the exciting possibilities that the Ethereum blockchain has to offer.
What is Metamask and Why Do You Need It?

Metamask is a cryptocurrency wallet that allows users to securely store, manage, and interact with Ethereum and other decentralized applications (dApps) on the Ethereum blockchain. It is a browser extension that integrates with popular web browsers like Chrome and Firefox, making it easy for users to access and interact with dApps.
Metamask provides users with a unique Ethereum address, which they can use to send and receive ETH and other ERC-20 tokens. It also offers a convenient way to manage multiple wallets and switch between different Ethereum networks, such as the mainnet and various testnets.
Key Features of Metamask:
Secure Wallet: Metamask uses industry-standard encryption and key management techniques to keep your funds safe. It stores private keys locally on your device, and you have full control over your funds.
Browser Integration: Metamask integrates seamlessly with your web browser, allowing you to interact with dApps directly from your browser without the need for any additional software.
Multiple Wallet Support: Metamask allows you to manage multiple wallets and switch between different Ethereum networks. This is useful for developers who need to test their dApps on different networks or for users who want to separate their personal and business transactions.
DApp Interaction: With Metamask, you can interact with decentralized applications on the Ethereum blockchain. This includes activities such as token swaps, participating in token sales (ICOs), and interacting with decentralized finance (DeFi) platforms.
Why Do You Need Metamask?
If you are interested in using Ethereum and decentralized applications, you will need a wallet to store and manage your funds. Metamask provides an easy-to-use and secure solution for accessing the Ethereum ecosystem without the need for a full node or syncing the entire blockchain.
In addition, many dApps require Metamask to interact with them, as it provides a secure way to sign transactions and authorize actions. By installing Metamask, you can seamlessly connect to these dApps and explore the world of decentralized finance, decentralized exchanges, gaming, and more.
| Pros | Cons |
|---|---|
| Easy-to-use interface | Relies on browser extension security |
| Secure local key storage | No built-in hardware wallet support |
| Ability to manage multiple wallets | Limited to Ethereum and ERC-20 tokens |
Step-by-Step Guide to Setting Up Your Metamask Wallet
Setting up your Metamask wallet is a vital step towards accessing the world of blockchain and decentralized applications. Follow this step-by-step guide to get your wallet up and running in no time.
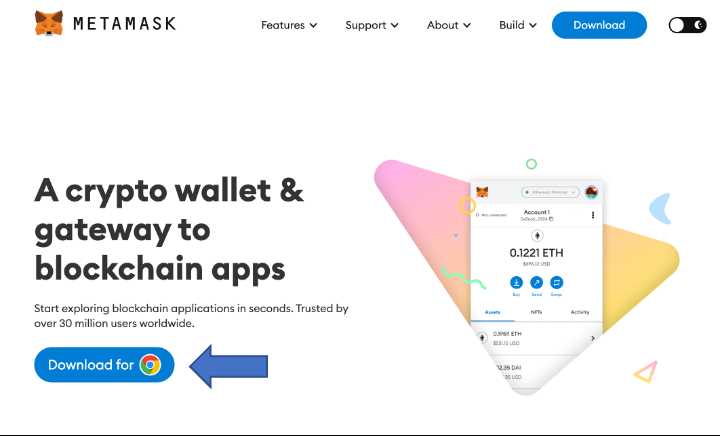
1. Install Metamask Extension
Start by installing the Metamask extension for your preferred web browser. Metamask is compatible with Chrome, Firefox, Brave, and Edge. Simply search for “Metamask” in your browser’s extension store and click on the “Add to Chrome” (or equivalent) button.
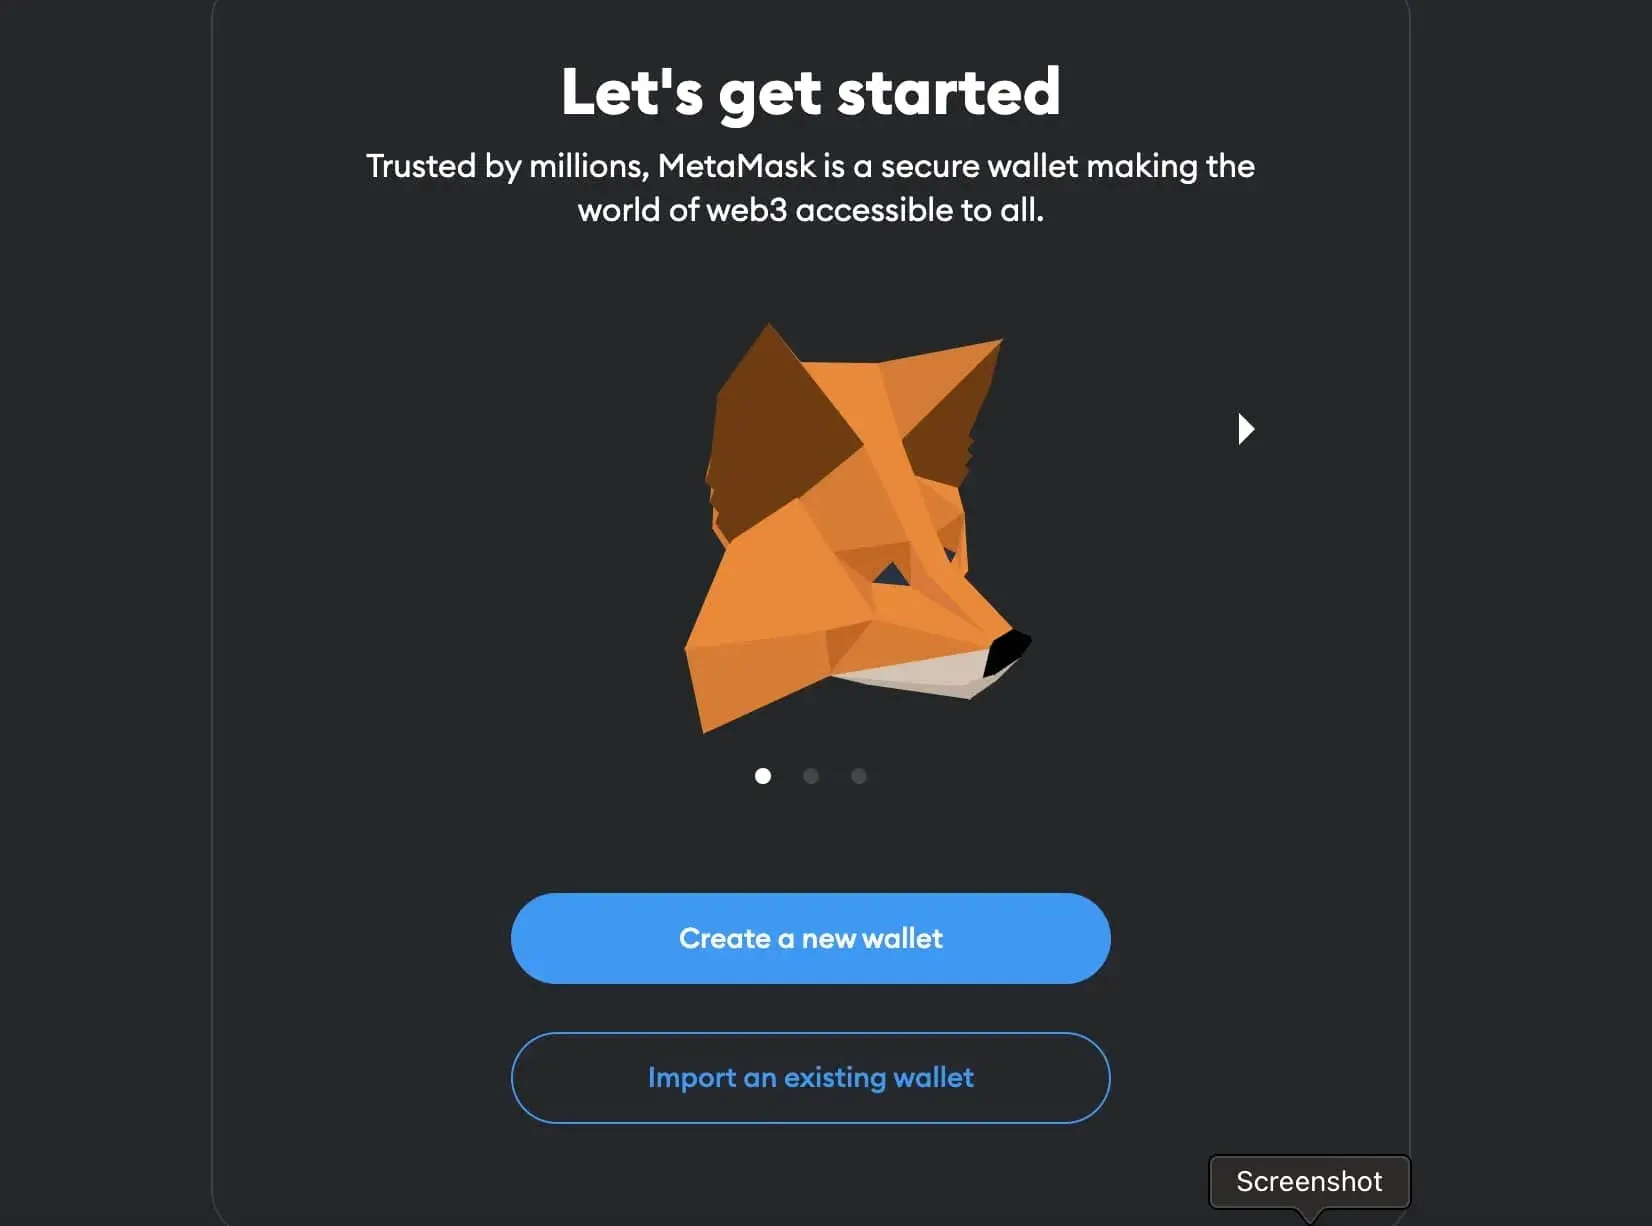
2. Create a New Wallet
Once the extension is installed, click on the Metamask icon in your browser’s toolbar and select “Get Started” on the welcome screen. Click on the “Create a Wallet” button and follow the on-screen instructions to set up a new wallet.
3. Secure Your Wallet
After creating a wallet, Metamask will display a secret backup phrase consisting of 12 randomly generated words. This phrase is essential for recovering your wallet in case of lost access. Write down this phrase on a piece of paper and keep it in a safe place. Click on “Next” once you have done this.
4. Confirm Your Secret Backup Phrase
Metamask will now ask you to confirm your secret backup phrase in the correct order. Select each word from the dropdown menus in the order they appeared when creating the wallet. This step ensures that you have accurately written down your backup phrase.
5. Set a Strong Password
Create a strong password to secure your Metamask wallet. The password should be unique and complex, combining uppercase and lowercase letters, numbers, and symbols. Avoid using common words or easily guessable combinations.
6. Connect to Ethereum Mainnet
Once your password is set, click on the dropdown menu on the top of the Metamask interface and select “Ethereum Mainnet.” This will connect your wallet to the Ethereum network, enabling you to send and receive Ether (ETH) and interact with decentralized applications built on Ethereum.
7. Add Custom Networks
If you want to access decentralized applications on other blockchain networks, you can add custom networks to your Metamask wallet. Click on the network dropdown menu and select “Custom RPC.” Here, you can add the network details provided by the blockchain project.
8. Import Existing Wallet
If you already have an existing wallet and want to import it into Metamask, click on the wallet icon in the Metamask interface and select “Import Wallet.” Follow the instructions to import your wallet using the seed phrase or private key.
9. Fund Your Wallet
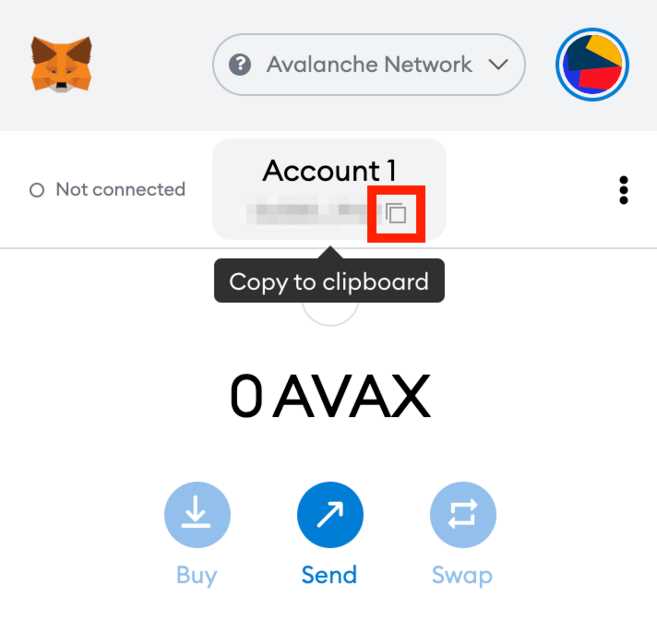
In order to interact with decentralized applications and make transactions, you will need to fund your Metamask wallet with cryptocurrency. Click on the account icon in the Metamask interface and select “Receive” to view your wallet’s public address. Send cryptocurrency from another wallet or exchange to this address.
Follow these step-by-step instructions, and you will have your Metamask wallet set up and ready to use. Remember to keep your secret backup phrase and password safe to ensure the security of your funds and information.
How to Secure and Backup Your Metamask Wallet
Securing and backing up your Metamask wallet is crucial to ensure the safety of your funds and protect yourself from potential hacks or accidental loss. Here are some important steps to follow:
1. Create a Strong Password: When setting up your Metamask wallet, make sure to create a strong and unique password. Avoid using common phrases or easily guessable information. It’s also recommended to use a password manager to securely store and manage your passwords.
2. Enable Two-Factor Authentication (2FA): Two-factor authentication provides an additional layer of security to your Metamask wallet. Enable 2FA by linking your wallet to an authenticator app such as Google Authenticator or Authy. This way, even if someone gets hold of your password, they won’t be able to access your wallet without the 2FA code.
3. Keep Your Recovery Phrase Safe: Metamask provides you with a recovery phrase (also known as a seed phrase) during the wallet setup process. This phrase is a series of 12 or 24 randomly generated words that can be used to restore your wallet in case of loss or device failure. Write down this recovery phrase and store it in a secure location. Avoid taking screenshots or storing it digitally, as it can be vulnerable to hacks or accidental exposure.
4. Backup Your Wallet: In addition to the recovery phrase, it’s important to create a backup of your wallet’s private key. To do this, click on the account icon at the top right corner of your Metamask wallet, select “Account Details,” and then click on “Export Private Key.” Save this private key in a secure location separate from your recovery phrase.
5. Use Hardware Wallets: For higher levels of security, consider using a hardware wallet such as Ledger or Trezor to store your Ethereum and other cryptocurrencies. Hardware wallets keep your private keys offline and provide an extra layer of protection against online threats.
6. Keep Your Software Updated: Metamask regularly releases updates to enhance security and fix any vulnerabilities. Make sure to keep your Metamask software updated to the latest version to benefit from the latest security features and patches.
7. Be Cautious of Phishing Attempts: Be vigilant against phishing attempts, where scammers mimic legitimate websites or send fraudulent emails to obtain your wallet information. Always double-check the website’s URL before entering any sensitive information and be cautious of unsolicited communications asking for your wallet details.
8. Test Your Backup: Once you’ve secured your wallet and backed up your recovery phrase and private key, it’s important to test your backups. Install Metamask on a different device and restore your wallet using the recovery phrase and private key to ensure they are working correctly.
By following these steps, you can significantly improve the security of your Metamask wallet and minimize the risk of losing your funds. Remember to stay informed about the latest security practices and adapt accordingly to protect your cryptocurrency investments.
Exploring Metamask’s Advanced Features and Integrations
Metamask is not just a simple Ethereum wallet; it is a powerful tool packed with advanced features and integrations that make it a valuable asset for anyone involved in the world of cryptocurrencies and decentralized applications (dApps).
1. Custom Networks
One of the advanced features of Metamask is its ability to connect to custom networks. In addition to the default Ethereum Mainnet and Testnet, you can add custom networks such as Binance Smart Chain, xDai Chain, or Polygon. This allows you to interact with different blockchains and access a wide range of dApps.
2. Hardware Wallet Integration
Metamask also supports integration with hardware wallets such as Ledger or Trezor. By connecting your hardware wallet to Metamask, you can securely manage your Ethereum and other supported cryptocurrencies. This adds an extra layer of security by keeping your private keys offline.
3. Token Swapping
With the built-in Decentralized Exchange (DEX) feature, you can easily swap one cryptocurrency for another directly within the Metamask wallet. Metamask supports popular DEX protocols such as Uniswap and SushiSwap, allowing you to trade ERC-20 tokens seamlessly.
4. Web3 Integration
Metamask is built on the Web3 framework, which enables seamless integration with dApps and blockchain-based websites. When you visit a dApp using Metamask, you can securely interact with it, sign transactions, and access your wallet balance, all without leaving the browser.
5. Multisig Wallet Support
For those looking for additional security, Metamask offers support for multisig wallets. A multisig wallet requires multiple signatures from different devices or individuals to authorize a transaction. This makes it more difficult for hackers to compromise your funds and provides an extra layer of protection.
These are just a few examples of the advanced features and integrations offered by Metamask. As you delve deeper into the world of cryptocurrencies and dApps, you’ll discover even more ways to make the most out of this powerful wallet.
Frequently Asked Questions:
What is a Metamask wallet?
A Metamask wallet is a digital wallet that allows you to securely store, manage, and interact with your cryptocurrency assets. It also acts as a bridge between your web browser and the Ethereum blockchain, enabling you to easily access decentralized applications (DApps).
How do I set up a Metamask wallet?
Setting up a Metamask wallet is easy. First, you need to install the Metamask browser extension. Once installed, you can create a new wallet by following the on-screen instructions. This typically involves setting a strong password and backing up your wallet seed phrase. After completing the setup process, you will have your own unique wallet address and can start using your Metamask wallet.
+ There are no comments
Add yours