


Are you tired of juggling between different cryptocurrency wallets? Want to simplify your life by consolidating all your assets in one place? Look no further!
Introducing Coinbase – the ultimate solution for managing your digital currencies with ease.
With Coinbase, you can seamlessly transfer your Metamask wallet to enjoy a streamlined experience. Follow these simple steps to make the switch:
- Step 1: Open your Metamask wallet and navigate to the settings menu.
- Step 2: Select the “Export Private Key” option and copy the provided key.
- Step 3: Open the Coinbase app and login to your account.
- Step 4: Navigate to the “Import Wallet” section.
- Step 5: Paste your Metamask private key in the designated field.
- Step 6: Verify the wallet transfer and confirm your action.
It’s that simple! Within minutes, you’ll have all your funds securely transferred to Coinbase, where you can easily manage and trade your favorite cryptocurrencies.
Don’t let the hassle of multiple wallets slow you down. Join millions of satisfied Coinbase users and experience the power of consolidated cryptocurrency management today!
Overview
Welcome to the step-by-step guide on how to transfer your Metamask Wallet to Coinbase. In this guide, we will walk you through the process of securely moving your funds from Metamask to Coinbase, ensuring that your assets are safely transferred and ready for trading or other activities on Coinbase.
Metamask is a popular cryptocurrency wallet that allows users to store, manage, and interact with Ethereum-based tokens. Coinbase, on the other hand, is a well-known cryptocurrency exchange that provides a secure platform for buying, selling, and storing various cryptocurrencies.
By transferring your Metamask Wallet to Coinbase, you will be able to take advantage of Coinbase’s extensive list of supported cryptocurrencies, as well as their user-friendly interface and robust security measures.
Before we begin, please ensure that you have the following prerequisites:
- A working internet connection
- A Metamask Wallet with funds you wish to transfer
- A Coinbase account
Once you have met these prerequisites, you can proceed with the step-by-step guide to safely and securely transfer your Metamask Wallet to Coinbase. Let’s get started!
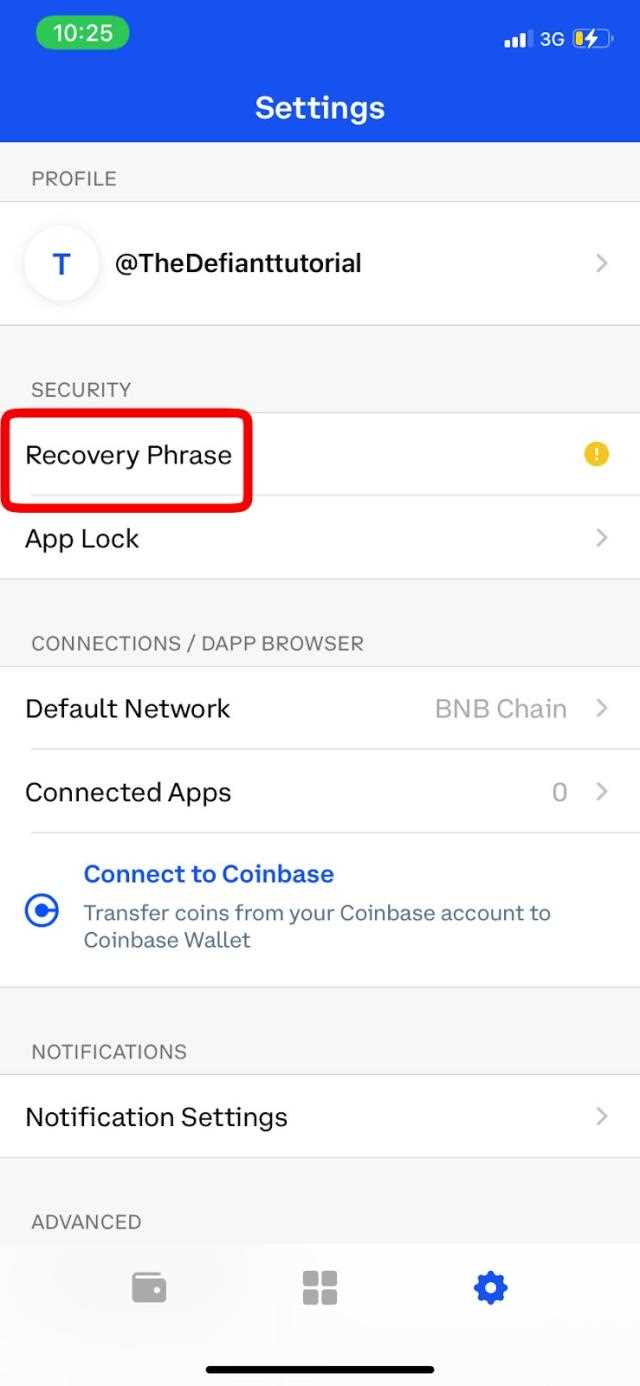
Step 1: Exporting Your Metamask Wallet
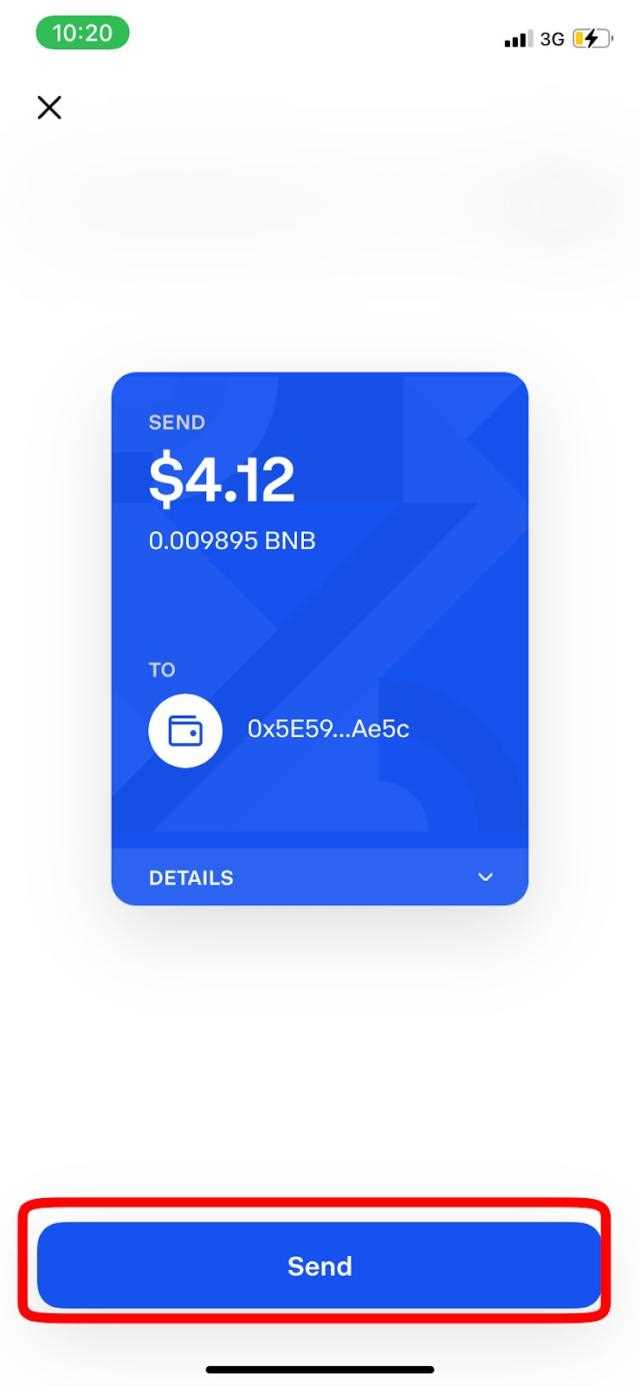
Before you can transfer your Metamask wallet to Coinbase, you need to export it from your current platform. Here is a step-by-step guide on how to do it:
- Open the Metamask extension in your browser.
- Click on the account icon in the top right corner and select “Settings” from the dropdown menu.
- In the Settings menu, click on the “Security & Privacy” tab.
- Scroll down to the section that says “Export Account” and click on the “Export” button.
- You will be prompted to enter your password. Enter it and click on the “Next” button.
- A JSON file will be downloaded to your computer. Make sure to save it in a secure location.
- Congratulations! You have successfully exported your Metamask wallet.
Once you have exported your wallet, you can proceed to the next step of transferring it to Coinbase. Stay tuned for our next guide on how to import your wallet to Coinbase!
Step 2: Setting Up Your Coinbase Wallet
Once you have transferred your Metamask wallet to Coinbase, the next step is to set up your Coinbase wallet. Follow the steps below to get started:
Create a Coinbase Account
If you don’t already have a Coinbase account, you’ll need to create one. Go to the Coinbase website and click on the “Sign Up” button. Fill in the required information, including your email address and password. Make sure to choose a strong password to protect your account.
Verify Your Identity
After creating your account, Coinbase will require you to verify your identity before you can use all the features of the platform. Follow Coinbase’s instructions to complete the identity verification process. This may involve providing a copy of your photo ID and possibly additional documentation.
Enable Two-Factor Authentication
To add an extra layer of security to your Coinbase wallet, enable two-factor authentication (2FA). This will require you to enter a unique code from an authentication app or via SMS whenever you log in or make transactions. Follow Coinbase’s instructions to set up 2FA for your account.
Link Your Bank Account or Debit Card
To fund your Coinbase wallet or make withdrawals, you’ll need to link it to your bank account or debit card. Coinbase supports various payment methods, so choose the option that works best for you. Follow the prompts to link your preferred payment method securely.
Congratulations! You have successfully set up your Coinbase wallet. In the next step, we will explore how to use Coinbase to store, manage, and exchange your cryptocurrencies.
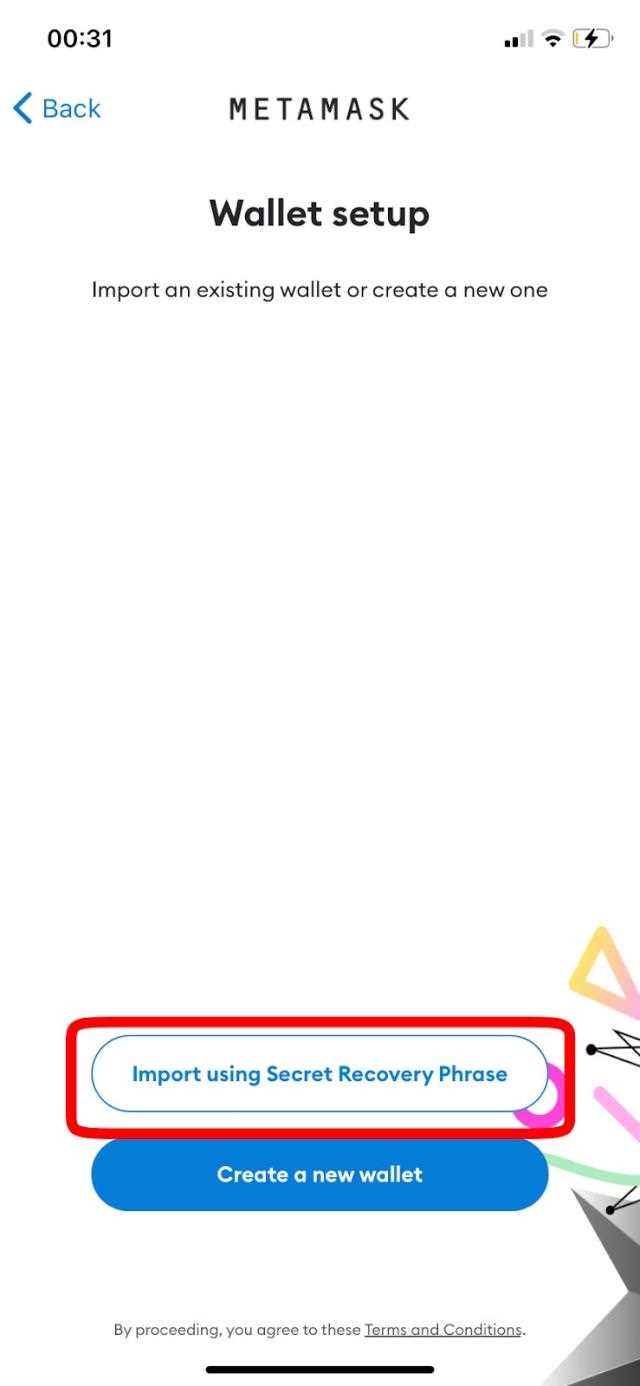
Step 3: Importing Your Metamask Wallet to Coinbase
Now that you have set up your Metamask wallet and secured your funds, the next step is to import your wallet to Coinbase. This will allow you to easily manage and access your cryptocurrency holdings in both Metamask and Coinbase.
1. Log in to your Coinbase account
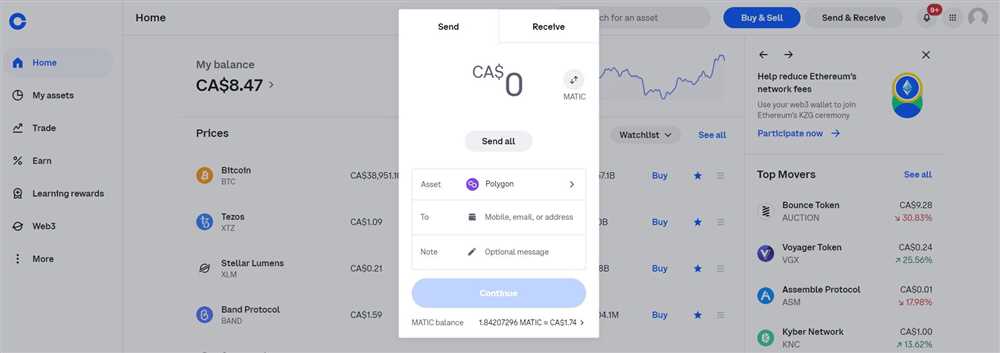
First, you need to log in to your Coinbase account. If you don’t have an account, you can easily create one by following the on-screen instructions.
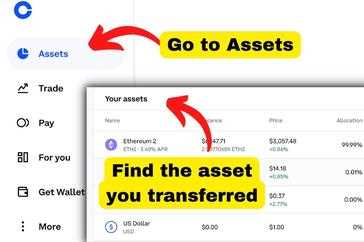
2. Navigate to the “Accounts” tab
Once you are logged in, locate the “Accounts” tab in the Coinbase menu. This is where you will be able to view and manage your cryptocurrency wallets.
3. Click on “Link a New Account”
Under the “Accounts” tab, you will find a list of your existing wallets. To import your Metamask wallet, click on the “Link a New Account” button.
4. Select “Metamask” as the account type
In the “Link a New Account” window, select “Metamask” as the account type. This will prompt you to connect your Metamask wallet to Coinbase.
5. Connect your Metamask wallet
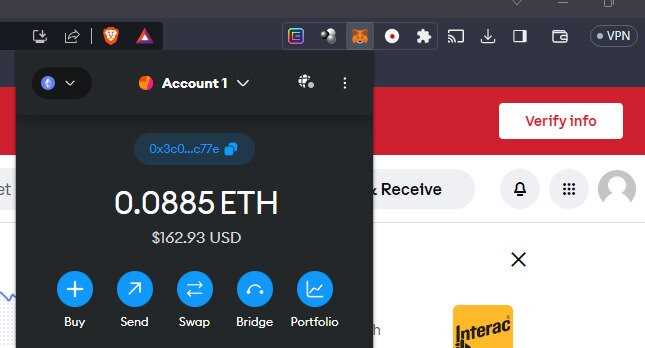
Follow the on-screen instructions to connect your Metamask wallet. You will need to grant permission for Coinbase to access your wallet. This will ensure that your funds are securely transferred.
6. Confirm the connection
After connecting your Metamask wallet, you will need to confirm the connection in Metamask. This adds an additional layer of security to ensure that you are authorizing the transfer.
Once the confirmation is complete, your Metamask wallet will be successfully imported to Coinbase. You will now be able to view and manage your cryptocurrency holdings in both platforms.
Frequently Asked Questions:
Is this guide suitable for beginners?
Yes, this step-by-step guide is designed for beginners and provides easy-to-follow instructions.
Can I transfer my Metamask wallet to Coinbase without any fees?
Transferring your Metamask wallet to Coinbase may involve network fees, depending on the current Ethereum gas prices.
What are the advantages of using Coinbase?
Using Coinbase allows you to easily buy, sell, and store cryptocurrencies, and provides a user-friendly interface for managing your digital assets.
+ There are no comments
Add yours