


Are you ready to explore the exciting world of zkSync network and take advantage of its fast and low-cost transactions? In this step-by-step guide, we’ll show you how to set up and use MetaMask with zkSync, so you can start unlocking the true potential of this innovative scaling solution.
zkSync is a layer 2 scaling solution for Ethereum, designed to address the network’s scalability issues and provide users with faster and cheaper transactions. By using zk-rollups technology, zkSync allows you to bundle multiple transactions together and submit them as a single proof to Ethereum’s mainnet, reducing congestion and saving on gas fees.
To get started, you’ll need to have MetaMask installed in your browser and set up with an Ethereum account. If you haven’t done so already, head over to the MetaMask website and follow the instructions to install the extension. Once you have MetaMask set up, you’re ready to connect it to the zkSync network and start enjoying the benefits of faster and cheaper transactions.
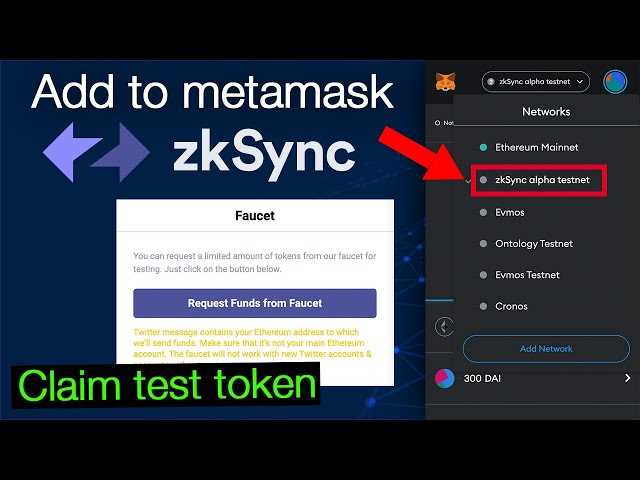
First, open your MetaMask extension and click on the network dropdown menu. Select “Custom RPC” and then click on “New Network”. In the network settings, enter the following details:
- Network Name: zkSync
- New RPC URL: https://rinkeby.zksync.io
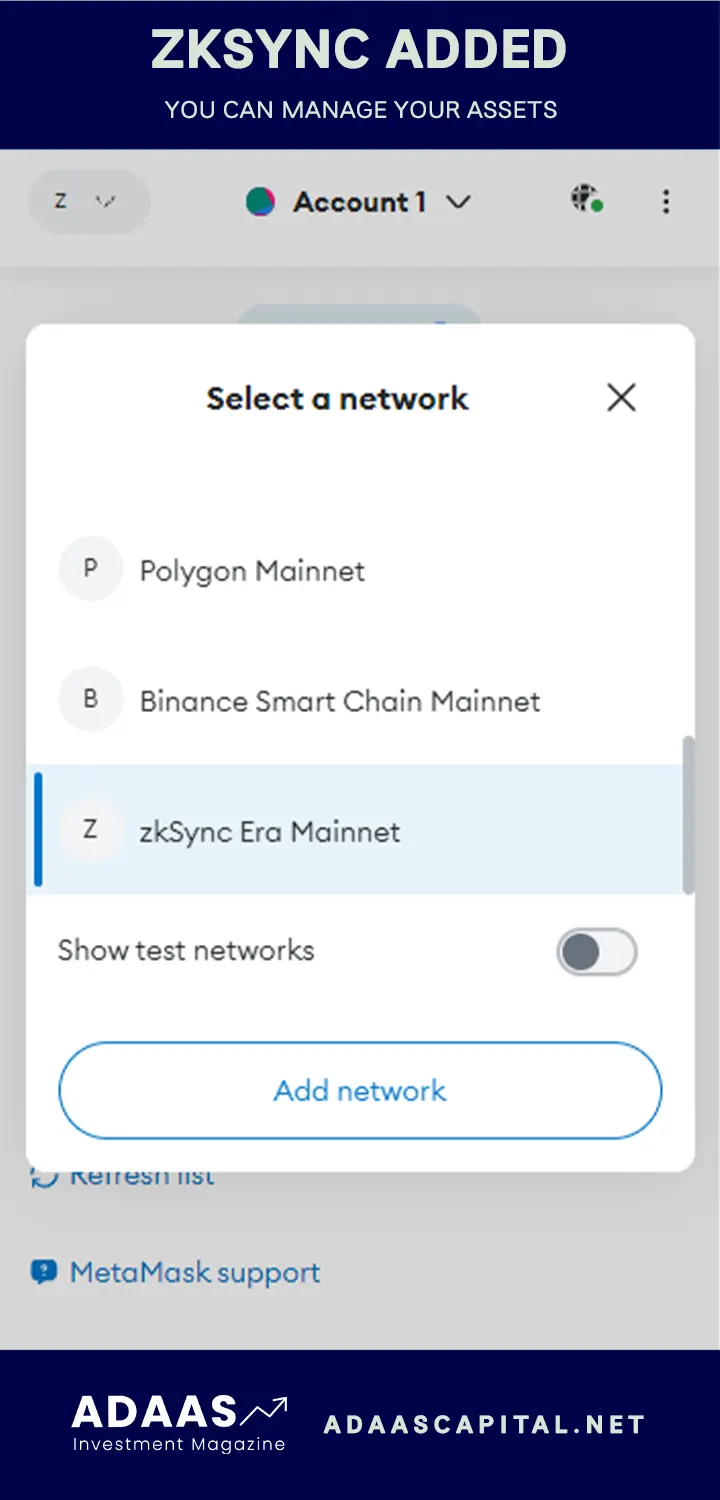
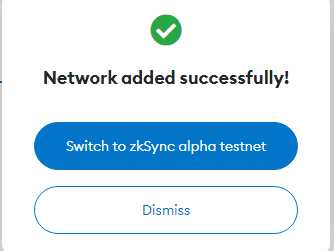
Click “Save” to save the network settings. Now, you should see “zkSync” as one of the available networks in the dropdown menu. To connect to the zkSync network, simply select “zkSync” from the dropdown menu.
Once you’re connected to the zkSync network, you can start using zkSync-compatible dApps and enjoying the benefits of faster and cheaper transactions. Keep in mind that you’ll need to transfer some funds to your zkSync account before you can make transactions on the network.
In conclusion, by using MetaMask with zkSync, you can unlock the full potential of the zkSync network and benefit from its fast and low-cost transactions. Follow this step-by-step guide to set up MetaMask with zkSync, and start enjoying the advantages of this innovative scaling solution today!
Unlocking the potential of zkSync network
zkSync is a layer 2 scaling solution for Ethereum that aims to increase transaction speed while reducing fees. By leveraging zero-knowledge proofs, zkSync allows for a high level of scalability and privacy, making it an attractive option for developers and users alike.
Using MetaMask with zkSync
In order to access the benefits of zkSync network, you can use MetaMask, a popular Ethereum wallet and browser extension. Follow these steps to unlock the potential of zkSync using MetaMask:
- Install MetaMask: If you don’t already have MetaMask installed, visit the official website and install the extension for your preferred browser.
- Create or import an Ethereum account: Once MetaMask is installed, create a new Ethereum account or import an existing one using your private key or seed phrase.
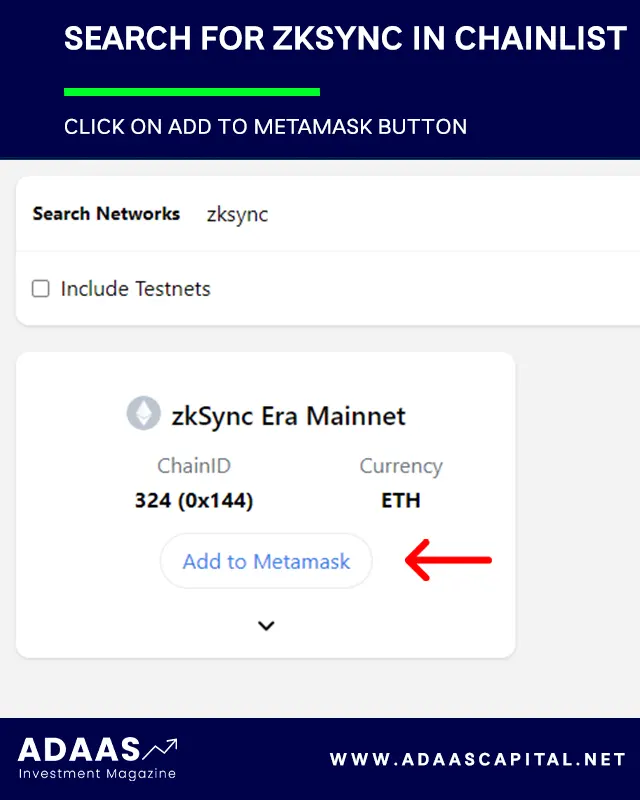
- Connect to zkSync network: After setting up your Ethereum account in MetaMask, open the extension and click on the network dropdown. Select “Custom RPC” and enter the following details:
- Network Name: zkSync
- New RPC URL: https://rpc.zksync.io
- Chain ID: 42161
- Symbol: ETH
- Block Explorer URL: https://zkscan.io
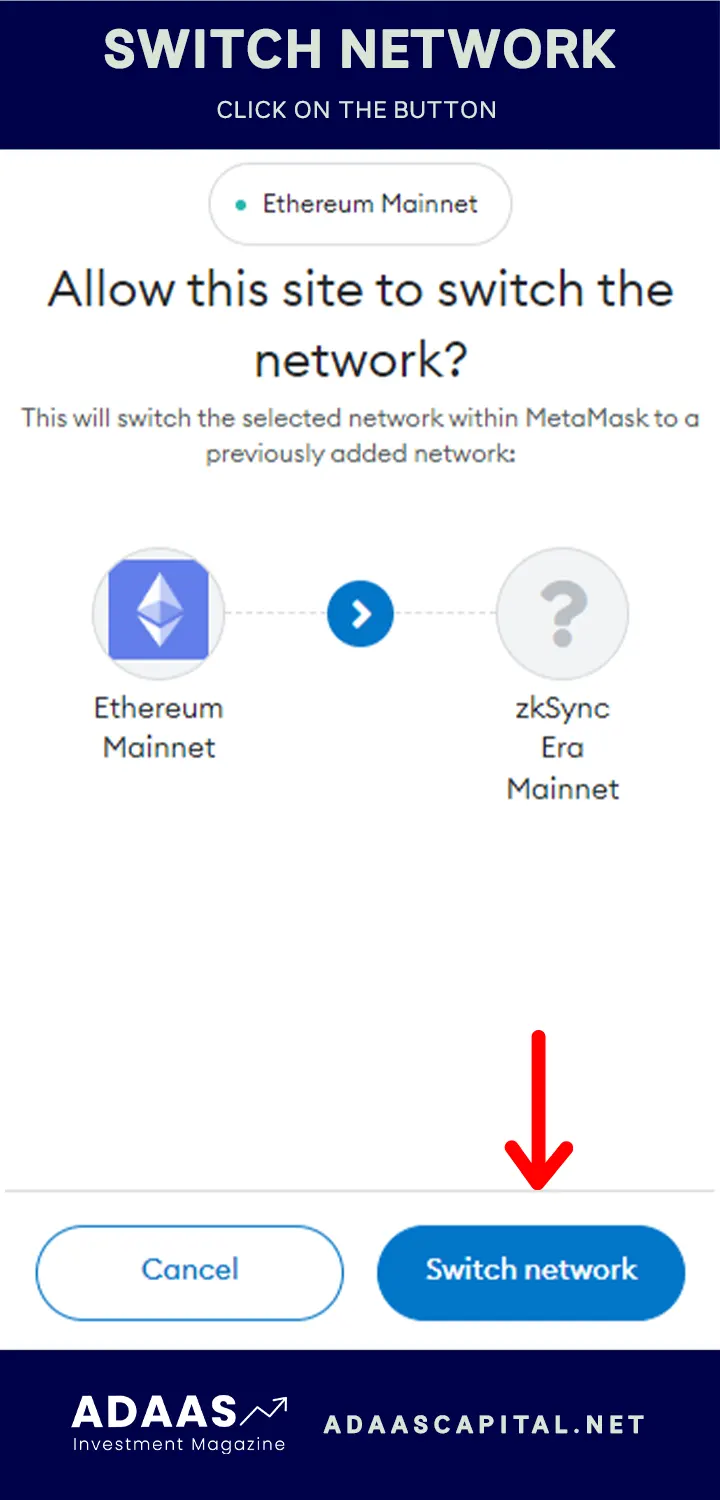
- Switch to zkSync network: Once the details are entered, click “Save” to connect to the zkSync network. You can verify that you are connected to the correct network by checking the network name and symbol in the MetaMask extension.
- Deposit funds to zkSync: In order to use zkSync, you need to deposit funds from the Ethereum mainnet to the zkSync network. Open the zkSync web wallet, select “Deposit” and follow the instructions to transfer your ETH or other supported tokens to the zkSync network.
- Enjoy the benefits of zkSync: Now that you have funds in the zkSync network, you can take advantage of fast and low-cost transactions. You can interact with decentralized applications (dApps) that are integrated with zkSync and experience the benefits of scalability and privacy.
Unlocking the potential of zkSync network with MetaMask is a straightforward process that enables you to enjoy the advantages of enhanced transaction speed and reduced fees. By following these steps, you can easily access the power of zkSync and experience a seamless Ethereum scaling solution.
A step-by-step guide for using MetaMask with zkSync
Step 1: Install MetaMask
First, make sure you have the MetaMask extension installed in your web browser. You can find it in the Chrome web store or the Firefox add-ons marketplace. Once installed, create a new MetaMask wallet or import an existing one with your recovery phrase.
Step 2: Connect to zkSync network
After setting up your MetaMask wallet, open the MetaMask extension and click on the network selection dropdown. Select “Custom RPC” and enter the zkSync RPC URL: https://rinkeby.zksync.io/. Click “Save” to connect to the zkSync network.
Step 3: Add custom token
In MetaMask, click on the menu button and select “Add Token”. Switch to the “Custom Token” tab and enter the following details:
- Token Contract Address: [Token Contract Address]
- Token Symbol: [Token Symbol]
- Decimals of Precision: [Decimals of Precision]
Replace the placeholders with the specific details of the token you want to add to your MetaMask wallet. Click “Next” and then “Add Tokens” to complete the process.
Step 4: Request funds
In order to interact with the zkSync network, you will need some test funds. Visit the official zkSync faucet website at https://faucet.zksync.io/ and follow the instructions to request test tokens for your MetaMask wallet.
Step 5: Start using zkSync
Now that you have MetaMask connected to the zkSync network and test tokens in your wallet, you can start using zkSync. You can perform transactions, transfer tokens, and interact with decentralized applications on the zkSync network.
Final thoughts:
With MetaMask and zkSync, you have unlocked the potential of a high-performance and scalable Layer 2 solution for Ethereum. Enjoy faster, cheaper, and more efficient transactions while still benefiting from the security and decentralization of the Ethereum network.
Connecting zkSync to MetaMask
To connect zkSync to MetaMask, you need to follow these steps:
- Install MetaMask: If you haven’t already, install the MetaMask extension for your browser.
- Create or import a wallet: Launch MetaMask and create a new wallet or import an existing one using your seed phrase or private key.
- Switch to the zkSync network: In MetaMask, click on the network dropdown and select “Custom RPC.”
- Add the zkSync network details: Fill in the following details for the zkSync network:
Network Name: zkSync Mainnet
New RPC URL: https://zksync.mainnet.v1.zkscan.io
Chain ID: 421611
Note: Make sure you have selected the zkSync Mainnet network before proceeding to the next step.
- Adding funds to your zkSync wallet: To use zkSync, you need to deposit funds from the Ethereum network to the zkSync network. You can do this by clicking on the “Wallet” tab in zkSync and following the instructions to deposit funds.
Once you have completed these steps, you should be connected to the zkSync network using MetaMask. You can now interact with decentralized applications and make transactions using zkSync.
Disclaimer: Ensure you are using the official MetaMask extension and double-check the network details to avoid scams or phishing attempts.
Transferring funds with zkSync and MetaMask
Once you have set up your MetaMask wallet and connected it to the zkSync network, you can easily and securely transfer funds using zkSync.
Step 1: Open the zkSync interface
Open the zkSync interface on your browser. If you have MetaMask installed, the interface will automatically detect it and connect to it.
Step 2: Select the asset to transfer
Choose the asset you want to transfer from your MetaMask wallet, such as ETH or ERC-20 tokens. You can select the asset from a dropdown menu or enter its contract address manually.
Step 3: Enter the recipient’s address
Enter the address of the recipient to whom you want to transfer the funds. Make sure to double-check the address to avoid sending funds to the wrong recipient.
Step 4: Enter the transfer amount
Specify the amount of funds you want to transfer. You can enter the amount in either the base unit (e.g., Wei for ETH) or the token’s decimal representation.
Step 5: Confirm and sign the transaction
Review the details of the transfer, including the asset, recipient address, and amount. Once you are satisfied with the details, click on the “Confirm” button. MetaMask will prompt you to confirm the transaction and sign it with your private key.
Step 6: Wait for confirmation
After signing the transaction, you will need to wait for it to be confirmed on the zkSync network. The confirmation time may vary depending on network congestion.
Step 7: Check the transaction status
You can check the status of your transaction on the zkSync interface or through a blockchain explorer. Once the transaction is confirmed, the funds will be transferred to the recipient’s address.
Step 8: Enjoy fast and low-cost transfers with zkSync
By using zkSync in conjunction with MetaMask, you can enjoy fast and low-cost transfers, thanks to the efficiency and scalability provided by zkRollups technology.
| Advantages | Disadvantages |
|---|---|
| Fast transactions | Requires initial setup |
| Low transaction fees | Dependent on zkSync network availability |
| Increased scalability | Less decentralized compared to layer 1 solutions |
Frequently Asked Questions:
What is zkSync network and how does it work?
zkSync is a layer 2 scaling solution for Ethereum that uses zero-knowledge proofs to enable faster and cheaper transactions. It works by aggregating multiple transactions into a single proof, reducing the data size and cost of verifying transactions on the Ethereum network.
What is MetaMask and how can I use it with zkSync?
MetaMask is a popular cryptocurrency wallet that allows users to interact with decentralized applications on the Ethereum network. To use MetaMask with zkSync, you need to install the zkSync plugin on Chrome or Firefox, connect your MetaMask wallet, and create a zkSync account. Once you have a zkSync account, you can transfer funds from your MetaMask wallet to your zkSync account and start using zkSync’s faster and cheaper transactions.
Can I use zkSync with other wallets besides MetaMask?
Yes, you can use zkSync with other wallets that support the Ethereum network. However, the step-by-step guide in the article specifically covers the process of using zkSync with MetaMask. You may need to refer to the documentation or guides provided by your specific wallet to learn how to use zkSync with it.

+ There are no comments
Add yours