


As the popularity of blockchain technology continues to grow, more and more developers are exploring the capabilities of different networks. One such network that has gained attention is Cronos, a Layer 2 network developed by Crypto.com. With its fast and low-cost transactions, it provides an alternative solution for decentralized applications (DApps) built on Ethereum.
If you are a developer looking to integrate Cronos into your DApp, one of the first steps is to connect it to your preferred wallet. In this step-by-step guide, we will take a closer look at how you can integrate Cronos into Metamask, one of the most popular Ethereum wallets.
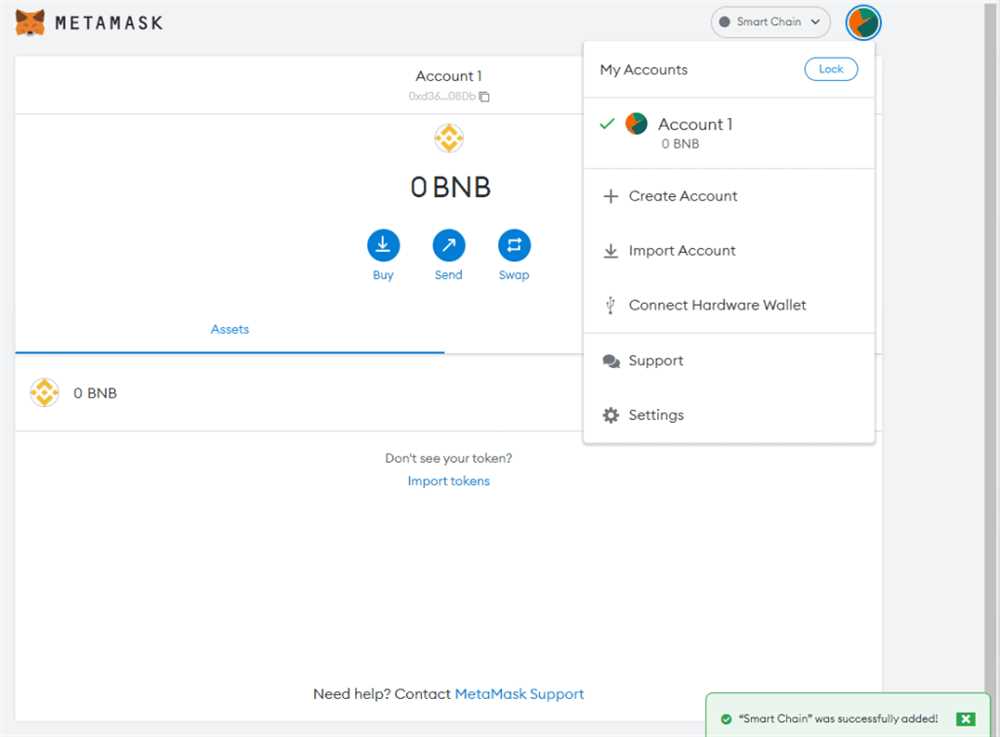
To begin, make sure you have the latest version of Metamask installed on your browser. Once you have that, open Metamask and click on the network selection dropdown. From the list, select “Custom RPC”. This will allow you to connect to Cronos.
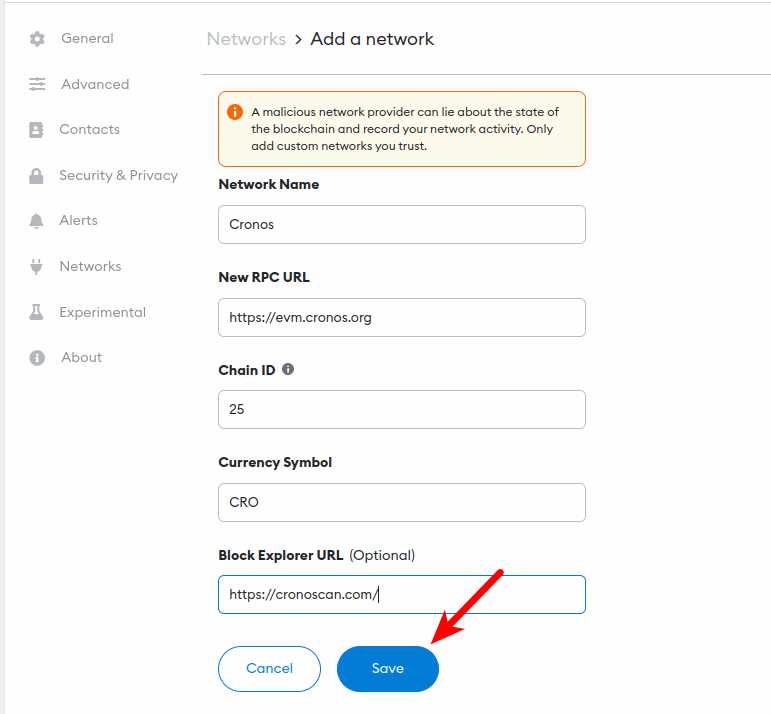
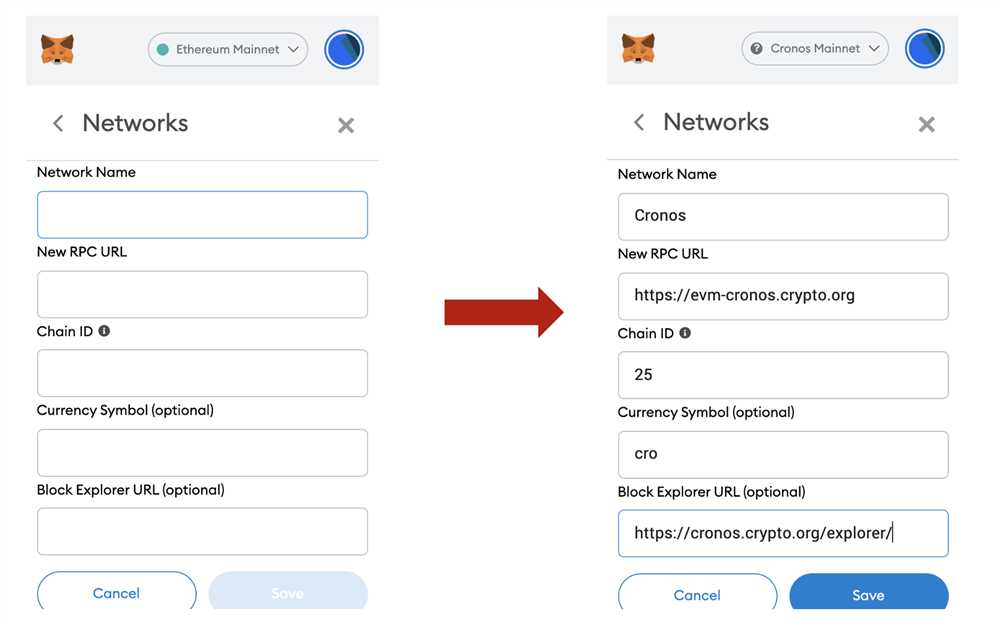
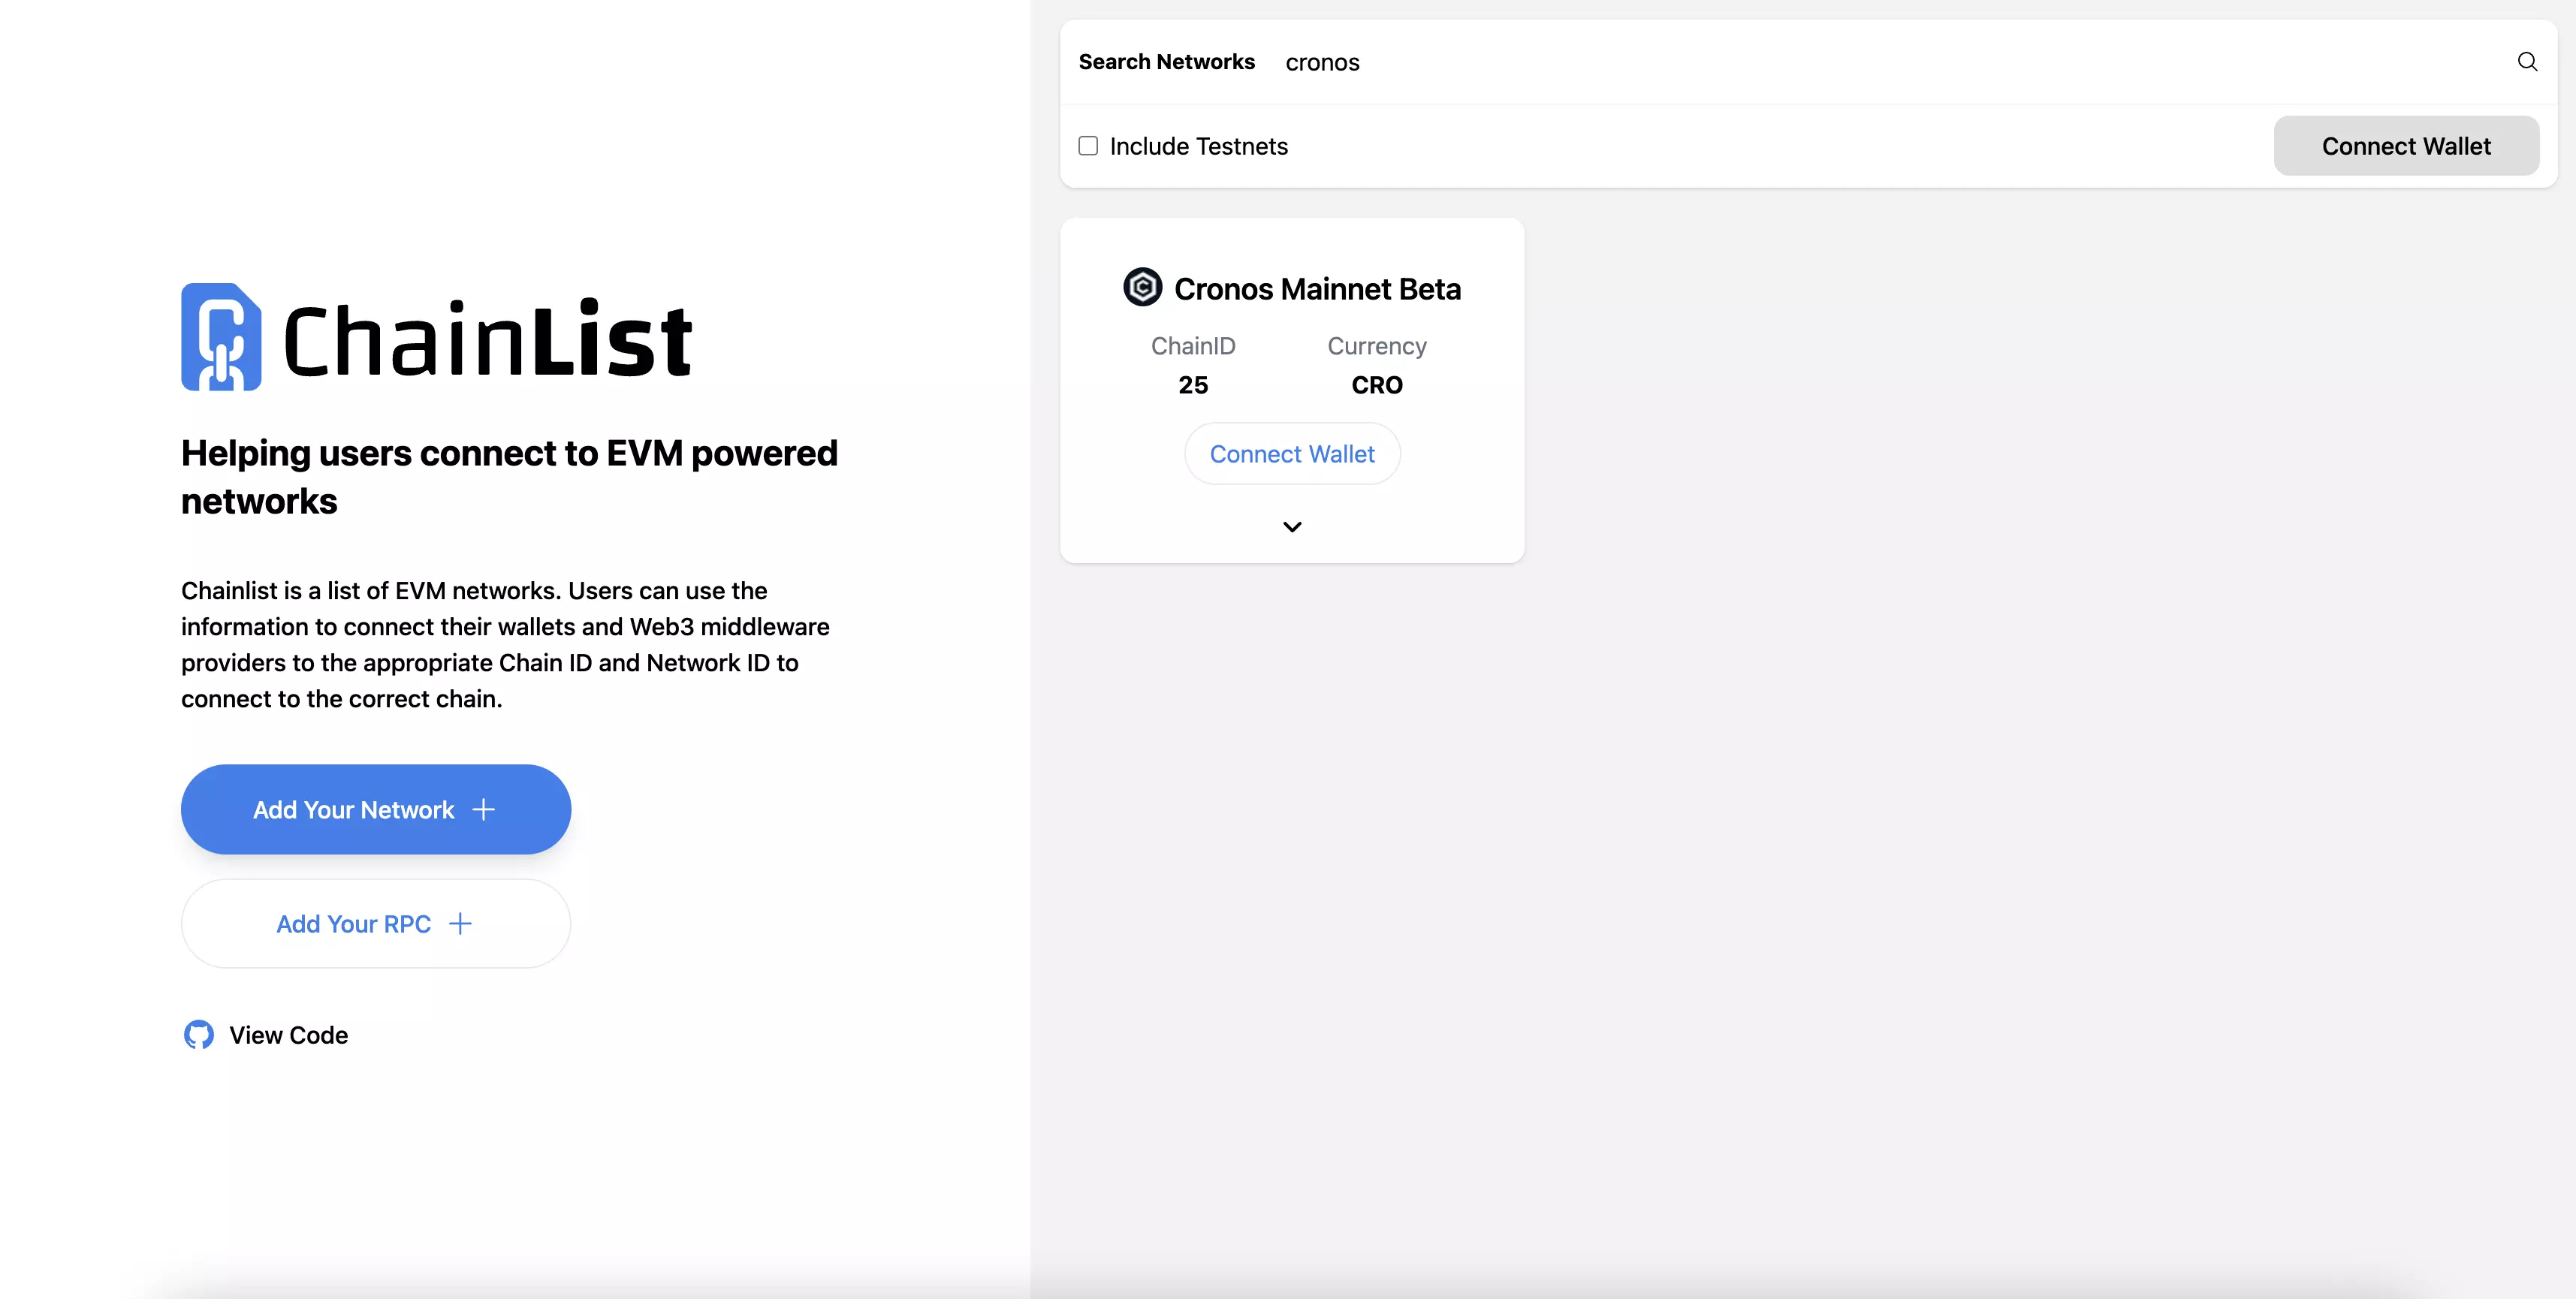
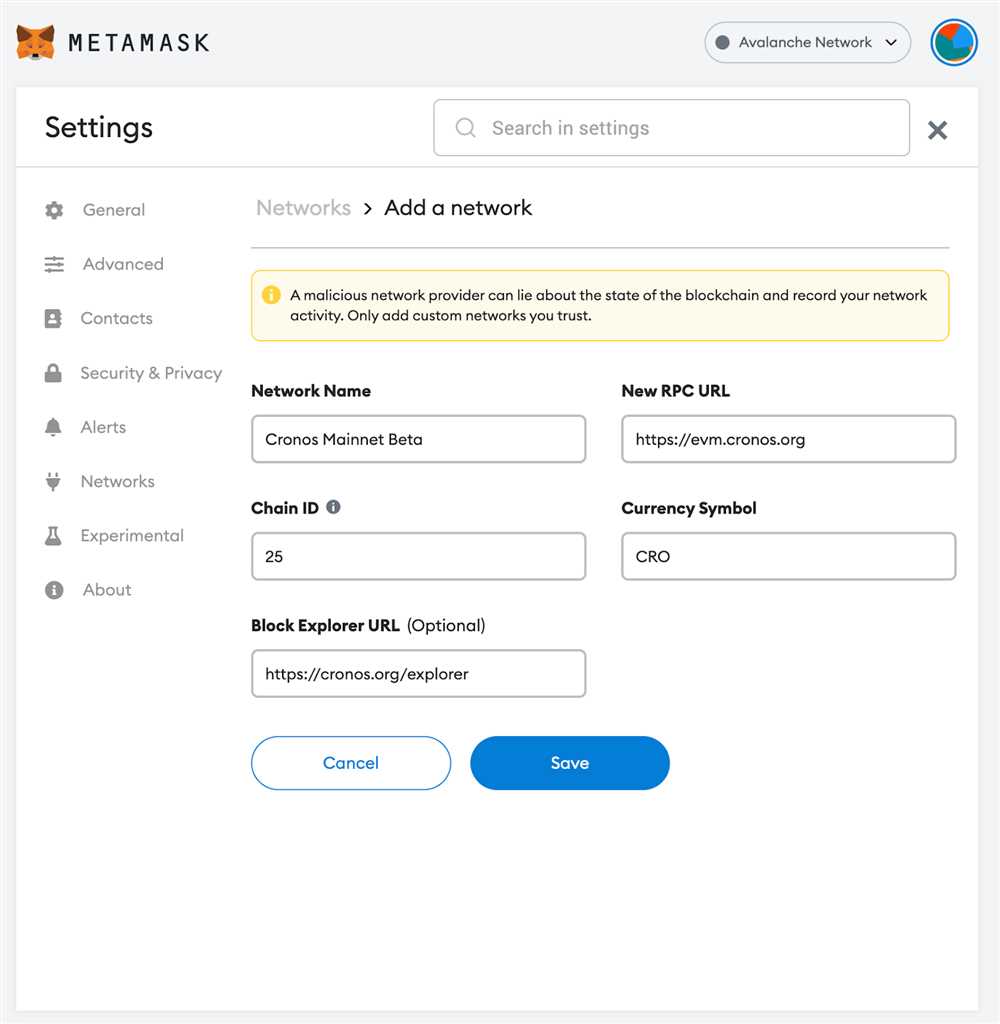
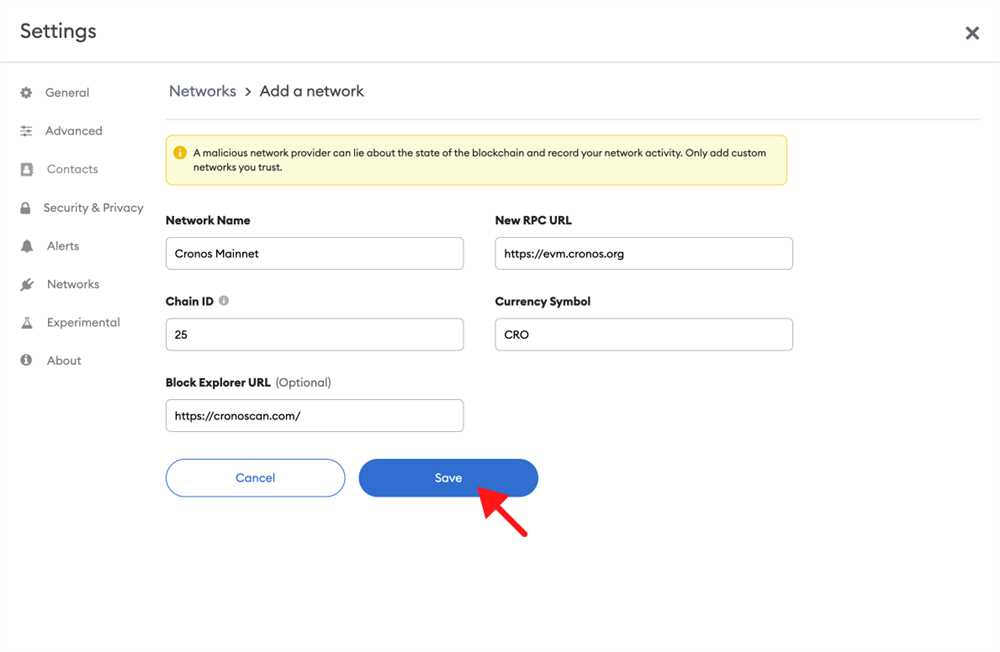
Next, you will need to provide the details to connect to the Cronos network. In the “Network Name” field, enter “Cronos”. In the “New RPC URL” field, enter “https://cronos.crypto.com”. Finally, enter the Chain ID as “366”. Once you have entered all the details, click “Save” to connect to Cronos.
Congratulations! You have successfully integrated Cronos into your Metamask wallet. You can now start exploring and interacting with Cronos-based DApps directly through Metamask. With its fast and low-cost transactions, Cronos is proving to be a promising network for developers looking for an alternative to Ethereum.
What is Cronos?
Cronos is a blockchain network that is designed to provide interoperability between different blockchains, including Ethereum and other layer 1 and layer 2 blockchains. It is built by the Crypto.com team and aims to address the scalability and cost issues associated with Ethereum by offering faster transaction processing and lower fees.
One of the key features of Cronos is its ability to integrate with existing Ethereum tools and infrastructure, including the popular wallet provider Metamask. This allows developers and users to easily interact with Cronos using the tools they are already familiar with.
Cronos uses a Proof-of-Authority (PoA) consensus mechanism, which means that transactions are validated by a set of approved validators rather than by a large number of validators as in the case of Ethereum. This allows for faster transaction confirmation times and lower fees.
With its focus on compatibility and scalability, Cronos aims to provide a seamless experience for developers and users looking to leverage the benefits of blockchain technology without the limitations of the Ethereum network. It offers a range of features and capabilities that make it an attractive option for building and deploying decentralized applications (dApps).
Key Features of Cronos:
- Interoperability with Ethereum and other blockchains
- Integration with existing Ethereum tools and infrastructure
- Faster transaction processing
- Lower transaction fees
- Proof-of-Authority consensus mechanism
- Support for building and deploying dApps
- Scalability and compatibility
How to Integrate Cronos into Metamask
If you want to access and interact with the Cronos network using Metamask, you can easily integrate it into your wallet. Here’s a simple step-by-step guide to help you do that:
| Step 1: | Open your Metamask wallet and make sure you are on the main network. |
| Step 2: | Click on the network dropdown menu and select “Custom RPC”. |
| Step 3: | In the “New Network” section, enter the following information: |
| Network Name: Cronos | |
| New RPC URL: https://cronos.chainapsis.com/ | |
| Chain ID: 366 | |
| Currency Symbol: CRO | |
| Block Explorer URL: https://cronos-explorer.crypto.org/ | |
| Step 4: | Click on the “Save” button to add the Cronos network to your Metamask. |
| Step 5: | Once the network is added, select the Cronos network from the network dropdown menu in Metamask. |
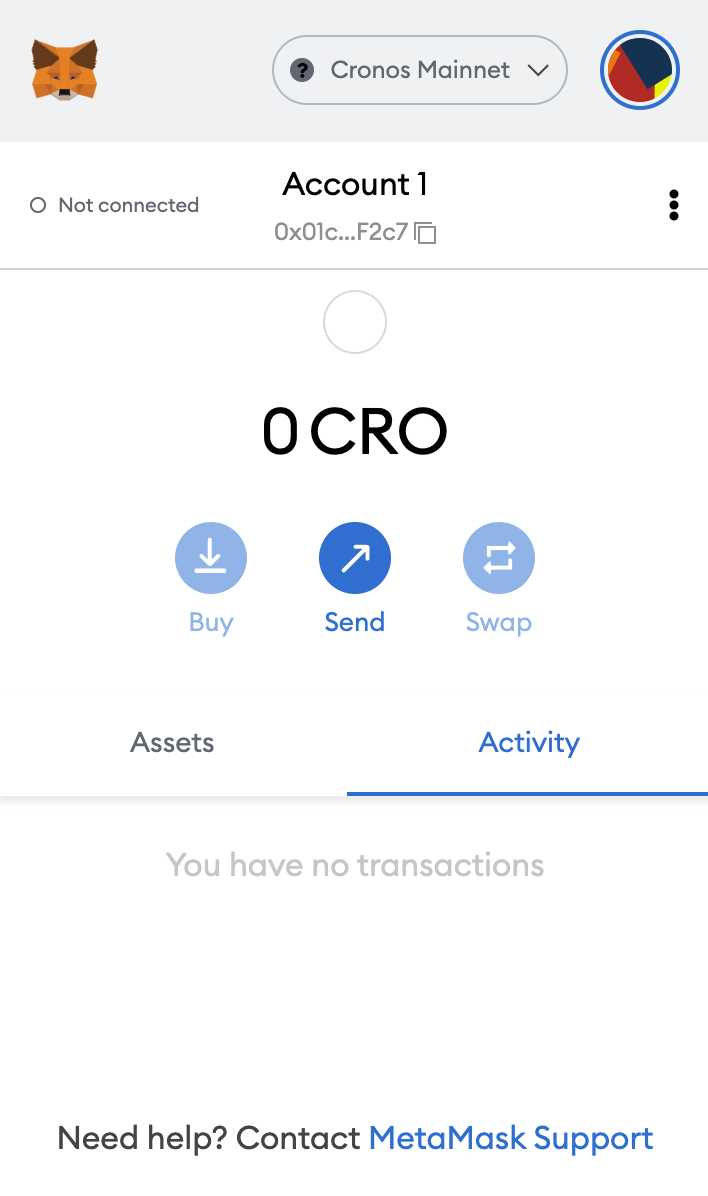
| Step 6: | You are now ready to use your Metamask wallet with the Cronos network. You can send and receive CRO tokens, interact with smart contracts, and explore the Cronos blockchain. |
Integrating Cronos into Metamask provides you with a seamless and convenient way to access all the features of the Cronos network while using your favorite Ethereum wallet. Follow these steps, and you’ll be up and running in no time!
Step 1: Installing the Cronos Bridge
To start integrating Cronos into Metamask, you need to install the Cronos Bridge. The Cronos Bridge enables communication between the Ethereum network and the Cronos network. Follow the steps below to install the Cronos Bridge:
| Step | Instructions |
|---|---|
| 1 | Open the Metamask extension in your browser |
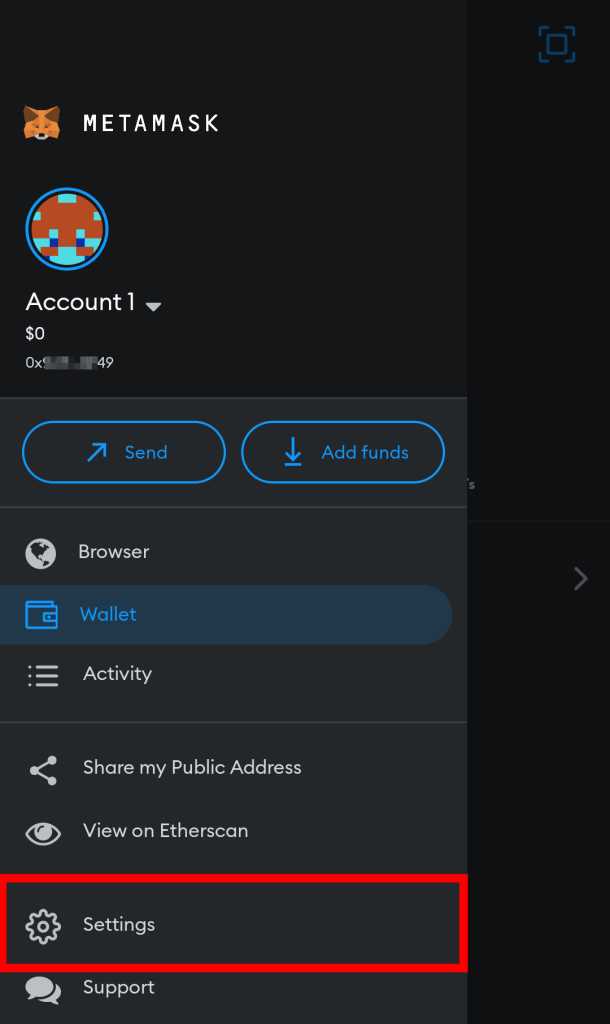
| 2 | Click on the hamburger menu icon in the top right corner of the Metamask window |
| 3 | Select “Settings” from the dropdown menu |
| 4 | Scroll down to the “Networks” section and click on “Add Network” |
| 5 | Fill in the following information in the “Add Network” form: – Network Name: Cronos Testnet – New RPC URL: https://cronos-testnet.crypto.org:8545/ – Chain ID: 338 – Symbol: CRO – Block Explorer URL: https://cronos-explorer.crypto.org/ |
| 6 | Click on “Save” to add the Cronos Testnet to your Metamask |
| 7 | Go to the Cronos Bridge website at https://cronos.crypto.org/bridge |
| 8 | Click on the “Connect with Metamask” button to connect your Metamask wallet to the Cronos Bridge |
| 9 | Follow the on-screen instructions to complete the installation of the Cronos Bridge |
Once you have successfully installed the Cronos Bridge, you can proceed to the next step of the integration process.
Step 2: Adding Cronos Network to Metamask
Now that you have installed Metamask, it’s time to add the Cronos network to your wallet. Follow the steps below to seamlessly integrate Cronos into Metamask:
Step 1: Open Metamask Extension
Click on the Metamask extension icon in your browser’s toolbar to open the wallet interface. If you don’t see the icon, you may need to pin it to the toolbar or enable the extension if it’s disabled.
Step 2: Access Network Settings
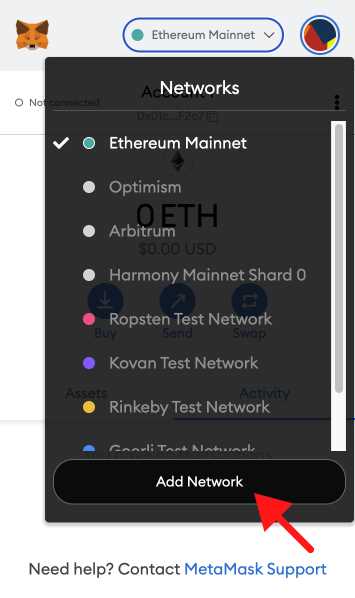
In the Metamask wallet interface, click on the network dropdown at the top. By default, it will show the Ethereum Mainnet. Click on “Custom RPC” at the bottom of the dropdown list.
Step 3: Configure Cronos Network
A form will appear where you can enter the network details. Provide the following information to configure the Cronos network:
- Network Name: Cronos
- New RPC URL: Enter the Cronos RPC URL provided by Crypto.org Chain. Make sure to copy the correct URL to avoid any connection errors.
- Chain ID: 330, which is the Chain ID for the Cronos network.
- Currency Symbol: CRO
- Block Explorer URL: You can use the block explorer provided by Crypto.org Chain or any other compatible block explorer.
Double-check that you have entered the correct information and then click “Save” to add the Cronos network to Metamask.
Congratulations! You have successfully added the Cronos network to your Metamask wallet. You can now start using Metamask to interact with Cronos and explore the exciting world of decentralized finance on the Cronos network.
Step 3: Connecting Metamask to Cronos
Now that you have Cronos set up and running, it’s time to connect it to your Metamask wallet. This will enable you to interact with Cronos and use its features through your familiar Metamask interface.
To connect Metamask to Cronos, follow these steps:
- Open your Metamask wallet extension in your browser.
- Click on the network selection dropdown (it should currently be set to the Ethereum Mainnet).
- Scroll down and click on “Custom RPC”.
- In the “New RPC URL” field, enter the RPC URL for your Cronos chain. This URL can usually be obtained from the Cronos documentation or your network provider.
- Click on “Save” to add the custom RPC network.
- Your Metamask wallet should now be connected to Cronos. You can verify this by checking that the network displayed in your Metamask extension is now set to Cronos.
Once you have connected Metamask to Cronos, you can seamlessly transfer funds, interact with Cronos-based decentralized applications (DApps), and perform other transactions on the Cronos chain using your Metamask wallet. Enjoy exploring the Cronos ecosystem with all its possibilities!
Benefits of Integrating Cronos into Metamask
Integrating Cronos into Metamask brings a multitude of benefits to users, developers, and the entire ecosystem. Here are some of the key advantages:
1. Seamless Cross-Chain Transactions: By integrating Cronos into Metamask, users can effortlessly perform cross-chain transactions between the Ethereum network and the Cronos network. This interoperability opens up a wide range of possibilities for users, allowing them to access the benefits and features of both networks.
2. Lower Transaction Fees: Cronos is built on the Cosmos SDK, which utilizes Proof-of-Stake (PoS) consensus. This means that transaction fees on the Cronos network are significantly lower compared to the Ethereum network. By integrating Cronos into Metamask, users can enjoy lower transaction fees, making it more cost-effective to transfer and interact with assets on the network.
3. Enhanced Scalability: As an Ethereum Virtual Machine (EVM) compatible blockchain, Cronos inherits the scalability features of the EVM. Transactions on Cronos can be processed more efficiently and quickly, enabling a higher throughput and reducing network congestion. Integrating Cronos into Metamask allows users to benefit from this enhanced scalability, ensuring a smooth and seamless experience.
4. Access to Cronos Ecosystem: By integrating Cronos into Metamask, users gain access to the growing ecosystem of decentralized applications (dApps) and services built on the Cronos network. This opens up new opportunities for users to explore and participate in the Cronos ecosystem, unlocking innovative features and decentralized finance (DeFi) solutions.
5. Simplified User Experience: Integrating Cronos into Metamask simplifies the user experience by providing a familiar interface and workflow. Users can leverage their existing Metamask wallets, accounts, and tools to seamlessly interact with the Cronos network. This eliminates the need for users to learn and adapt to new interfaces, reducing friction and enhancing accessibility.
Overall, integrating Cronos into Metamask brings numerous benefits that enhance the user experience, improve scalability and affordability, and unlock the full potential of the Cronos network.
Frequently Asked Questions:
What is Cronos?
Cronos is a layer 2 scaling solution for the Ethereum network. It aims to provide faster and cheaper transactions by creating a sidechain that runs parallel to the Ethereum mainnet.
What is Metamask?
Metamask is a cryptocurrency wallet and browser extension that allows users to interact with decentralized applications (dApps) on the Ethereum network. It provides a user-friendly interface for managing Ethereum accounts and executing transactions.
Why would I want to integrate Cronos into Metamask?
Integrating Cronos into Metamask allows you to access the Cronos sidechain directly from your Metamask wallet. This means you can take advantage of Cronos’ faster and cheaper transactions while still using Metamask’s familiar interface and functionality.
+ There are no comments
Add yours