


If you’re looking to take full control over your Ethereum holdings, it’s time to make the move from Coinbase to Metamask. With Metamask, you can manage your Ethereum wallet directly from your web browser and enjoy the added security and convenience it offers. In this step-by-step guide, we’ll walk you through the process of sending Ethereum from Coinbase to Metamask so you can start taking advantage of all that Metamask has to offer.
Step 1: Set Up your Metamask Wallet
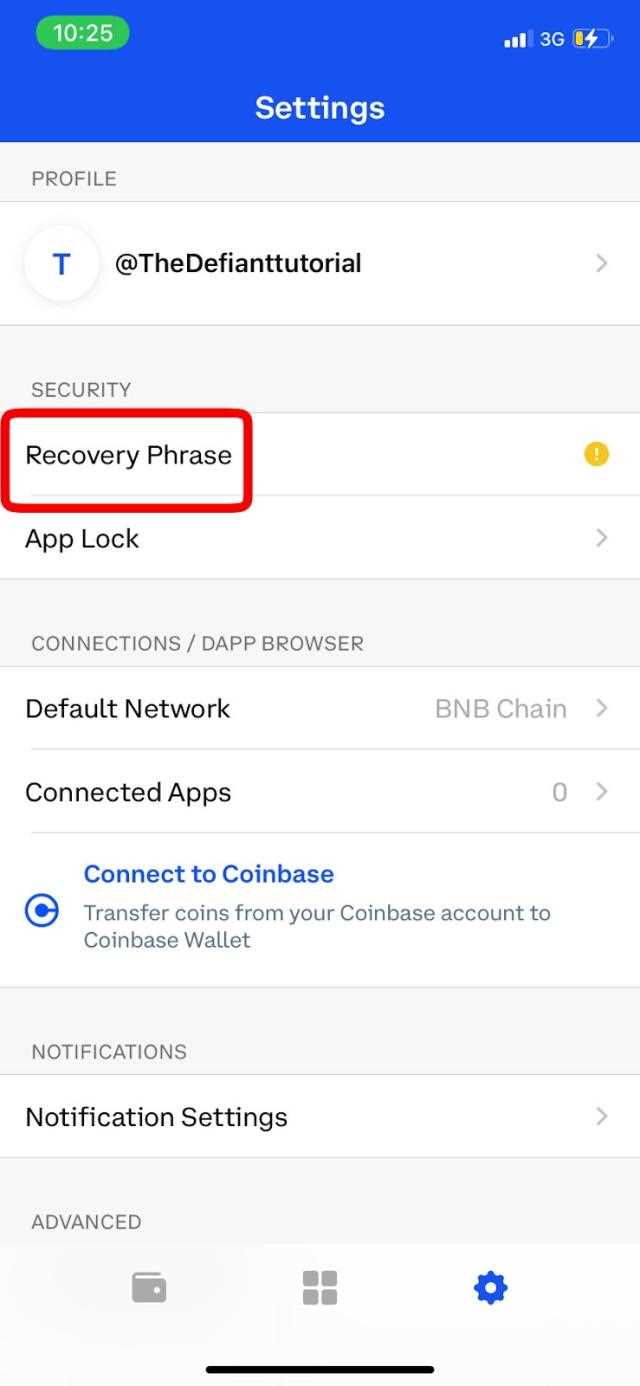
Before you can send Ethereum to Metamask, you’ll need to set up a Metamask wallet. Start by installing the Metamask extension for your web browser and follow the on-screen instructions to create a new wallet. Make sure to securely store your wallet’s 12-word seed phrase as this will be crucial for recovering your wallet in case of loss or theft.
Note: Make sure you only download the Metamask extension from the official website or trusted sources to avoid phishing attacks.
Step 2: Obtain Your Metamask Wallet Address
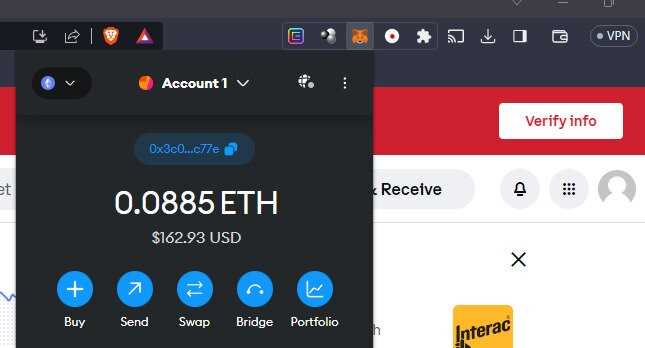
Once you have set up your Metamask wallet, you will have a unique wallet address associated with it. To find your wallet address, click on the Metamask icon in your web browser, select “Account 1,” and copy the address provided. This address will be used to receive Ethereum from Coinbase.
Step 3: Log In to Your Coinbase Account
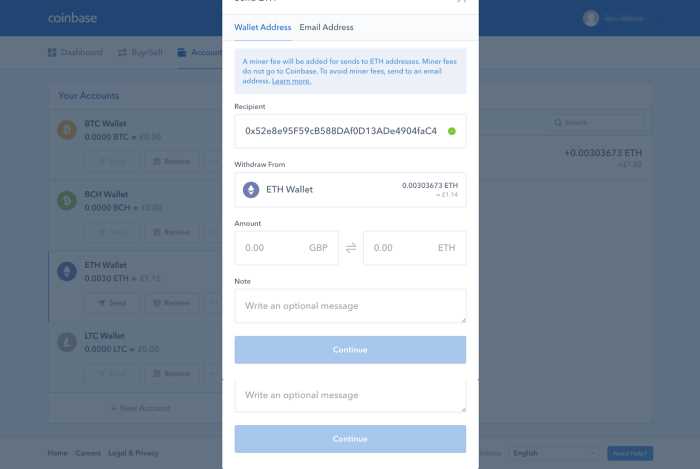
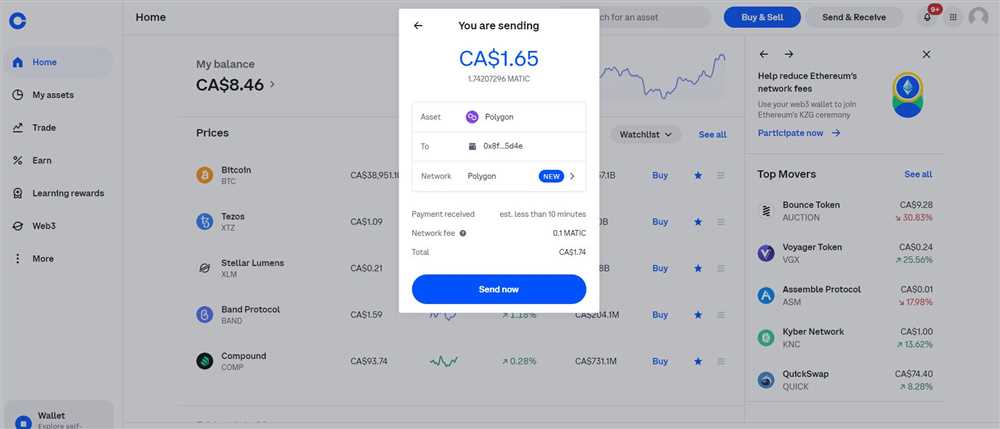
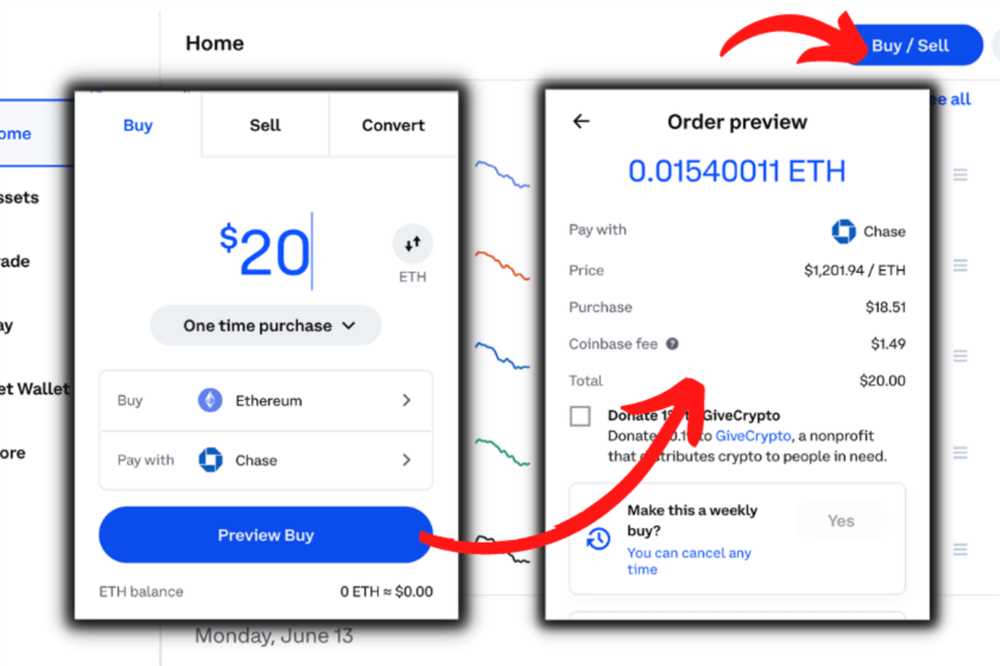
Log in to your Coinbase account and navigate to the “Accounts” tab. Find your Ethereum wallet and click on the “Send” button.
Step 4: Enter Your Metamask Wallet Address
In the recipient field of the Coinbase send form, paste your Metamask wallet address. Double-check that the address is correct to avoid any potential loss of funds.
Step 5: Confirm and Send
Enter the amount of Ethereum you wish to send to Metamask and review the transaction details. Once you’re satisfied, click the “Send” button to initiate the transfer.
That’s it! You have successfully sent Ethereum from Coinbase to Metamask. The transfer may take a few minutes to process, but once it’s complete, you’ll be able to manage your Ethereum holdings through Metamask and enjoy the added security and convenience it provides.
A Beginner’s Guide
If you’re new to cryptocurrency and looking to start using Ethereum, this beginner’s guide will help you understand the basics of sending Ethereum from Coinbase to Metamask.
What is Ethereum?
Ethereum is a decentralized, open-source blockchain platform that allows developers to build and deploy smart contracts and decentralized applications (DApps). It has its own native cryptocurrency called Ether (ETH).
What is Coinbase?

Coinbase is a popular cryptocurrency exchange platform that allows users to buy, sell, and store cryptocurrencies such as Bitcoin, Ethereum, and more. It also provides wallets for storing these cryptocurrencies securely.
What is Metamask?
Metamask is a browser extension wallet that allows users to interact with Ethereum-based DApps and manage their Ethereum assets. It provides a user-friendly interface and serves as a bridge between your browser and the Ethereum network.
Now that you have a basic understanding, let’s walk through the step-by-step process of sending Ethereum from Coinbase to Metamask.
Step 1: Set up a Metamask Wallet
If you haven’t done so already, install the Metamask browser extension and set up a wallet by following the prompts. Make sure to securely store your seed phrase, as it will be needed for wallet recovery.
Step 2: Sign in to Coinbase
If you don’t have a Coinbase account, sign up for one and complete the verification process. Once signed in, navigate to the “Accounts” tab and select your Ethereum wallet.
Step 3: Get Your Metamask Address
In your Metamask wallet, click on the account icon and select “Copy Address to Clipboard” to copy your Ethereum address.
Step 4: Withdraw from Coinbase
Go back to Coinbase and select the “Send” button on your Ethereum wallet. Paste your Metamask address into the recipient field, enter the amount of Ethereum you want to send, and confirm the transaction.
Step 5: Verify the Transaction
Once the transaction is sent from Coinbase, you can view its status on the Ethereum blockchain by searching for your transaction hash on a blockchain explorer like Etherscan. This will provide you with the confirmation that the transaction has been successfully processed.
Congratulations! You have successfully sent Ethereum from Coinbase to Metamask. Now, you can use your Ethereum in the Metamask wallet to interact with various DApps and smart contracts on the Ethereum network.
| Important Note: |
|---|
| Always double-check the recipient address before initiating any transaction to ensure it is correct. Sending cryptocurrencies to the wrong address may result in irreversible loss of funds. |
Getting Started with Ethereum
Ethereum is a decentralized, open-source blockchain platform that allows users to build and deploy smart contracts. With Ethereum, developers and users can interact with decentralized applications (dapps) that run on the network.
What is Ethereum?
Ethereum was proposed by Vitalik Buterin in late 2013 and the network went live on July 30, 2015. It was created as an extension of the blockchain technology used by Bitcoin, with the aim of providing a more versatile platform for building decentralized applications.
Unlike Bitcoin, which is primarily used as a digital currency, Ethereum’s main focus is on facilitating and enabling decentralized applications. Ethereum introduced its native cryptocurrency, Ether (ETH), which is used to power the network and execute smart contracts.
How to Get Started with Ethereum
To get started with Ethereum, you will need the following:
| Item | Description |
|---|---|
| 1 | A computer or mobile device with internet access |
| 2 | An Ethereum wallet to store your Ether and interact with the network |
| 3 | Ether (ETH) to use on the network |
Once you have these prerequisites, you can follow these steps to get started:
- Choose and set up an Ethereum wallet: There are various wallets available, such as Metamask, MyEtherWallet, and Ledger. Choose a wallet that fits your needs and follow the instructions to set it up.
- Obtain Ether (ETH): You can obtain Ether by purchasing it from a cryptocurrency exchange, earning it through mining, or receiving it as payment. Make sure to choose a reputable exchange and follow the necessary steps to acquire Ether.
- Start interacting with the Ethereum network: Once you have your wallet set up and Ether in your account, you can start interacting with the Ethereum network. Explore decentralized applications, send and receive Ether, and participate in various activities on the network.
Now that you understand the basics of Ethereum and how to get started, you can dive deeper into the world of decentralized applications and smart contracts. Ethereum’s versatility and growing ecosystem make it an exciting platform for developers and users alike.
Creating a Coinbase Account
Creating a Coinbase account is the first step towards sending Ethereum to your Metamask wallet. Follow these steps to create an account:
- Go to the Coinbase website at www.coinbase.com.
- Click on the “Get started” button on the top right corner of the page.
- Fill in your personal information, including your name, email address, and password. Make sure to choose a strong password to protect your account.
- Read and accept the terms of service and privacy policy.
- Verify your email address by clicking on the verification link sent to your email inbox.
- Once your email is verified, you will be asked to provide a phone number for two-factor authentication. This adds an extra layer of security to your account.
- Enter the verification code sent to your phone to complete the two-factor authentication process.
- After completing these steps, your Coinbase account will be created, and you can proceed to the next step of sending Ethereum to your Metamask wallet.
It is important to note that Coinbase may require additional verification steps, such as providing a photo ID, depending on your location and the level of verification required for your account.
Setting Up Metamask Wallet
Metamask is a popular web browser extension that allows you to manage your Ethereum wallet and interact with decentralized applications (dApps) on the Ethereum network. To get started with Metamask, follow these steps:
Step 1: Install Metamask
Open your preferred web browser and go to the Metamask website. Click on the “Get Started” button to begin the installation process. Follow the instructions to add the Metamask extension to your browser.
Step 2: Create a New Wallet
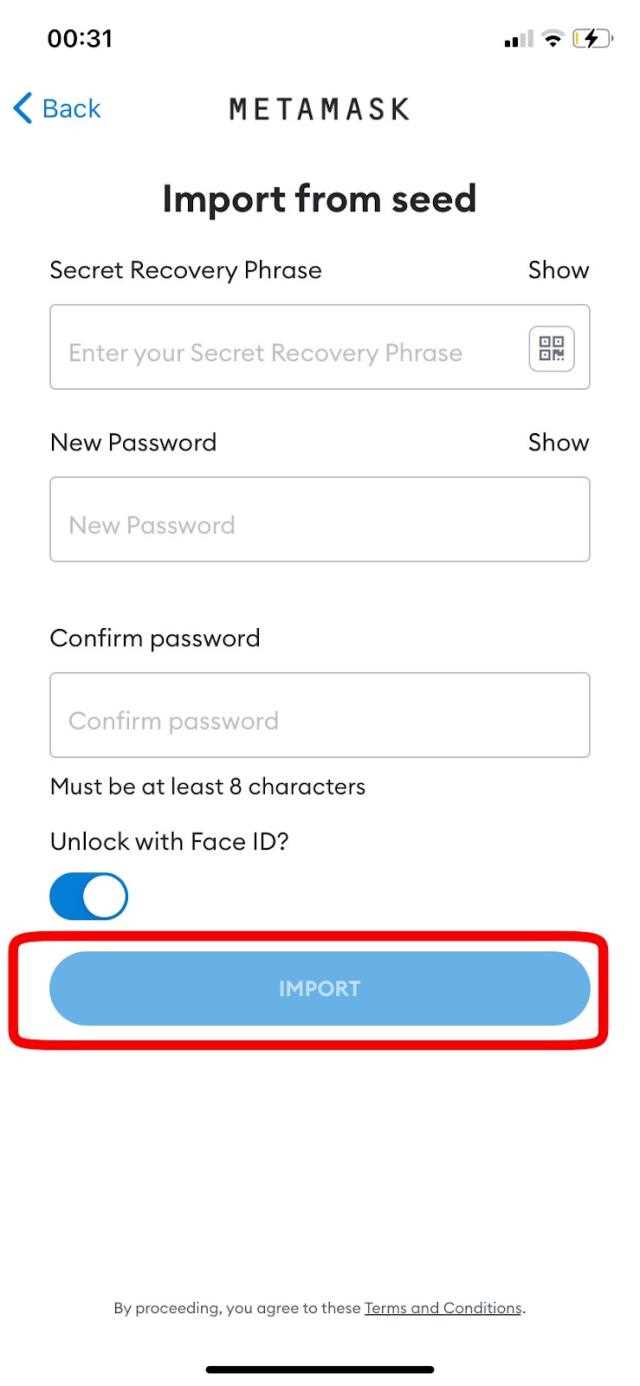
Once Metamask is installed, click on the extension icon at the top right corner of your browser. You’ll be prompted to set up a new wallet. If you already have a wallet, you can choose the “Import Wallet” option instead.
Enter a strong password for your wallet and click on the “Create” button. Make sure to choose a password that you can remember but is also secure.
Metamask will generate a secret backup phrase consisting of 12 words. Write down this phrase and store it in a safe place. This phrase is essential for recovering your wallet if you lose access to it.
Note: Do not share your secret backup phrase with anyone. It grants full access to your wallet.
Step 3: Connect to Ethereum Network
After creating your wallet, Metamask will show a list of available networks. Make sure the Ethereum Mainnet is selected.
If you’re planning to use Metamask for testing purposes or interacting with Ethereum test networks, you can choose a different network from the dropdown menu.
Click on the “Connect” button to connect Metamask to the selected network.
That’s it! You’ve successfully set up your Metamask wallet. You can now receive, store, and send Ethereum and interact with dApps on the Ethereum network.
Sending Ethereum from Coinbase to Metamask
Sending Ethereum from Coinbase to Metamask is a straightforward process that allows you to have more control over your Ethereum holdings and interact with decentralized applications (dApps). Here’s a step-by-step guide on how to do it:
Step 1: Open your Coinbase account and navigate to the “Accounts” tab.
Step 2: Locate your Ethereum wallet in the list of accounts and click on it.
Step 3: Click on the “Send” button, and a form will appear.
Step 4: In the “Recipient” field, enter your Metamask wallet address. Make sure to double-check the address to avoid any mistakes.
Step 5: Enter the amount of Ethereum you want to send. You can specify the amount in Ether (ETH) or choose a preferred fiat currency from the drop-down menu.
Step 6: Review the transaction details, including the network fees, and ensure everything looks correct.
Step 7: Once you’ve reviewed all the details, click on the “Send” button to initiate the transaction.
Step 8: Coinbase may prompt you to verify the transaction through a second form of authentication, such as SMS or email confirmation.
Step 9: After verifying the transaction, Coinbase will broadcast it to the Ethereum network for confirmation.
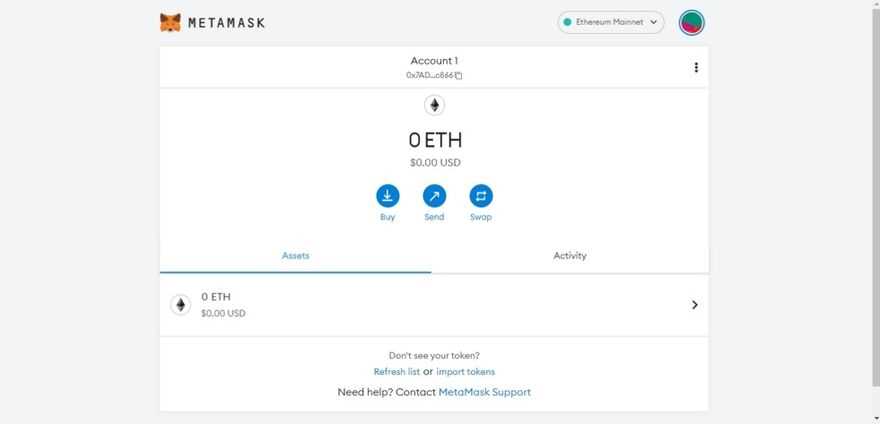
Step 10: Open your Metamask wallet and navigate to the “Assets” tab. You should see the Ethereum balance reflecting the recent transfer from Coinbase.
Step 11: You can now use your Ethereum in Metamask to interact with dApps, participate in token sales, or simply manage your crypto assets more securely.
Note: It’s important to keep in mind that cryptocurrency transactions are irreversible, so double-check all the details before confirming the transaction.
Following these steps will help you successfully send Ethereum from Coinbase to Metamask. Enjoy using your Ethereum in the world of decentralized finance!
Frequently Asked Questions:
What is Coinbase?
Coinbase is a cryptocurrency exchange and digital wallet that allows users to buy, sell, and store various cryptocurrencies, including Ethereum.
What is Metamask?
Metamask is a popular Ethereum wallet and browser extension that allows users to interact with decentralized applications (dApps) on the Ethereum network.
Why would I want to send Ethereum from Coinbase to Metamask?
Sending Ethereum from Coinbase to Metamask is useful if you want to use your Ethereum to interact with dApps or perform other transactions on the Ethereum network that require a wallet with more advanced functionalities.
Are there any fees for sending Ethereum from Coinbase to Metamask?
Yes, there are usually fees associated with sending Ethereum from Coinbase to Metamask. These fees can vary depending on the current network congestion and the size of your transaction. Coinbase will provide you with the exact fee amount before confirming the transaction.

+ There are no comments
Add yours