


The Metamask wallet is a popular cryptocurrency wallet that allows users to securely store and manage their digital assets. If you have recently started using Metamask and want to send Bitcoin to your wallet, this step-by-step guide will walk you through the process.
Step 1: Install and Set Up Metamask
If you haven’t already, you will need to install the Metamask extension in your web browser. Once installed, follow the instructions to create a new wallet or import an existing one. Make sure to securely store your password and seed phrase, as this will be needed to access your wallet later.
Step 2: Get Your Metamask Wallet Address
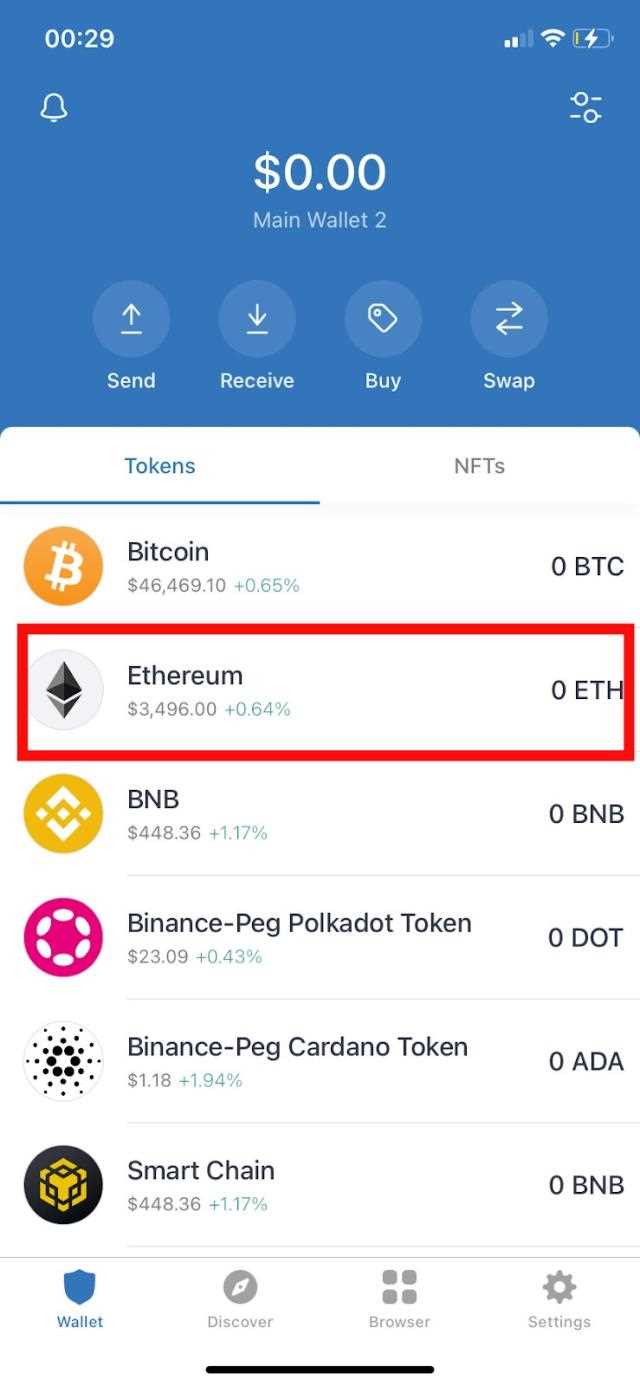
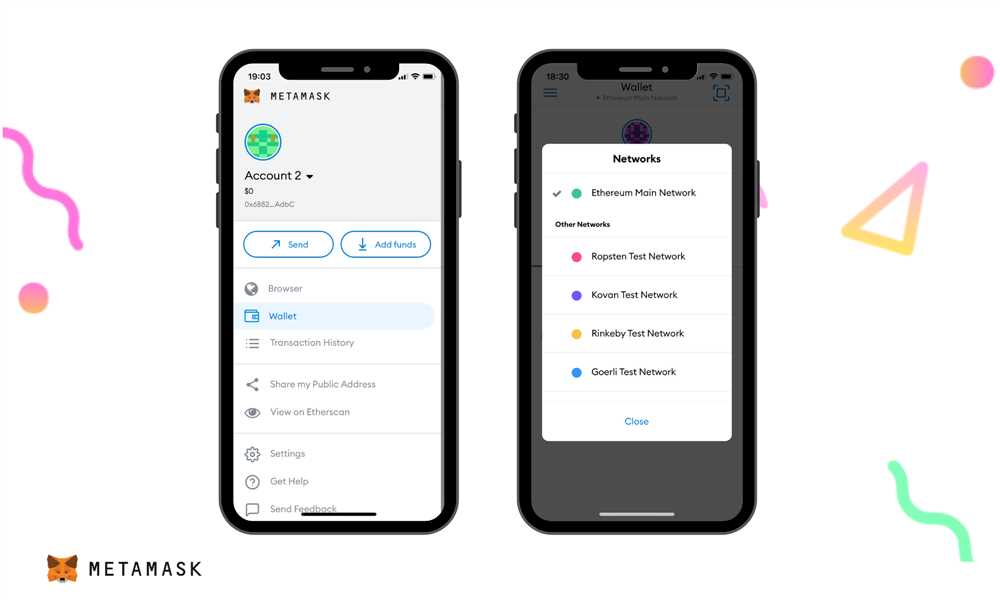
After setting up your Metamask wallet, you will be assigned a unique wallet address. To find your wallet address, click on the Metamask icon in your browser toolbar, then click on your account name to view your wallet details. Your wallet address will be displayed in a format similar to this: 0xAbC123DeF456GhI789JkLm.
Note: Ensure that you have selected the Bitcoin network in Metamask, as you can use the wallet for multiple cryptocurrencies.
Step 3: Copy Your Wallet Address
To send Bitcoin to your Metamask wallet, you will need to copy your wallet address. You can do this by clicking on the wallet address or using the copy button provided. Double-check that you have copied the address correctly, as any mistakes can result in the loss of your funds.
Pro Tip: Consider using a QR code to share your wallet address, as it can make exchanging addresses more convenient and minimize the risk of errors.
Step 4: Send Bitcoin to Your Metamask Wallet
Now that you have your Metamask wallet address, you can proceed to send Bitcoin to it. Open your existing Bitcoin wallet or exchange account, and find the “Send” or “Withdraw” option. Paste your Metamask wallet address in the recipient’s address field, specify the amount of Bitcoin you want to send, and double-check that everything is correct before confirming the transaction.
Note: It may take some time for the Bitcoin network to process and confirm your transaction. Be patient and keep an eye on your Metamask wallet for the arrival of your Bitcoin.
Congratulations! You have successfully sent Bitcoin to your Metamask wallet. You can now use your Bitcoin within the Metamask ecosystem or securely store it for future use.
Remember to always exercise caution when sending cryptocurrencies and ensure that you are using reliable wallets and platforms.
Step 1: Set up your Metamask Wallet

To send Bitcoin to your Metamask wallet, you first need to set up and install the Metamask extension on your web browser. Follow the steps below to get started:
1. Install Metamask:
Go to the official Metamask website or search for “Metamask” in your web browser’s extension store (e.g., Chrome Web Store). Click on the “Add to Chrome,” “Add to Firefox,” or “Add to Brave” button to install the extension on your browser.
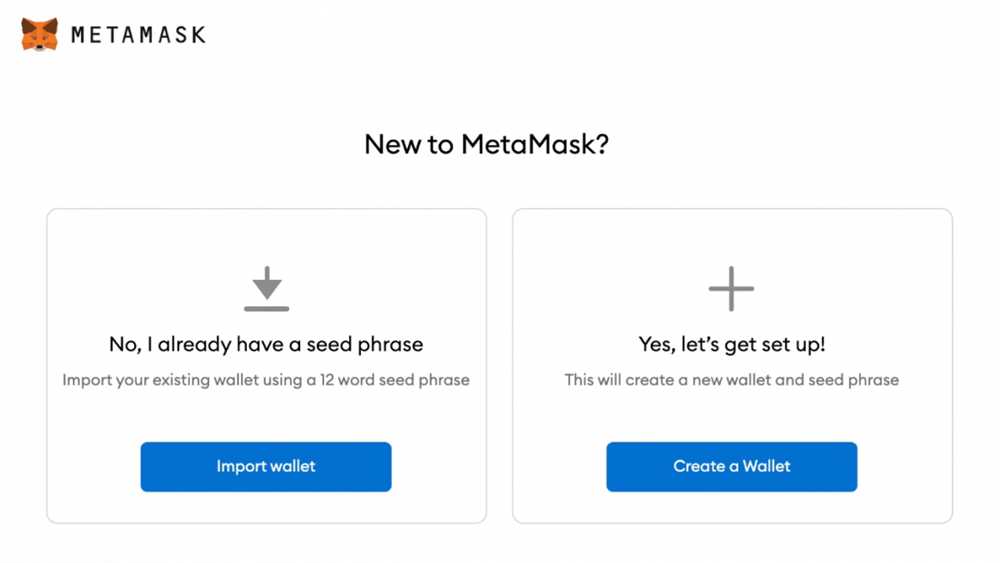
2. Create a Metamask wallet:
Once the extension is installed, click on the Metamask icon in your browser’s toolbar to open it. You will be prompted to import an existing wallet or create a new one. Select the “Create a Wallet” option.
3. Set up a strong password:
Choose a strong password for your Metamask wallet. Make sure to use a combination of uppercase and lowercase letters, numbers, and special characters. Confirm your password.
4. Save your secret phrase:
Metamask will generate a secret phrase (also known as a seed phrase) consisting of 12 or 24 words. This phrase is crucial for recovering your wallet if you ever lose access to it. Write down the phrase and store it in a safe place. Do not share it with anyone.
Note: The secret phrase is the most important piece of information to secure your wallet. Do not store it digitally or take screenshots.
5. Confirm your secret phrase:
After noting down your secret phrase, Metamask will ask you to confirm it by selecting the correct words in the right order. This step ensures that you have saved the phrase correctly. Select the words in the correct order and click “Confirm”.
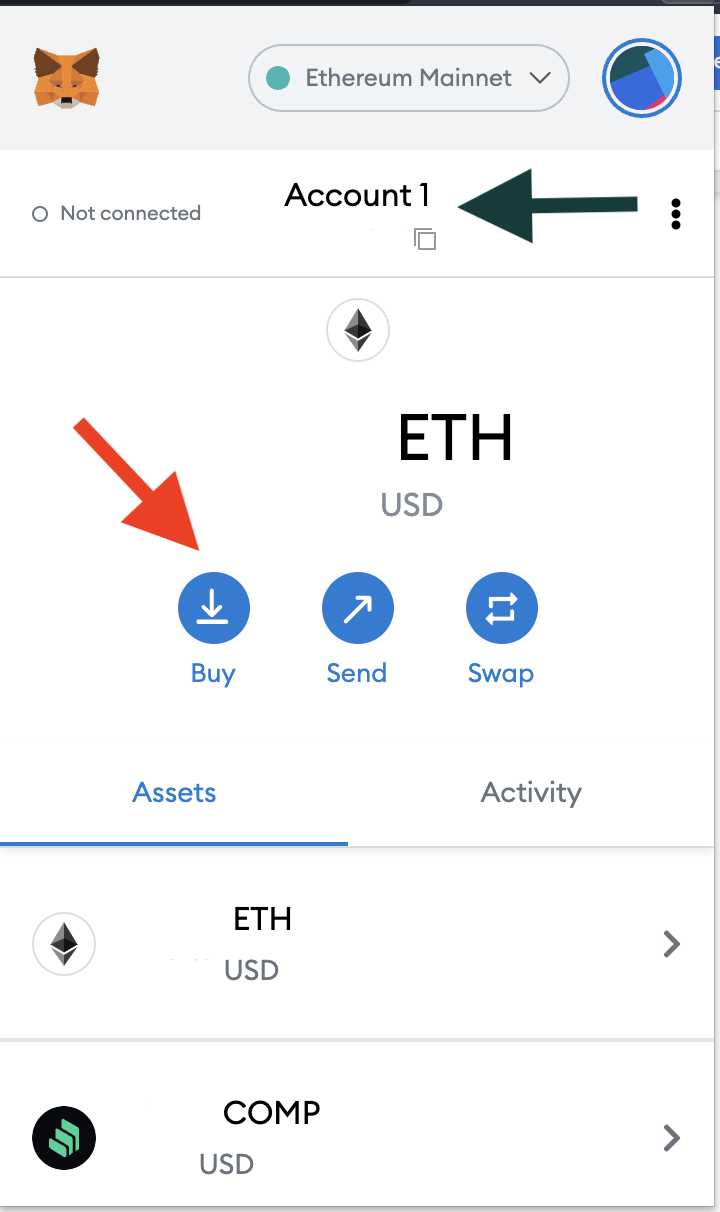
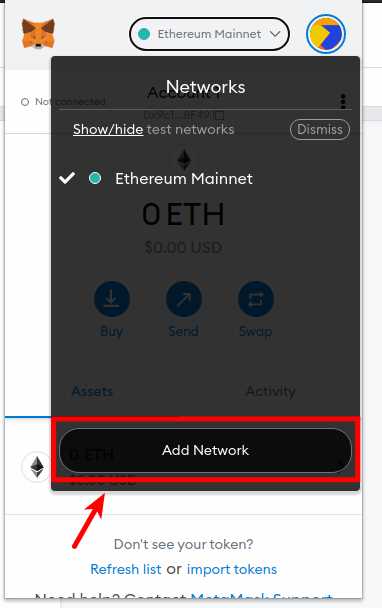
6. Connect to the Ethereum Mainnet:
Metamask defaults to the Ethereum Mainnet, but you can switch to other networks such as Binance Smart Chain or Polygon if needed. For sending Bitcoin, the Ethereum Mainnet is sufficient.
7. Add some Ethereum to your wallet:
Before sending Bitcoin to your Metamask wallet, make sure you have some Ethereum (ETH) in it. You need a small amount of ETH in your wallet to pay for transaction fees on the Ethereum network.
Note: If you don’t have any Ethereum, you can purchase it on a cryptocurrency exchange and then transfer it to your Metamask wallet.
Once you have completed these steps, your Metamask wallet will be set up and ready to receive Bitcoin. You can proceed to the next steps to learn how to send Bitcoin to your Metamask wallet.
Step 2: Obtain your Bitcoin address
Before you can send Bitcoin to your Metamask wallet, you’ll need to obtain your Bitcoin address. This address is like a unique identifier for your wallet and is necessary to receive Bitcoin.
Option 1: Generate a new Bitcoin address through Metamask
- Open Metamask and log in to your wallet.
- Click on the account icon in the top-right corner.
- Select the “Receive” option.
- Click on “Create Account” to generate a new Bitcoin address.
- Copy the newly generated Bitcoin address to your clipboard.
Option 2: Use an external Bitcoin wallet
If you already have a Bitcoin wallet from another platform, you can use that instead. Here’s how:
- Open your external Bitcoin wallet.
- Find the option to receive Bitcoin or view your Bitcoin address.
- Copy your Bitcoin address to your clipboard.
Once you have obtained your Bitcoin address through either option, you are ready to move on to the next step: sending Bitcoin to your Metamask wallet.
Step 3: Log in to your Bitcoin wallet
Once you have set up your Bitcoin wallet, it’s time to log in and access your account. Follow these steps to log in:
1. Go to the login page
Visit the website of your Bitcoin wallet provider and go to the login page. This page is usually accessible through a “Sign In” or “Log In” button on the homepage.
2. Enter your credentials
On the login page, you will typically find two fields where you need to enter your login credentials. These credentials usually consist of a username or email address and a password. Fill in the required information.
3. Complete any additional security steps
Depending on your Bitcoin wallet provider, you may need to complete additional security steps to log in, such as solving a CAPTCHA or entering a two-factor authentication code. Follow the instructions provided to successfully complete these steps.
4. Click on the “Log In” or “Sign In” button
After entering your credentials and completing any additional security steps, click on the “Log In” or “Sign In” button to proceed. This will direct you to your Bitcoin wallet account dashboard.
Once you have successfully logged in, you can now proceed to the next step of sending Bitcoin to your Metamask wallet.
Step 4: Initiate the Bitcoin transfer
Once you have copied the Bitcoin address linked to your Metamask wallet and acquired the necessary amount of Bitcoins, it’s time to initiate the transfer. Follow these steps to send Bitcoin to your Metamask wallet:
1. Open your Bitcoin wallet.
Launch your Bitcoin wallet software or log in to your online Bitcoin wallet.
2. Locate the “Send” option.
Find the “Send” or “Send Bitcoin” option in your Bitcoin wallet. This is usually located in the main menu or in the wallet’s dashboard.
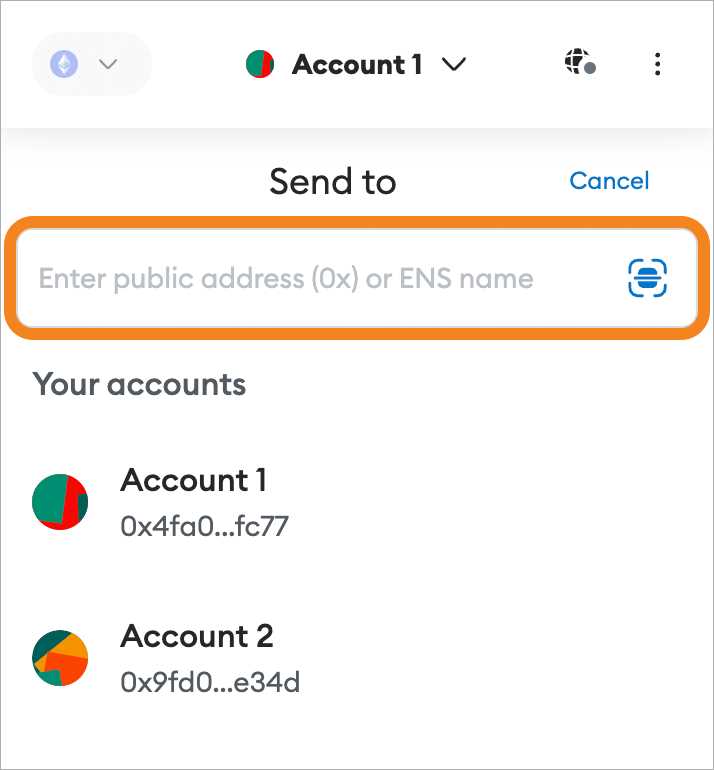
3. Enter the recipient address.
Paste the Bitcoin address that you copied from your Metamask wallet into the “Recipient Address” or “To” field. Make sure to double-check the address to avoid any mistakes.
4. Specify the amount to send.
Enter the amount of Bitcoins you want to send to your Metamask wallet. Some wallets allow you to select the currency type (BTC) and the amount directly, while others may require you to enter the amount in a separate field.
5. Set the transaction fee (optional).
You may have the option to specify the transaction fee for the Bitcoin transfer. This fee is paid to miners who verify and process the transaction. Higher fees usually result in faster confirmation times. If you’re not sure, you can use the default fee suggested by the wallet.
6. Double-check the details.
Review the recipient address, the amount, and the transaction fee to ensure everything is accurate. Take extra precautions as Bitcoin transactions are irreversible, and sending funds to the wrong address may result in permanent loss of your Bitcoins.
7. Confirm and send the transaction.
Once you are satisfied with the details, click on the “Send” or “Confirm” button to initiate the Bitcoin transfer. Depending on your wallet, you may need to provide additional authentication, such as entering your wallet password or confirming the transaction on your mobile device.
8. Wait for confirmation.
After initiating the transaction, you will need to wait for the Bitcoin network to confirm it. This can take anywhere from a few minutes to several hours, depending on the network congestion and the transaction fee you set.
Note: It’s important to keep your Bitcoin wallet secure. Make sure to use a strong and unique password, enable two-factor authentication if available, and store your wallet backup in a safe place.
Frequently Asked Questions:
What is a Metamask wallet?
A Metamask wallet is a digital wallet that allows users to store, manage, and interact with Ethereum-based decentralized applications (dApps) directly from their web browser.
How can I create a Metamask wallet?
You can create a Metamask wallet by installing the Metamask browser extension on your web browser and following the steps to set up a new wallet. Once installed, you will be prompted to create a new wallet with a password and receive a unique seed phrase.
Can I send Bitcoin to my Metamask wallet?
No, Metamask is primarily designed for Ethereum-based assets and does not support native Bitcoin transactions. However, you can use third-party services like a bridge or exchange platform to convert your Bitcoin to an Ethereum-based token that is compatible with Metamask.
Are there any fees involved in sending Bitcoin to a Metamask wallet?
Yes, there may be fees involved in converting your Bitcoin to an Ethereum-based token and sending it to a Metamask wallet. The fees can vary depending on the exchange or bridge platform you use and the current network congestion. It is recommended to check the fee structure before initiating any transactions.
+ There are no comments
Add yours