


If you’re a cryptocurrency enthusiast, chances are you’re familiar with Metamask – a popular browser extension that allows you to manage your Ethereum assets and interact with decentralized applications (dApps) on the Ethereum network. But did you know that you can also add other networks, such as the Smart Chain, to your Metamask wallet? In this step-by-step guide, we’ll walk you through the process of adding the Smart Chain to your Metamask wallet, so you can take advantage of the exciting opportunities it offers.
Step 1: Install Metamask Extension
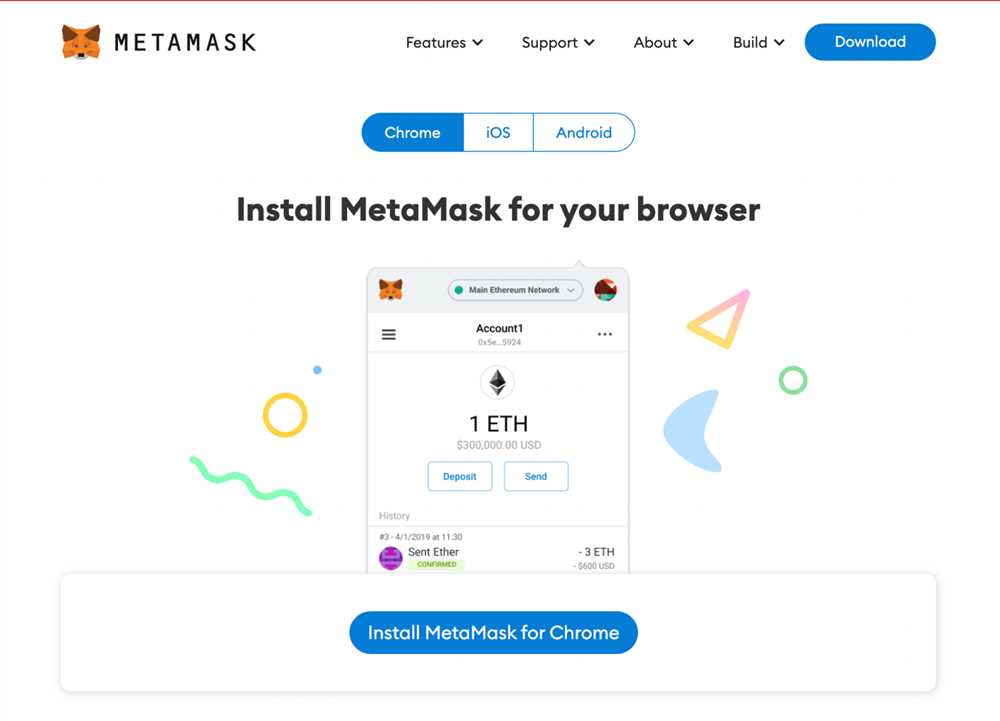
To get started, you’ll need to have the Metamask extension installed in your browser. If you haven’t already done so, simply search for “Metamask” in your browser’s extension store and follow the installation instructions. Once you have the extension installed, you’ll see the Metamask fox icon in your browser’s toolbar.
Step 2: Create or Import a Wallet
If you already have a Metamask wallet, you can skip this step. Otherwise, click on the Metamask fox icon in your browser’s toolbar and select “Create a Wallet” or “Import Wallet” if you have an existing wallet seed phrase. Follow the on-screen instructions to set up your wallet. Make sure to securely store your seed phrase, as it’s the key to accessing your wallet.
Disclaimer: It’s important to note that cryptocurrency investments come with risks. The information in this guide is provided for educational purposes only and should not be considered financial advice. Always do your own research and consult with a financial advisor before making any investment decisions.
Create a New Wallet
To add a new wallet to your Metamask, follow these steps:
- Open the Metamask extension in your browser.
- Click on the profile icon at the top right corner.
- In the dropdown menu, select “Create a Wallet”.
- Read and accept the terms of use.
- Create a strong password for your wallet.
- Click on “Create” to generate your new wallet.
- Make sure to copy and securely store your secret backup phrase as it’s the only way to recover your wallet.
Once your wallet is created, you can start using it to send and receive funds on the Metamask network.
Note: It is highly recommended to use a strong and unique password for your wallet to ensure its security.
Install the Metamask Extension
In order to add the Smart Chain to your Metamask wallet, you will need to have the Metamask extension installed on your browser. Follow these steps to install the Metamask extension:
- Open your preferred browser and go to the Metamask website.
- Click on the “Get Chrome Extension” button if you are using Google Chrome, or “Get Firefox Extension” if you are using Firefox.
- The Metamask extension page will open in the Chrome Web Store or Firefox Add-ons website.
- Click on the “Add to Chrome” button or “Add to Firefox” button to start the installation process.
- A pop-up window will appear asking for confirmation. Click on “Add extension” to proceed.
- The Metamask extension will now be added to your browser.
- Next, click on the Metamask icon that appears in the top right corner of your browser.
- A welcome screen will appear. Click on “Get Started” to create a new wallet or “Import Wallet” if you already have one.
- Follow the on-screen instructions to set up your wallet or import an existing wallet if needed.
- Once you have completed the setup process, you will now have the Metamask extension installed and ready to use.
With the Metamask extension installed, you can now proceed to the next steps to add the Smart Chain to your Metamask wallet.
Add Binance Smart Chain Network
If you want to add Binance Smart Chain to your Metamask wallet, follow these step-by-step instructions:
Step 1: Open Metamask Extension
First, open your Metamask browser extension by clicking on the Metamask icon in your browser’s toolbar.
Step 2: Switch to Mainnet
In the Metamask extension, click on the network selection dropdown and choose “Main Ethereum Network” if it’s not already selected.
Step 3: Open Network Settings
At the bottom of the network selection dropdown, click on the “Custom RPC” option to open the network settings.
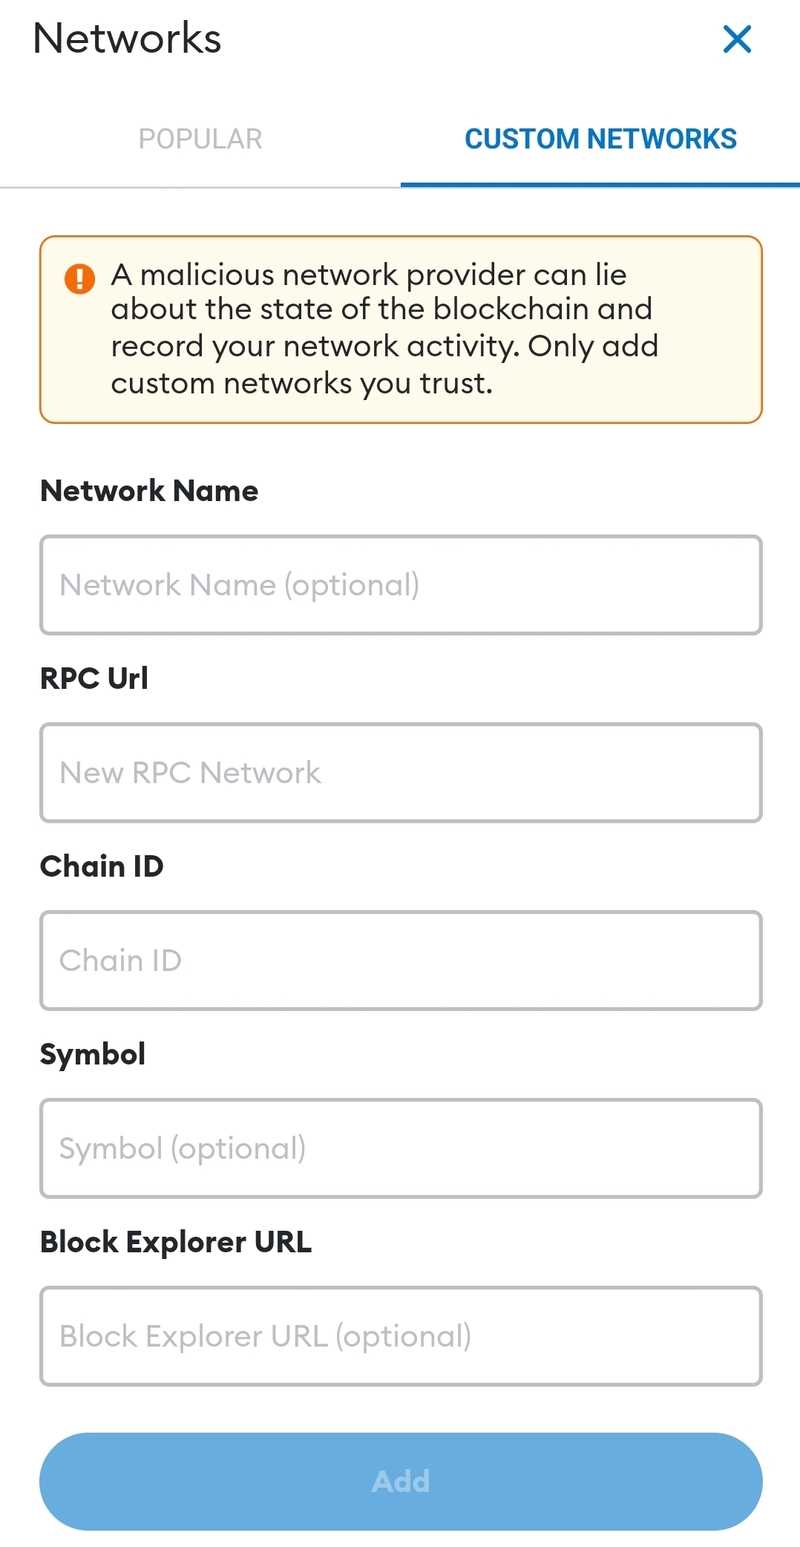
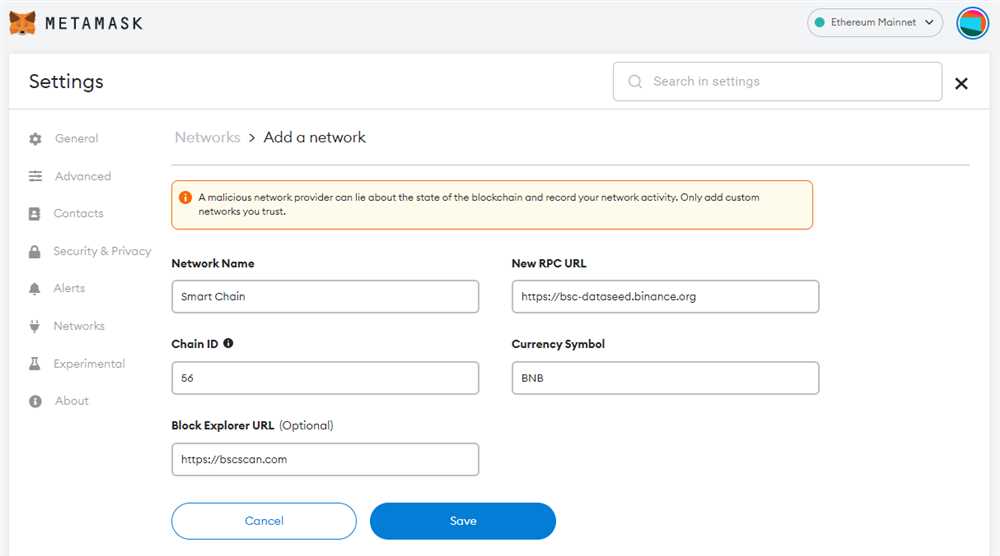
Step 4: Add Binance Smart Chain Details

In the network settings, add the following details for Binance Smart Chain:
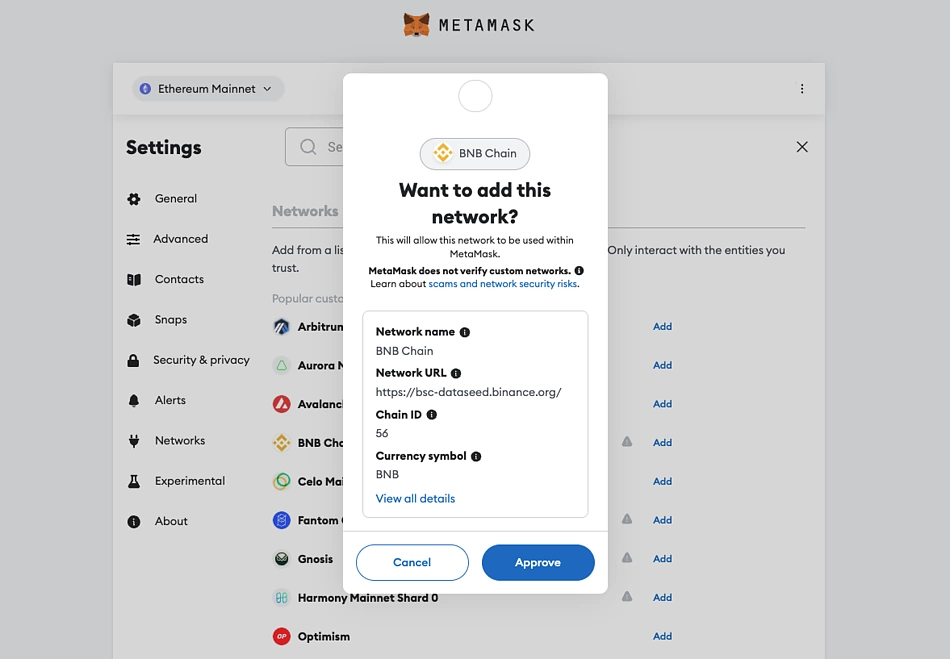
- Network Name: Binance Smart Chain
- New RPC URL: https://bsc-dataseed1.binance.org/ or any other valid Binance Smart Chain RPC URL
- ChainID: 56
- Symbol: BNB
- Block Explorer URL: https://bscscan.com/
Step 5: Save Network
Click on the “Save” button to add the Binance Smart Chain network to your Metamask wallet.
Once you have successfully added the Binance Smart Chain network, you can now switch to it by selecting it from the network selection dropdown. You will be able to interact with Binance Smart Chain dApps and send/receive BNB tokens.
Connect Metamask to Binance Smart Chain
To connect your Metamask wallet to Binance Smart Chain, follow the step-by-step guide below.
| Step | Instructions |
|---|---|
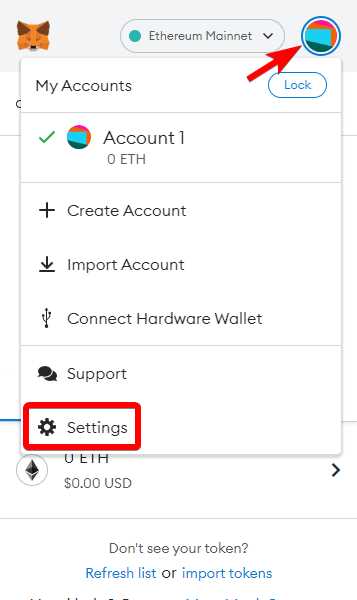
| 1 | Open the Metamask extension in your browser and make sure you are logged in. |
| 2 | Click on the account icon located in the top right corner of the extension. |
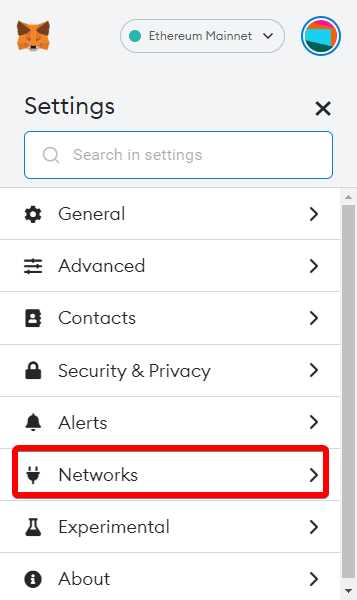
| 3 | From the dropdown menu, select “Settings”. |
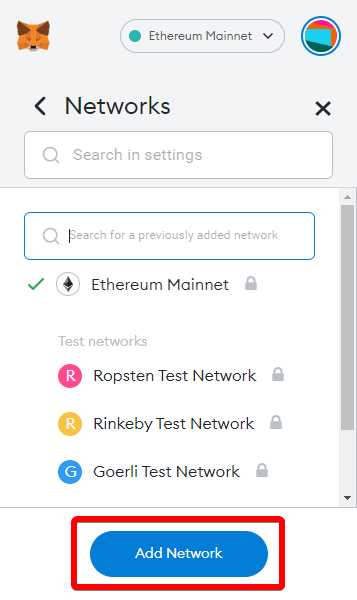
| 4 | In the left sidebar, click on “Networks”. |
| 5 | Scroll down and click on “Add Network”. |
| 6 | Enter the following details for the Binance Smart Chain network: |
|
|
| 7 | Click on “Save”. |
| 8 | Now, you should see the Binance Smart Chain network added to your Metamask extension. |
| 9 | To switch to the Binance Smart Chain network, click on the network dropdown in the top center of the extension, and select “Binance Smart Chain”. |
Congratulations! You have successfully connected your Metamask wallet to Binance Smart Chain. You can now use your Metamask wallet to interact with decentralized applications (dApps) and manage your Binance Smart Chain assets.
Frequently Asked Questions:
What is Metamask?
Metamask is a cryptocurrency wallet and browser extension that allows users to interact with decentralized applications (DApps) on the Ethereum blockchain.
Can I use Smart Chain with Metamask?
Yes, you can use Smart Chain with Metamask by adding the Smart Chain network to your Metamask settings. Once added, you can interact with decentralized applications (DApps) and send/receive Binance Smart Chain tokens using Metamask.
What are the benefits of adding Smart Chain to Metamask?
Adding Smart Chain to Metamask allows you to access and use decentralized applications (DApps) on the Binance Smart Chain network. Smart Chain offers fast and low-cost transactions, making it an attractive option for users who want to avoid high fees on the Ethereum network. By adding Smart Chain to Metamask, you can enjoy the benefits of both networks and easily switch between them.

+ There are no comments
Add yours