


If you’re an avid user of the Metamask wallet and are interested in exploring the Polygon Network, you may be wondering how to add it to your list of supported networks. Well, you’ve come to the right place! In this step-by-step guide, we’ll walk you through the process of adding the Polygon Network to your Metamask wallet, so you can start taking advantage of all the benefits it has to offer.
Step 1: Install the Metamask Extension
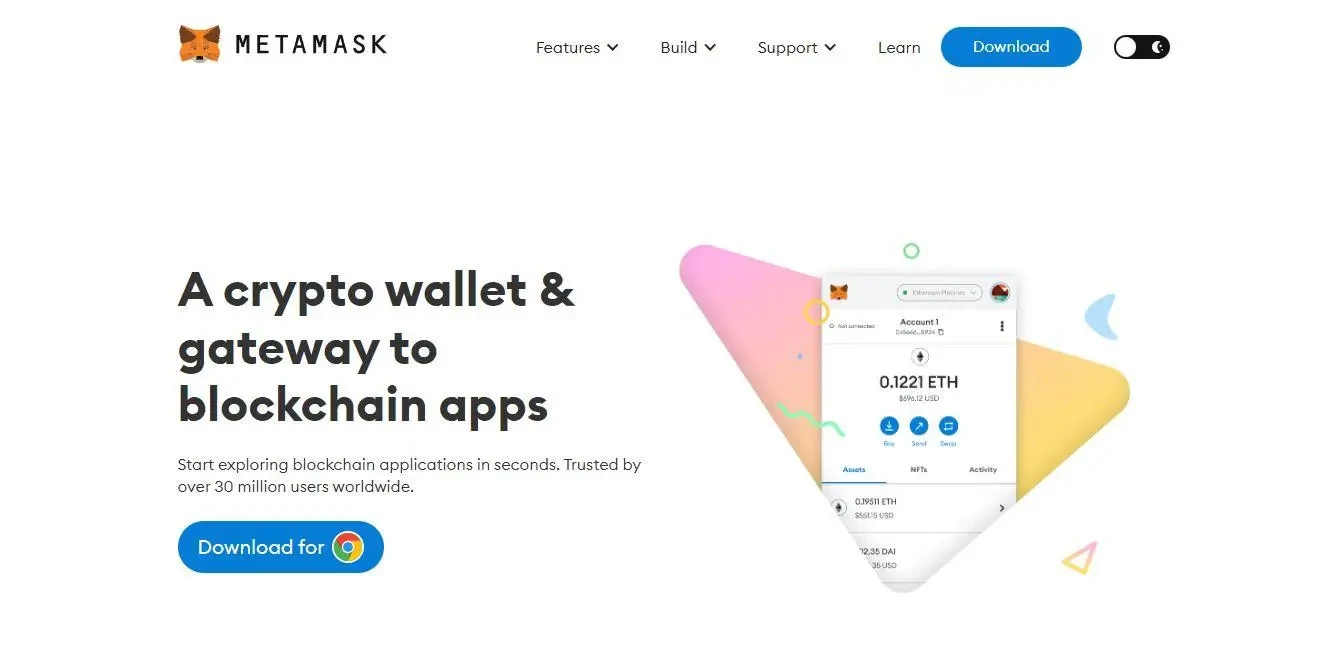
The first thing you’ll need to do is install the Metamask extension if you haven’t already. Metamask is a browser-based wallet that allows you to interact with decentralized applications (dApps) on the Ethereum network. Simply visit the Metamask website and follow the instructions to install the extension for your preferred browser.
Note: Metamask is currently available for Chrome, Firefox, Brave, and Edge browsers.
Step 2: Create or Import a Wallet
Once you have the Metamask extension installed, open it up and either create a new wallet or import an existing one using your recovery phrase or private key. Make sure you securely store your recovery phrase or private key, as they are the keys to accessing your wallet and funds.
Step 3: Access the Network Settings
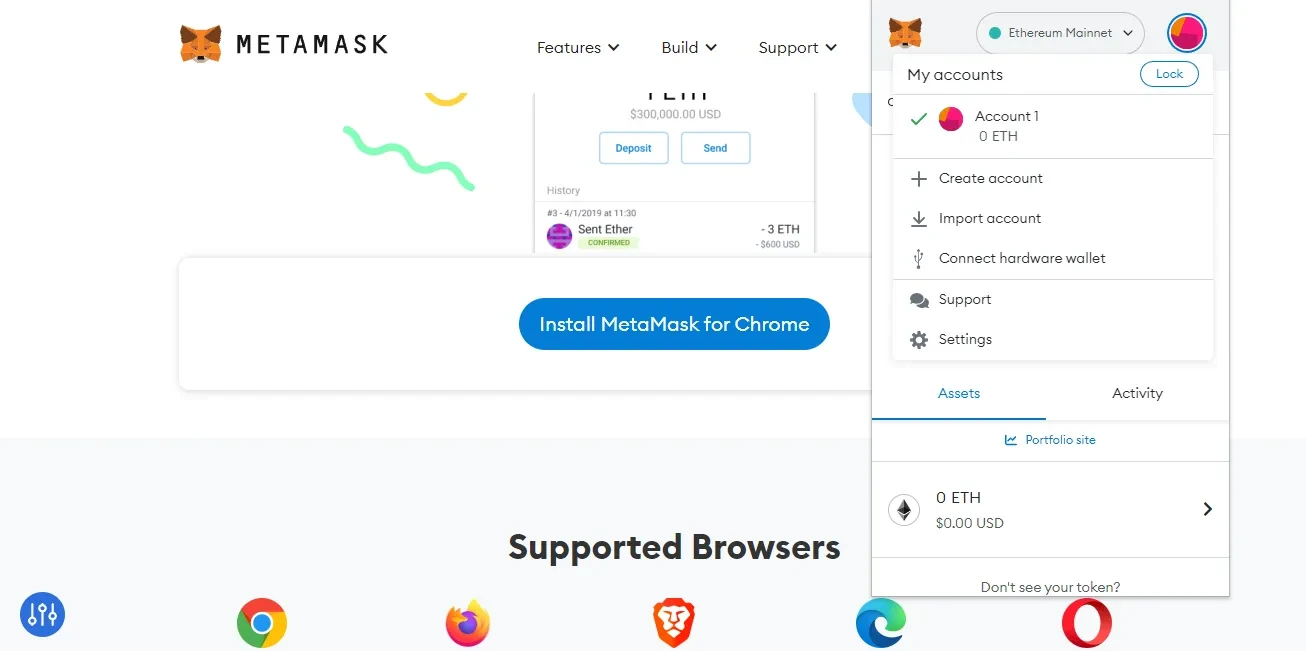
With your new or imported wallet open, click on the network selection button located at the top of the Metamask interface. It should display the currently selected network (likely “Ethereum Mainnet”) with a small arrow next to it. Click on this arrow to access the network settings.
Step 4: Add the Polygon Network
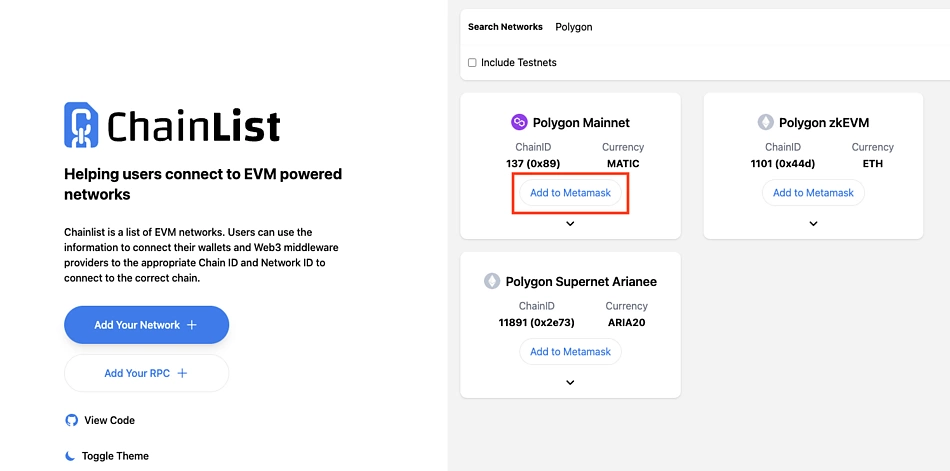
From the network settings menu, you’ll see a list of supported networks. To add the Polygon Network, click on the “Custom RPC” option. This will allow you to input the specific details of the network you wish to add.
Note: The Polygon Network uses a custom RPC (Remote Procedure Call) endpoint.
Step 5: Input the Polygon Network Details
In the “New RPC URL” field, enter the following URL to connect to the Polygon Network: https://rpc-mainnet.maticvigil.com/. You can also give your network a custom name, such as “Polygon” or “Matic”, to easily differentiate it from other networks.
Next, input the Polygon Network’s Chain ID, which is 137. Finally, for the currency symbol, enter MATIC. Once you have filled in all the required fields, click “Save” to add the Polygon Network to your list of supported networks.
Step 6: Switch to the Polygon Network
Congratulations! You have successfully added the Polygon Network to your Metamask wallet. To switch to the Polygon Network, simply click on the network selection button again and choose “Polygon” (or whatever custom name you entered in Step 5) from the list of supported networks. Now, you can start exploring the world of dApps and decentralized finance (DeFi) on the Polygon Network using your Metamask wallet.
That’s it! You’re now ready to enjoy the benefits of the Polygon Network and all the amazing dApps it has to offer. Happy exploring!
Getting Started with Metamask
If you’re new to the world of cryptocurrency and decentralized applications (DApps), Metamask is an essential tool that allows you to securely manage your Ethereum accounts and interact with the vast ecosystem of DApps on the Ethereum network.
To get started with Metamask, follow these simple steps:
Step 1: Download and Install Metamask
Visit the official Metamask website and download the extension for your preferred web browser. Metamask is available for Chrome, Firefox, Brave, and Edge.
Step 2: Create a New Account
Once you have installed Metamask, click on the Metamask icon in your browser toolbar. Follow the prompts to create a new account by setting up a strong password and backing up your secret seed phrase.
Remember: Your secret seed phrase is crucial for recovering your account, so make sure to store it in a safe and secure location. Do not share it with anyone.
Step 3: Connect to the Ethereum Mainnet
By default, Metamask is connected to the Ethereum Mainnet. To confirm this, check that the network dropdown in the top left corner of the Metamask window displays “Main Ethereum Network”.
If you’re using a different network, click on the network dropdown and select “Main Ethereum Network” from the list.
Step 4: Add the Polygon Network
To add the Polygon network to Metamask, click on the network dropdown and select “Custom RPC”.
In the “New Network” tab, enter the following details:
Network Name: Polygon
New RPC URL: https://rpc-mainnet.maticvigil.com/
Chain ID: 137
Once you have entered the details, click “Save” to add the Polygon network to your Metamask.
Step 5: Start Using Metamask on the Polygon Network
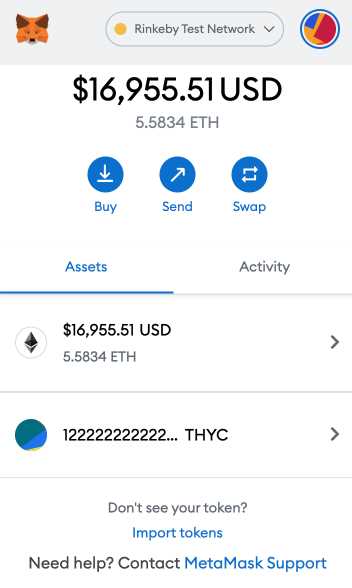
With the Polygon network added to Metamask, you can now switch between networks by selecting the desired network from the network dropdown.
To interact with DApps on the Polygon network, make sure you have some MATIC tokens in your Metamask wallet. You can obtain MATIC tokens by transferring them from the Ethereum Mainnet or by using a token bridge.
Note: When using the Polygon network, keep in mind that transaction fees and confirmation times may differ from the Ethereum Mainnet.
Now that you’re familiar with the basics of getting started with Metamask, you can explore the vast world of decentralized finance (DeFi) and other exciting DApps on the Ethereum and Polygon networks.
What is Metamask?
Metamask is a popular browser extension that serves as a digital wallet and allows users to manage Ethereum-based assets and interact with decentralized applications (dApps). It acts as a bridge between your browser and the Ethereum blockchain, allowing you to securely store and send Ethereum tokens, as well as interact with various decentralized platforms.
With Metamask, you can easily create and manage multiple Ethereum accounts, import existing accounts, and securely store your private keys. It provides a user-friendly interface that simplifies the process of transacting with Ethereum-based assets and dApps.
In addition to being a wallet, Metamask also supports browser integration, enabling seamless interaction with various dApps and blockchain-enabled websites. This means that you can use Metamask to securely authenticate and interact with decentralized platforms, making it a convenient tool for participating in blockchain-based ecosystems.
Metamask is available as a browser extension for popular browsers like Google Chrome, Mozilla Firefox, and Brave. It is compatible with desktop and mobile devices, allowing you to access your Ethereum accounts and interact with dApps on the go.
Overall, Metamask is a powerful tool that makes it easy for individuals to manage their Ethereum assets, securely interact with decentralized platforms, and participate in the growing ecosystem of blockchain applications.
Setting Up Metamask
Metamask is a popular cryptocurrency wallet and browser extension that allows users to interact with the Ethereum blockchain. To add the Polygon Network to Metamask, follow the step-by-step guide below:
Step 1: Install Metamask
If you don’t have Metamask installed, you need to install it first. Metamask is available as a browser extension for Google Chrome, Mozilla Firefox, and Brave. Visit the respective extension store for your browser and search for “Metamask”. Click on the “Add to Chrome/Firefox/Brave” button to install it.
Step 2: Create a Metamask Account
Once Metamask is installed, you need to create a new Metamask account or import an existing one. Click on the Metamask icon in your browser toolbar and select “Create a Wallet” if you don’t have a Metamask account yet. Follow the on-screen instructions to set up your account by creating a strong password and saving your secret backup phrase.
Step 3: Connect to the Polygon Network

After creating your Metamask account, you need to connect it to the Polygon Network. To do this, click on the Metamask icon in your browser toolbar and select “Settings”. In the Settings menu, click on “Networks” and then “Add Network”.
In the “Add Network” dialogue box, enter the following details:
- Network Name: Polygon
- New RPC URL: https://rpc-mainnet.matic.network
- Chain ID: 137
- Symbol: MATIC
- Block Explorer URL: https://explorer.matic.network
Once you have entered all the details, click on “Save” to add the Polygon Network to Metamask. You will now be able to switch between the Ethereum Network and the Polygon Network in your Metamask wallet.
Congratulations! You have successfully set up Metamask and added the Polygon Network. You can now use Metamask to interact with dApps and decentralized exchanges on the Polygon Network.
Adding the Polygon Network
Adding the Polygon Network to your Metamask wallet is a simple and straightforward process. By following these step-by-step instructions, you’ll be able to access the Polygon network and explore its decentralized applications (dApps).
Step 1: Download and Set Up Metamask
If you haven’t already, visit the official Metamask website and download the wallet extension for your preferred web browser. Once installed, create a new account or import an existing one by following the provided instructions.
Step 2: Access Metamask Settings
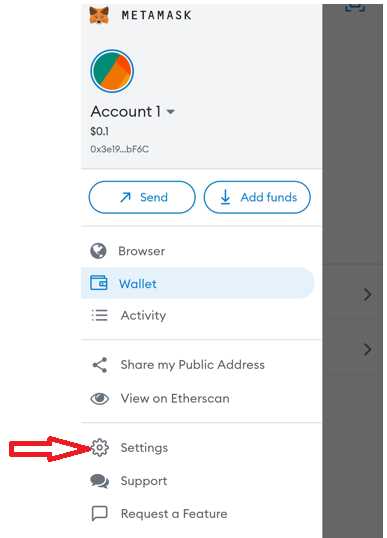
After successfully setting up Metamask, click on the wallet extension icon in your browser’s toolbar. This will open the Metamask popup. From the popup, select the account you wish to add the Polygon network to, and then click on the “Settings” button, represented by the gear icon.
Step 3: Network Configuration
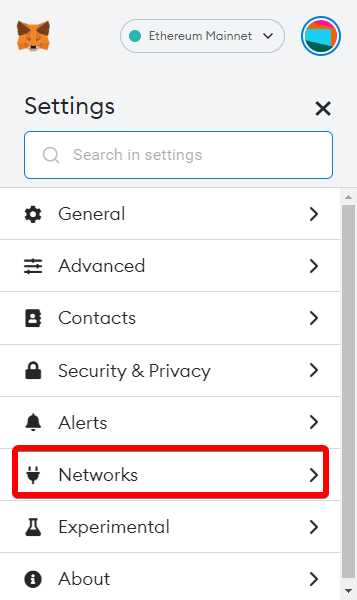
In the settings menu, locate and click on the “Networks” tab. This will display a list of supported networks. At the bottom of the list, you’ll find a section called “New Network”. Here, fill in the following details:
| Network Name | Polygon Network |
|---|---|
| New RPC URL | https://polygon-rpc.com/ |
| Chain ID | 137 |
| Symbol | MATIC |
| Block Explorer URL | https://polygonscan.com/ |
Once you have filled in all the details, click on the “Save” button to create the Polygon Network configuration.
Step 4: Switch to the Polygon Network
To switch to the Polygon Network, go back to the Metamask popup and click on the network selection dropdown. In the dropdown, you should now see “Polygon Network” listed as an option. Click on it to switch your Metamask account to the Polygon Network.
Congratulations! You have successfully added the Polygon Network to your Metamask wallet. Now you can freely interact with dApps and explore the decentralized world of the Polygon network.
Frequently Asked Questions:
What is the Polygon Network?
The Polygon Network is a popular Ethereum scaling solution that aims to improve the scalability and usability of Ethereum.
Why would I want to add the Polygon Network to Metamask?
Adding the Polygon Network to Metamask allows you to seamlessly interact with decentralized applications (dApps) and tokens on the Polygon Network directly from your Metamask wallet.
How do I add the Polygon Network to Metamask?
To add the Polygon Network to Metamask, you need to open Metamask, click on the network selection dropdown, select “Custom RPC,” and then enter the following details: Network Name: Polygon, New RPC URL: https://polygon-rpc.com, Chain ID: 137, Symbol: MATIC, and Block Explorer URL: https://polygonscan.com. Once you’ve entered these details, click “Save” to add the Polygon Network to Metamask.
Can I use the Polygon Network on other wallets aside from Metamask?
Yes, the Polygon Network is compatible with other Ethereum wallets and can be added using similar steps. However, the specific instructions may vary depending on the wallet you are using.
What are the advantages of using the Polygon Network?
The advantages of using the Polygon Network include faster and cheaper transactions, improved scalability, access to a wide range of dApps and tokens, and the ability to earn rewards through staking and liquidity provision.
+ There are no comments
Add yours