


MetaMask is a popular cryptocurrency wallet that allows users to securely store, manage, and transfer their digital assets. One of the most common questions users have is how to transfer funds from MetaMask to their bank account. In this article, we will guide you through the simple process of transferring funds from MetaMask to your bank account.
Step 1: Connect your bank account
In order to transfer funds from MetaMask to your bank account, you first need to connect your bank account to MetaMask. To do this, go to the settings section of your MetaMask wallet and click on the “Connect Bank Account” button. Follow the instructions on the screen to link your bank account securely.
Step 2: Verify your identity
After connecting your bank account, you will need to verify your identity. This is a standard security measure to ensure that only you can transfer funds from your MetaMask wallet to your bank account. Simply follow the on-screen instructions to complete the identity verification process.
Step 3: Transfer funds
Once your bank account is connected and your identity is verified, you are ready to transfer funds. Go to the “Transfer” section of your MetaMask wallet and select the amount of funds you want to transfer. Choose your bank account as the destination, and click on the “Transfer” button. The funds will be transferred to your bank account instantly.
Transferring funds from MetaMask to your bank account has never been easier. With just a few simple steps, you can securely move your digital assets into your traditional bank account. Whether you are looking to cash out your cryptocurrencies or simply want to have easy access to your funds, MetaMask provides a seamless and user-friendly experience.
Note: It’s important to keep in mind that transferring funds from MetaMask to your bank account may be subject to fees and restrictions imposed by your bank. Make sure to review and understand these before initiating any transfers.
Transferring funds from MetaMask: A simple guide
MetaMask is a popular cryptocurrency wallet that allows users to securely store and manage their digital assets. If you have funds in your MetaMask wallet and want to transfer them to your bank account, we have prepared a simple guide to help you with the process.
Step 1: Connect your bank account
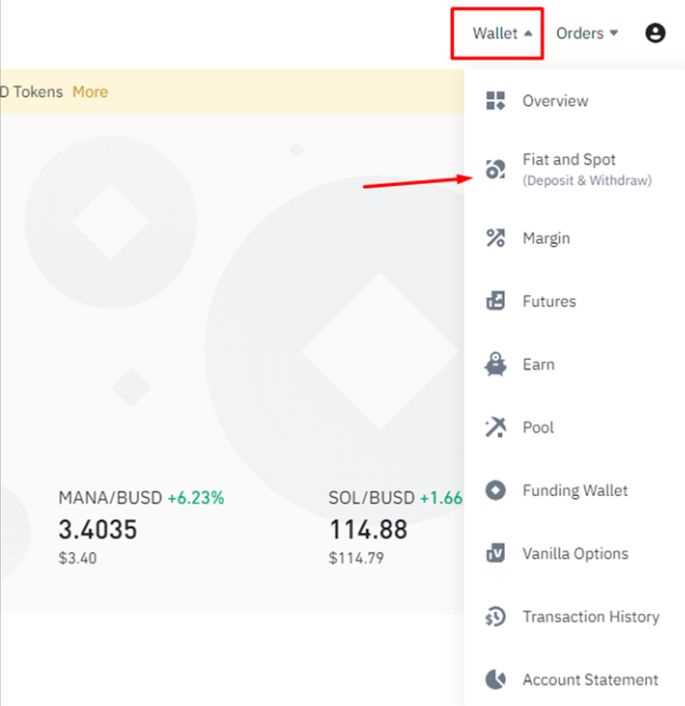
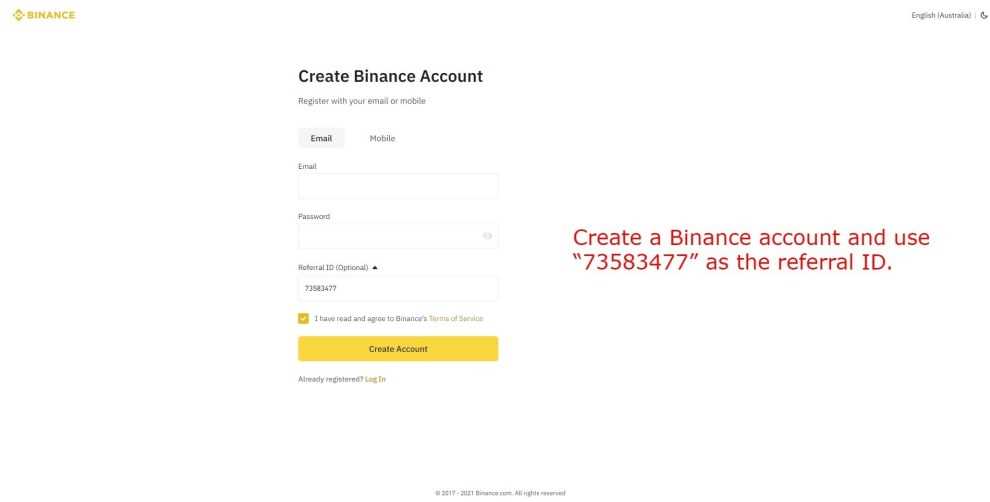
Before you can transfer your funds from MetaMask to your bank account, you need to connect your bank account to a cryptocurrency exchange. Choose a reputable exchange that supports fiat currency withdrawals and follow their instructions to link your bank account.
Step 2: Convert your funds to fiat currency
Once your bank account is linked to the cryptocurrency exchange, you can proceed to convert your digital assets into fiat currency. Most exchanges have a trading platform where you can sell your cryptocurrencies for fiat. Follow the exchange’s interface to execute the trade.
Step 3: Withdraw funds to your bank account
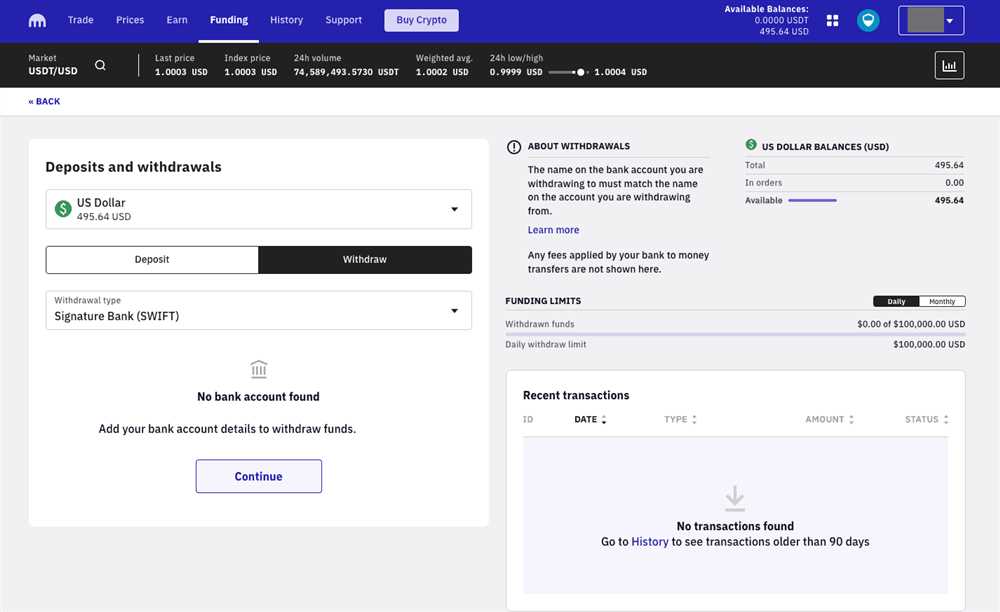
After converting your funds to fiat currency, you can now initiate a withdrawal to your bank account. Select the withdrawal option provided by the exchange and enter the necessary details, such as the amount you wish to transfer and your bank account information. Double-check the information to ensure its accuracy.
Note: Some exchanges may have withdrawal fees or minimum withdrawal limits. Make sure to familiarize yourself with the exchange’s policies before proceeding with the withdrawal.
Step 4: Wait for the transfer to complete
Once you have submitted your withdrawal request, it may take some time for the transfer to be processed and completed. The processing time can vary depending on the exchange and your bank’s policies. Be patient and monitor your bank account for the arrival of the funds.
Please be aware that cryptocurrency transactions are irreversible. Once you have initiated the transfer, you cannot cancel or reverse it. Make sure to review all the details before confirming the withdrawal.
By following these simple steps, you can transfer your funds from MetaMask to your bank account with ease. Remember to always prioritize security and double-check all the information to ensure a smooth and successful transfer.
Step 1: Connect your bank account

To transfer funds from your MetaMask wallet to your bank account, you will first need to connect your bank account to your MetaMask wallet. Here are the steps to do it:
- Open your MetaMask wallet and navigate to the “Settings” section. You can usually find this by clicking on the menu icon in the top-right corner of the wallet.
- In the settings menu, look for the option to “Connect Bank Account” or something similar. Click on it to proceed.
- You will be prompted to enter your bank account details, such as your account number and routing number. Fill in the required information accurately and double-check it before proceeding.
- After entering your bank account details, you may need to authorize the connection by verifying your identity. This step is necessary to ensure the security of your funds and prevent unauthorized access.
- Once your bank account is successfully connected to your MetaMask wallet, you will be able to transfer funds from your wallet to your bank account easily. Remember to always verify the transaction details before confirming the transfer.
By connecting your bank account to your MetaMask wallet, you can enjoy the convenience of transferring funds directly to your bank account and use them in your everyday banking transactions.
Step 2: Set up your MetaMask wallet
To start transferring funds from your MetaMask wallet to your bank account, you’ll first need to set up a MetaMask wallet. Follow these steps to get started:
1. Go to the MetaMask website and download the browser extension for the browser you are using. MetaMask is available for popular browsers like Chrome, Firefox, and Brave.
2. Once the extension is installed, create a new account by clicking on the MetaMask icon in your browser toolbar and selecting “Create a Wallet”. Follow the prompts to set up a strong password, write down your secret backup phrase, and agree to the terms and conditions.
3. After creating your wallet, you will be prompted to choose a network. Select the network that you want to use for transferring funds. The Ethereum network is the most common choice.
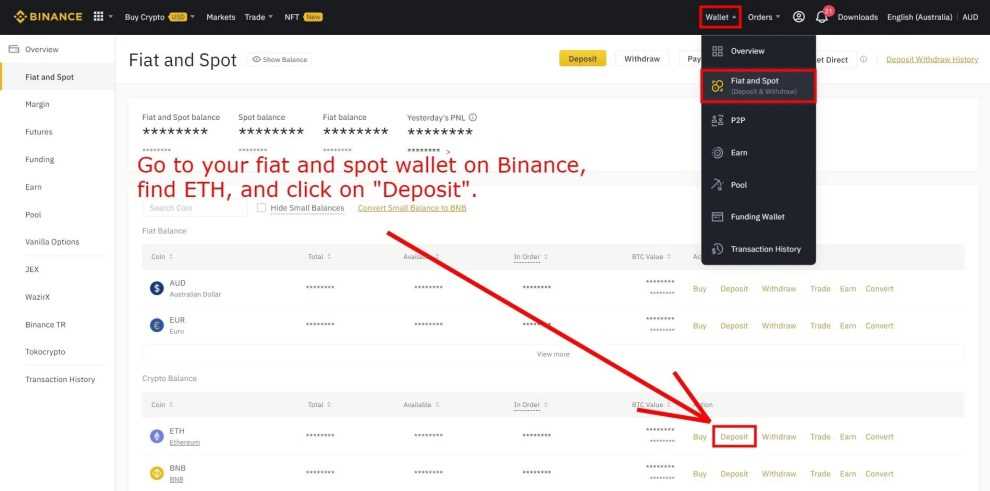
4. Next, you’ll need to add some funds to your MetaMask wallet. You can do this by purchasing Ethereum on a cryptocurrency exchange and sending it to your wallet address. Alternatively, you can receive funds from another wallet or person by sharing your wallet address with them.
5. Once your wallet is funded, you’re ready to start transferring funds to your bank account. Stay tuned for the next steps in the process!
Note: It’s important to keep your MetaMask wallet secure. Never share your private key or secret backup phrase with anyone, and be cautious of phishing attempts or suspicious websites.
Step 3: Link your bank account to MetaMask
Once you have transferred your funds from MetaMask to your bank account, you can easily link your bank account to MetaMask for future transactions. This will allow you to seamlessly transfer funds back and forth between your bank account and MetaMask.
1. Open MetaMask settings
To link your bank account, you need to access your MetaMask settings. Click on the MetaMask extension icon in your browser toolbar, and then click on the “Settings” option.
2. Choose “Add Bank Account”
In the MetaMask settings, you will see a list of options. Click on the “Add Bank Account” option to start linking your bank account.
3. Enter your bank account details
A form will appear where you need to enter your bank account details. Fill in the required information, such as your bank name, account number, and routing number. Make sure to double-check the details for accuracy.
4. Verify your bank account
After submitting the form, MetaMask will initiate the verification process for your bank account. This may involve providing additional documentation or completing a verification call with your bank. Follow the instructions provided by MetaMask to complete the verification successfully.
5. Bank account linked!
Once your bank account is successfully linked to MetaMask, you will receive a confirmation notification. You can now easily transfer funds between your bank account and MetaMask with just a few clicks.
| Tip |
|---|
| Make sure to only link a bank account that you own and have control over. Avoid linking shared or joint accounts, as it may lead to complications. |
Step 4: Transfer funds from MetaMask to your bank account
Once you have successfully connected your MetaMask wallet to your bank account, you can proceed with transferring funds. Follow the steps below to complete the process:
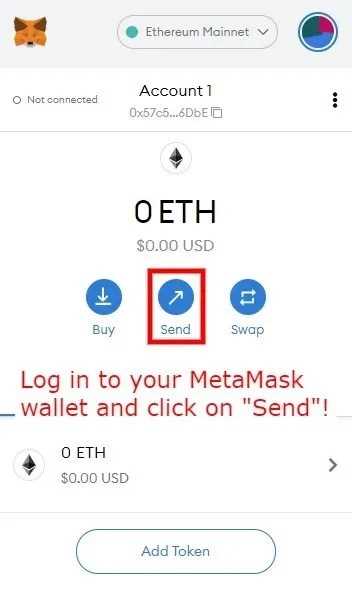
1. Open your MetaMask wallet and click on the “Send” button, usually located on the main dashboard.
2. In the “Recipient” field, enter the bank account details where you’d like to transfer the funds. This typically includes the account holder’s name, bank name, account number, and routing number. Make sure to double-check the information to avoid any errors.
3. Next, specify the amount of funds you wish to transfer. You may have the option to choose a specific token if your MetaMask wallet supports multiple cryptocurrencies.
4. Review the transaction details carefully to ensure everything is accurate. Confirm that the recipient’s bank account information is correct and that you have entered the correct amount.
5. Once you have reviewed the details, click on the “Send” button to initiate the transfer. MetaMask will prompt you to confirm the transaction, and you may need to enter your wallet password or use any additional security measures you have enabled.
6. After confirming the transfer, MetaMask will initiate the transaction and send the funds to the specified bank account. The transfer typically takes a few minutes to process, but it may vary depending on the network congestion and the recipient bank’s processing times. You can monitor the progress of the transfer using the transaction hash provided by MetaMask.
7. Once the transfer is complete, you should receive a confirmation notification from MetaMask. Additionally, you can verify the success of the transaction by checking your bank account balance.
And that’s it! You have successfully transferred funds from your MetaMask wallet to your bank account. It’s important to note that the time and fees associated with the transfer may vary depending on the blockchain network and the recipient bank’s policies.
Frequently Asked Questions:
What is MetaMask?
MetaMask is a cryptocurrency wallet that allows users to securely store and manage their cryptocurrencies. It is a browser extension that can be integrated into various web browsers.
Are there any fees for transferring funds from MetaMask to a bank account?
Yes, there may be fees associated with transferring funds from MetaMask to a bank account. The fees can vary depending on various factors, such as the amount of funds being transferred and the specific bank you are using. It is advisable to check with your bank for their fee structure.
+ There are no comments
Add yours