


MetaMask has revolutionized the way we interact with decentralized applications (dApps) by enabling us to seamlessly connect our wallets to the Ethereum network. But did you know that you can also add new networks to your MetaMask wallet? Unlock a whole new world of opportunities by expanding your MetaMask capabilities.
Adding a new network to your MetaMask wallet allows you to connect with different blockchain networks, besides Ethereum, and explore a wide range of dApps that are not available on the Ethereum network alone. Whether you’re interested in accessing dApps on the Binance Smart Chain, Polygon, or any other network, MetaMask has got you covered.
By adding a new network, you can tap into the growing ecosystem of dApps and decentralized finance (DeFi) projects that are thriving on alternative networks. Discover new investment opportunities, participate in yield farming, stake your tokens, and much more. With MetaMask, the possibilities are endless.
Unlocking additional opportunities with MetaMask is a simple process. Just open your MetaMask wallet, click on the top right corner to access the Settings menu, and select “Networks.” From there, you can add a custom network by filling in the network details provided by the network you want to connect to. Once added, you can easily switch between networks within your MetaMask wallet.
Don’t limit yourself to a single network. Embrace the power of MetaMask and explore the vast landscape of decentralized applications by adding new networks to your wallet. Expand your horizons and unlock a world of opportunities today.
Understanding MetaMask Wallet
MetaMask is a popular cryptocurrency wallet that allows users to securely manage their Ethereum-based assets. It serves as a bridge between the user’s web browser and the Ethereum blockchain, enabling them to interact with decentralized applications (dApps) and handle their digital assets.
Key Features of MetaMask Wallet
1. Account Management: MetaMask provides users with the ability to create and manage multiple Ethereum accounts. Each account is associated with a unique address and private key, which are essential for conducting transactions and accessing assets.
2. Browser Extension: MetaMask functions as a browser extension, currently available for popular browsers like Google Chrome, Firefox, and Brave. This integration allows users to access their wallets directly from their browsers, making it more convenient to interact with dApps.
3. Wallet Security: MetaMask employs robust encryption techniques to ensure the security of user funds and private keys. By default, the wallet stores private keys locally on the user’s device, giving them full control over their funds. Additionally, users can set up additional security measures, such as passphrase protection.
4. Integration with dApps: MetaMask acts as a gateway to decentralized applications on the Ethereum network. It provides a seamless integration that enables users to interact with dApps and perform various operations, including token transfers, asset swaps, and more.
Getting Started with MetaMask Wallet
1. Installation: Start by installing the MetaMask browser extension from the official website of your preferred browser. Follow the instructions to complete the installation process. Once installed, the MetaMask icon should appear in your browser’s toolbar.
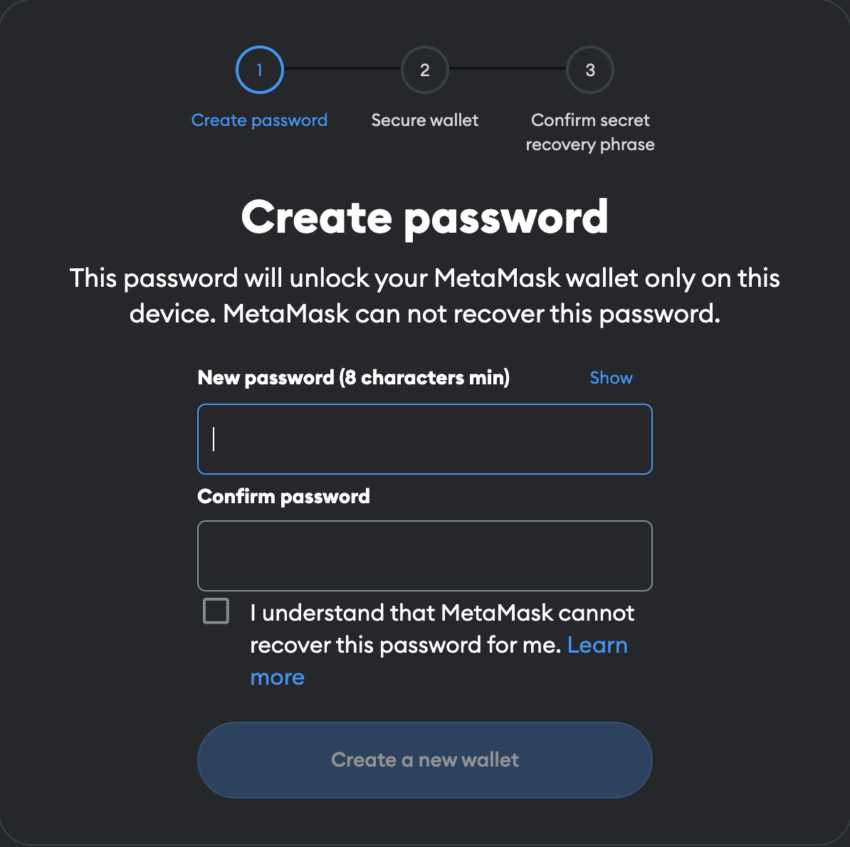
2. Account Creation: After installing MetaMask, click on the extension icon to launch the wallet. Follow the prompts to create a new wallet or import an existing one. Be sure to store your mnemonic phrase and password securely, as they are essential for account recovery.
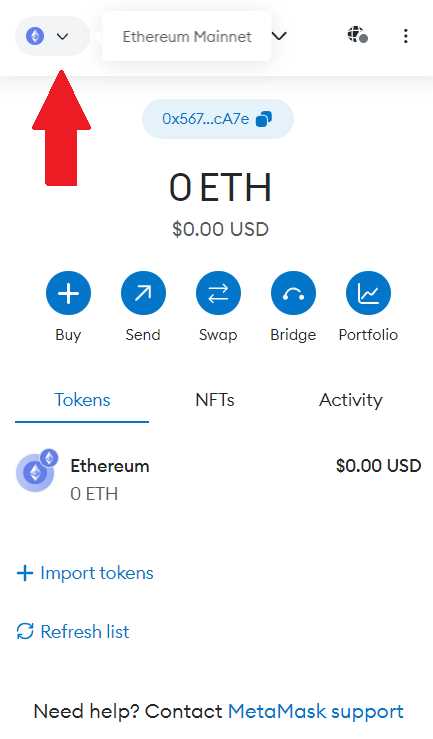
3. Connecting to Networks: By default, MetaMask connects to the Ethereum main network. However, it also allows users to connect to other networks, such as Ropsten, Rinkeby, or the Binance Smart Chain. You can switch between networks by clicking on the network dropdown in the wallet interface.
4. Managing Assets: Once your wallet is set up, you can manage your Ethereum-based assets by receiving, sending, or storing tokens. Simply copy and paste the recipient’s address, specify the amount, and confirm the transaction.
Conclusion
MetaMask Wallet is a powerful tool that enables users to securely manage their Ethereum assets and interact with decentralized applications. Its user-friendly interface, strong security features, and compatibility with various browsers make it a popular choice among cryptocurrency enthusiasts. By understanding the basics of MetaMask, you can unlock a world of opportunities in the decentralized finance (DeFi) space.
Steps to Add a New Network to MetaMask Wallet
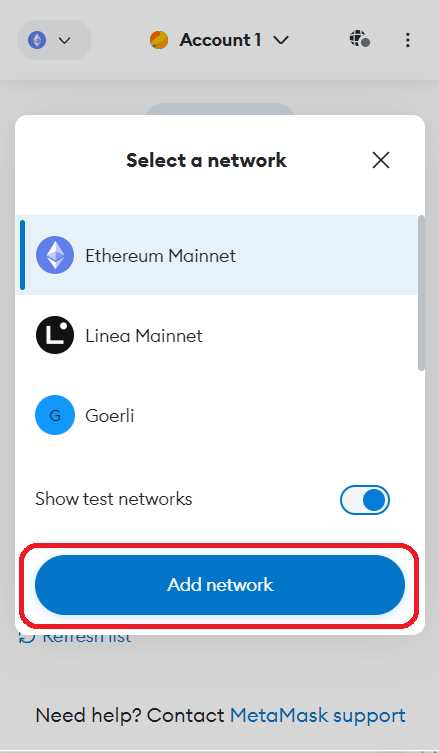
Adding a new network to your MetaMask wallet allows you to unlock additional opportunities and connect with different decentralized applications. Here are the steps to add a new network to your MetaMask wallet:
- Open your MetaMask wallet extension in your browser.
- Click on the network dropdown, located at the top of the MetaMask interface.
- Select “Custom RPC” from the list of options.
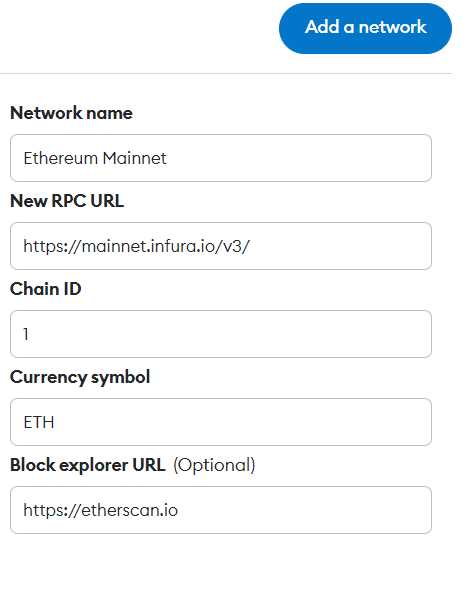
- In the “New Network” tab, enter the details of the network you want to add.
- Provide a name for the network in the “Network Name” field.
- Enter the Network URL in the “New RPC URL” field.
- Choose the chain ID for the network, if applicable.
- Specify the currency symbol and number of decimals, if necessary.
- Click on the “Save” button to add the new network to your MetaMask wallet.
Once you have successfully added the new network, you will be able to switch between networks directly from the MetaMask interface. This allows you to explore different decentralized applications and take advantage of the opportunities each network offers.
Remember to be cautious when adding a new network to your MetaMask wallet. Only add networks that you trust and ensure that you have obtained all the necessary information and details for the network.
Benefits of Adding a New Network
Adding a new network to your MetaMask wallet opens up a range of benefits and opportunities. Here are some of the key advantages:
Access to New DApps and Platforms
By adding a new network to your MetaMask wallet, you gain access to a whole new world of decentralized applications (DApps) and platforms. Each network has its own unique set of DApps and platforms that may not be available on other networks. This gives you the opportunity to explore and use different DApps and platforms based on your interests and needs.
Expanded Asset Support
Adding a new network can also expand the number of supported assets in your MetaMask wallet. Each network has its own set of native tokens and supported cryptocurrencies. By adding a new network, you can access and manage a wider range of assets, including tokens that may not be available on the default network.
With expanded asset support, you can explore different investment opportunities and diversify your portfolio across multiple networks.
Interoperability and Cross-Chain Transactions
Adding a new network to your MetaMask wallet enables you to interact with other chains and perform cross-chain transactions. This means you can easily transfer assets and value between different networks, facilitating seamless interoperability and enhancing your overall crypto experience.
Interoperability opens up new possibilities for decentralized finance (DeFi), allowing you to leverage the unique features and advantages of multiple networks to optimize your financial strategies.
Overall, adding a new network to your MetaMask wallet expands your access to various DApps, increases the number of supported assets, and enhances interoperability. It empowers you to make the most of the decentralized ecosystem and unlock a wide range of opportunities.
Exploring New Opportunities with MetaMask Wallet
MetaMask is an essential tool for anyone involved in the world of decentralized finance (DeFi). With MetaMask, you have access to a range of applications and networks, allowing you to explore exciting new opportunities.
Adding a New Network
One of the key features of MetaMask is the ability to add new networks to your wallet. By doing so, you can connect to different blockchain networks and tap into their unique offerings. To add a new network, simply follow these steps:
- Open your MetaMask wallet and click on the network switcher at the top of the screen.
- Select “Custom RPC” to add a custom network.
- Enter the network details, such as the network name, URL, chain ID, and symbol.
- Click “Save” to add the network to your MetaMask wallet.
By adding new networks, you open up a world of possibilities. You can access different decentralized exchanges (DEXs), lending protocols, and yield farming opportunities that may not be available on the default Ethereum network.
Exploring DeFi Applications
With MetaMask, you can also explore various DeFi applications that are built on different networks. These applications offer a wide range of opportunities, including:
- Decentralized Exchanges (DEXs) – Trade your tokens without the need for intermediaries.
- Lending Platforms – Earn interest on your crypto assets by lending them to others.
- Yield Farming – Stake your tokens to earn additional rewards in the form of fees or new tokens.
- NFT Marketplaces – Buy, sell, and trade unique digital assets.
Each application may have its own unique features, so be sure to do your research and understand how they work before getting involved.
By exploring new opportunities with MetaMask, you can take advantage of the ever-expanding world of decentralized finance. So, start adding new networks and diving into different applications to unlock even more possibilities!
Frequently Asked Questions:
Can I add more than one network to my MetaMask wallet?
Yes, you can add multiple networks to your MetaMask wallet. This allows you to interact with decentralized applications on different networks without needing multiple wallets.
How do I add a new network to my MetaMask wallet?
To add a new network to your MetaMask wallet, you will need to click on the network dropdown on the top of your MetaMask extension and select “Custom RPC”. Then, you can enter the details of the network you want to add, such as the RPC URL, Chain ID, and Symbol. Once you click “Save”, the new network will be added to your wallet.
+ There are no comments
Add yours