


If you’re looking to explore the world of Solana, one of the fastest-growing blockchain platforms, you’ll need a wallet that supports Solana transactions. While there are many wallets to choose from, connecting Solana to Metamask can open up a whole new level of possibilities. In this step-by-step tutorial, we’ll guide you through the process of connecting your Solana wallet to Metamask, empowering you to seamlessly interact with the Solana ecosystem.
Metamask is a popular Ethereum wallet that allows you to manage your Ethereum accounts and interact with decentralized applications (dApps) on the Ethereum blockchain. By connecting your Solana wallet to Metamask, you can leverage the user-friendly interface and powerful features of Metamask while accessing the vibrant and fast-growing Solana ecosystem. This tutorial will provide you with the knowledge and confidence to unlock the full potential of Solana through your Metamask wallet.
The first step in connecting your Solana wallet to Metamask is to ensure you have both wallets installed and set up on your device. If you haven’t done so already, download and install the Solana wallet and the Metamask extension for your preferred browser. Once installed, create a new Solana wallet and a new Ethereum wallet within Metamask. It’s essential to keep your private keys secure and make sure you utilize strong passwords for additional security.
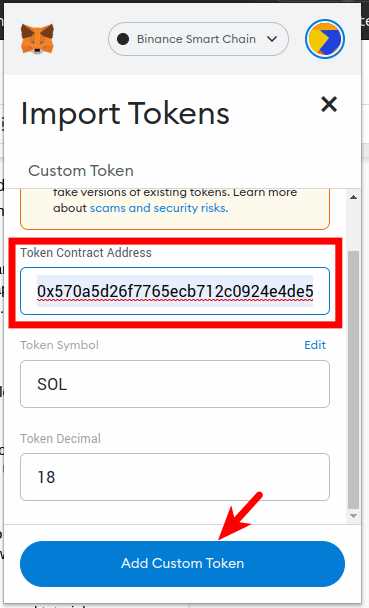
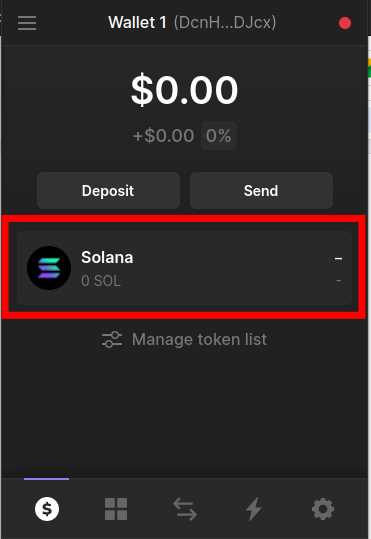
Once you have both wallets set up, we can begin the process of connecting them. Open your Metamask extension and click on the account icon in the top-right corner. From the dropdown menu, click on “Import Account.” This will bring up a dialog box where you can enter the private key of your Solana wallet. Copy and paste the private key into the designated field and click “Import.” Metamask will then import your Solana account and display it alongside your Ethereum accounts.
Unlocking the Power of Solana
Solana is a high-performance blockchain platform that aims to provide fast and scalable solutions for decentralized applications (dApps) and cryptocurrencies. With its unique features and capabilities, Solana has gained popularity among developers and crypto enthusiasts.
By connecting your Solana wallet to Metamask, you can unlock even more functionality and access a wide range of dApps and services built on the Solana blockchain. This tutorial will guide you through the step-by-step process of connecting your Solana wallet to Metamask, allowing you to seamlessly interact with the Solana ecosystem.
Once connected, you’ll be able to explore and use various decentralized finance (DeFi) protocols, trade tokens on decentralized exchanges (DEXs), participate in token sales and auctions, and much more. This integration opens up a world of possibilities and empowers you to take full advantage of the power of Solana.
Benefits of connecting your Solana wallet to Metamask:
- Access to a wide range of dApps and services on the Solana blockchain.
- Seamless integration with popular Ethereum-based tools and services.
- Ability to use your existing Ethereum accounts and assets on the Solana network.
- Opportunity to participate in the growing Solana ecosystem and community.
- Enhanced usability and convenience in managing your Solana assets.
Unlock the power of Solana by connecting your wallet to Metamask today!
Connect Solana Wallet to Metamask
If you’re interested in harnessing the power of Solana, connecting your Solana wallet to Metamask can provide you with added flexibility and accessibility. By following these step-by-step instructions, you’ll be able to easily connect your Solana wallet to the well-known and widely-used Metamask wallet.
Step 1: Install Metamask
If you don’t already have Metamask installed, the first step is to install it on your preferred browser. Metamask is available for popular browsers such as Chrome, Firefox, and Brave. Simply search for “Metamask” in your browser’s extension store, and click on “Add to Chrome” (or equivalent) to begin the installation process.
Step 2: Access Metamask Settings
Once you have Metamask installed, click on the Metamask icon in your browser’s toolbar to open it. From the Metamask popup, click on the profile icon on the top right corner, and select “Settings” from the dropdown menu.
Step 3: Add the Solana Network
In the Metamask settings, navigate to the “Networks” tab. Scroll down to the bottom of the page and click on “Add Network” to manually add the Solana network.
- Network Name: Solana
- New RPC URL: https://api.mainnet-beta.solana.com
- Chain ID: 101
- Symbol: SOL
- Block Explorer URL: https://explorer.solana.com
Once you have filled in the required information, click on “Save” to add the Solana network to Metamask.
Step 4: Import Your Solana Wallet
After adding the Solana network, return to the Metamask popup and click on the profile icon again. This time, select “Import Account” from the dropdown menu. In the import window, select “Solana” as the type and enter your Solana wallet’s seed phrase or private key.
Follow the prompts to complete the import process. Once imported, your Solana wallet will be linked to Metamask, and you’ll be able to access and manage your Solana funds, tokens, and decentralized applications (DApps) directly from your Metamask wallet, alongside your Ethereum and other supported networks.
Note: It’s important to exercise caution when entering your seed phrase or private key. Make sure you are entering it in a secure and trusted environment to protect your wallet and funds from potential threats.
Congratulations! You have successfully connected your Solana wallet to Metamask. Enjoy the benefits of accessing and managing your Solana assets easily with the familiar and feature-rich Metamask wallet.
Step-by-Step Tutorial
In this step-by-step tutorial, we will guide you through the process of connecting your Solana wallet to Metamask. By following these instructions, you will be able to unlock the power of Solana and access the wide range of DeFi applications and services available on this blockchain network.
Prerequisites
Before we begin, please make sure you have the following:
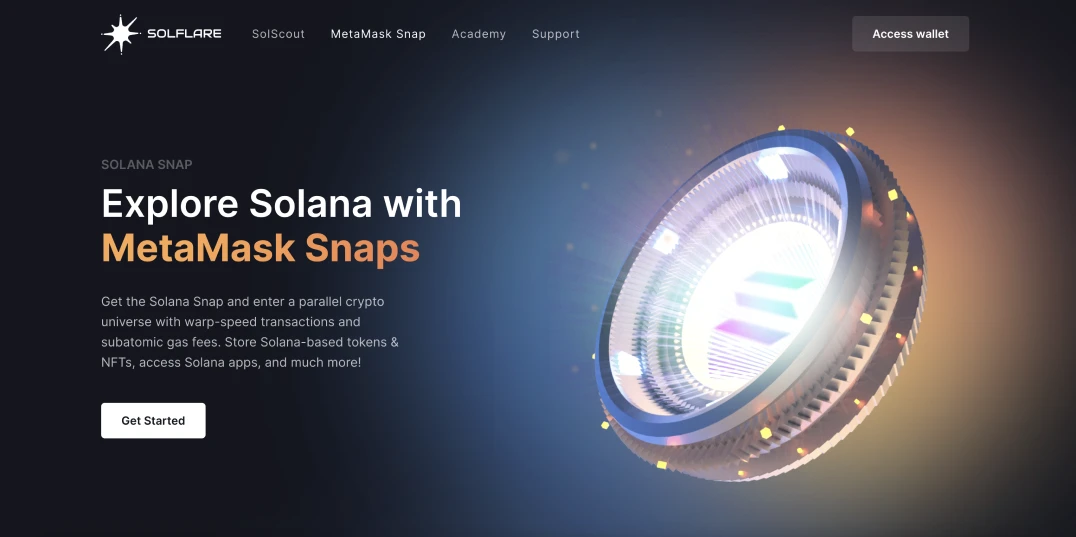
- A Solana wallet with funds available. If you don’t have one, you can create a new wallet using solflare.com or sollet.io.
- The Metamask browser extension installed. You can download and install it from the official Metamask website.
Step 1: Install Metamask and Create a New Account
If you haven’t done so already, download and install the Metamask browser extension. Once installed, open Metamask and follow the prompts to create a new account. Make sure to securely backup your seed phrase.
Step 2: Connect Metamask to the Solana Network
- Click on the Metamask browser extension icon in your browser toolbar to open Metamask.
- Click on the network selection dropdown (it should say “Mainnet” by default) and select “Custom RPC”.
- In the “Custom RPC” section, enter the following details:
Network Name: Solana New RPC URL: https://api.mainnet-beta.solana.com Chain ID: 101 Symbol: SOL Block Explorer URL: https://explorer.solana.com - Click “Save” to add the Solana network to Metamask.
Step 3: Connect your Solana Wallet to Metamask
- Open your Solana wallet (e.g., solflare.com or sollet.io) and navigate to the account you want to connect.
- Copy your Solana wallet address from your Solana wallet.
- Go back to Metamask and click on the account selection dropdown at the top right of the Metamask window.
- Select “Import Account” and paste your Solana wallet address into the “Private Key” field.
- Click “Import” to connect your Solana wallet to Metamask.
Congratulations! You have successfully connected your Solana wallet to Metamask. You can now use Metamask to interact with Solana-powered dApps, trading platforms, and other decentralized services. Enjoy exploring the world of DeFi on Solana!
Frequently Asked Questions:
What is Solana?
Solana is a high-performance blockchain platform that aims to provide fast, secure, and scalable solutions for decentralized applications (dApps) and cryptocurrency transactions.
Why would I want to connect my Solana wallet to Metamask?
Connecting your Solana wallet to Metamask allows you to conveniently access and manage your Solana assets through the familiar interface of Metamask, which is a popular Ethereum wallet.
How can I connect my Solana wallet to Metamask?
You can connect your Solana wallet to Metamask by installing the Solana network on Metamask and then importing your Solana wallet using a mnemonic phrase or seed phrase. Detailed step-by-step instructions can be found in the article.
+ There are no comments
Add yours